 | Top Site map Site map About This Manual About This Manual |
|---|---|
 Preface
 About This Manual
 How to Use the Search Function
 Trademarks
 Copyright
 Disclaimers
 Canon Business Imaging Online
 Overview of Canon Business Imaging Online
 Overview of Forms Services/Print Services
 Service Overview
 Terms Used in This Manual
 Setting Up Forms Services/Print Services
 Setup Flow
 Preparations before Starting
 System Requirements
 Setting the Web Browser
 Internet Explorer Settings
 Firefox Settings
 Safari Settings
 Applying for a Contract
 Logging In
 Logging In for the First Time
 Logging In
 Settings after Starting
 Preparations for Using Forms Services
 Registering Forms
 Registering a Trusted IP Address
 Installing the Forms Services Application
 Settings after Starting a Contract
 Issuing a Security Token
 Setting Single Sign-On
 Salesforce Settings
 Canon Business Imaging Online Settings
 Preparations for Using Print Services
 Preparing the MFPs
 Setting the Network and Checking the IP Address
 Remote UI Settings
 Proxy Settings
 Checking Certificates
 Installing a Certificate
 Installing the Print Services Application (for MFP Devices)
 Preparing the SFPs
  Setting the Network and Checking the IP Address
 Remote UI Settings
 Proxy Settings
 Checking Certificates
 Installing a Certificate
 Installing the Print Services Application (for SFP Devices)
 Preparing the Computers
 Web Browser Settings (When Using Internet Explorer)
 Installing a Certificate
 Device Login Service Federation Settings
 Register Device
 Register My Printer
 How to Use Forms Services/Print Services
 Tenant Settings
 Operational Administrator Settings
 User Registration
 Editing User Information
 Deleting Users
 Creating a Forms Services Delegated User
 User Management (Batch Settings)
 Managing Formats Used with Forms Services
 Using Services
 Creating Forms
 Printing a Form Document
 Deleting a Form Document
 Linking with FedEx Office
 Transferred Printing Settings
 Configuring Auto Batch Printing
 Checking Service Usage
 Totaling Usage
 Usage Log Output
 Changing Settings after Starting Services
 Adding/Changing an ID Provider
 Changing a Computer
 Changing the Password
 Resetting a Password
 Appendix
 List of Time Zones
 FAQ
FAQ|
Required Privileges
|
|
Administrator or general user privileges for the Tenant
[User] role for Print Services
|
|
NOTE
|
|
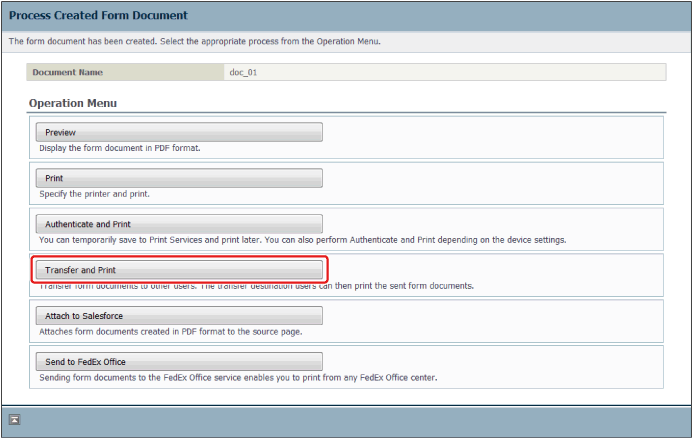
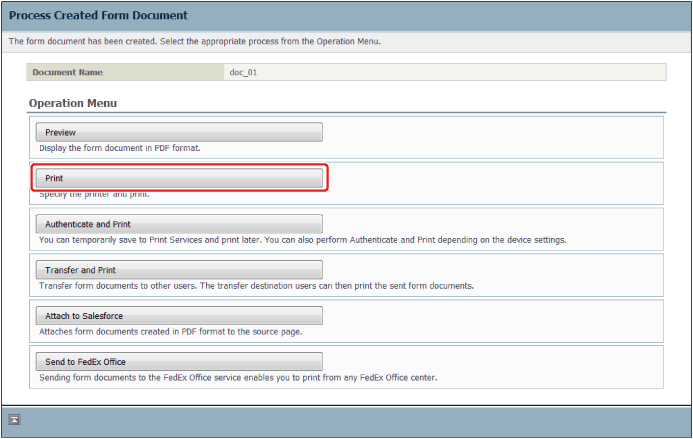
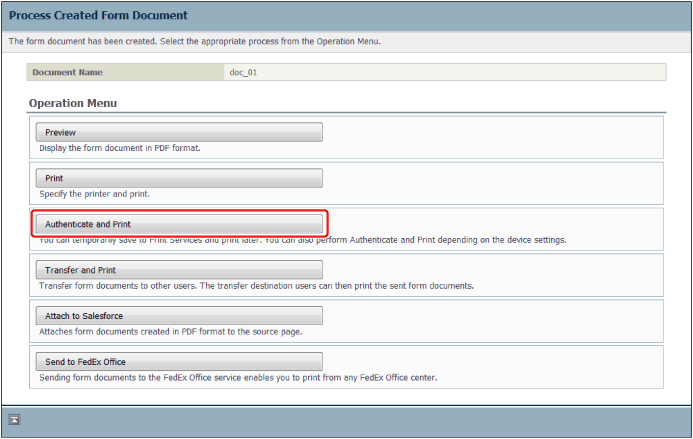
You can print the displayed PDF with the printer driver by clicking [Preview] on the [Process Created Form Document] screen. You can also attach a form created using a PDF format to the source page by clicking [Attach to Salesforce].
You can specify a day of the week and time, etc. to periodically print specified forms using the Auto Batch Printing function. (See "Configuring Auto Batch Printing".)
|

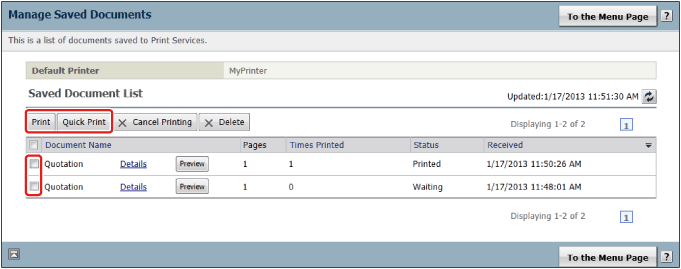
|
[Print]
|
Prints after checking/changing the settings on the [Print Settings] screen.
|
|
[Quick Print]
|
Prints with the default settings from the printer set in [Default Printer].
|
|
IMPORTANT
|
|
The following settings are required to use transferred printing. (See "Transferred Printing Settings".)
The user that creates forms registers the user to transfer jobs to
The user that jobs are transferred to registers the user that creates forms as the source of the jobs
|
