Installing a Certificate
Install one of the following certificates to perform SSL encrypted communication.
Self-Signed Certificates
Create a certificate on each device.
Purchased Certificates
Install a certificate purchased from a third-party organization.
CA Certificate
For information on installation procedure for using a CA certificate, see the instruction manuals included with the device.
You cannot change the key used when the certificate is already used by an SSL application. Since the key being used is used, no setting is required here.
Self-Signed Certificates
1.
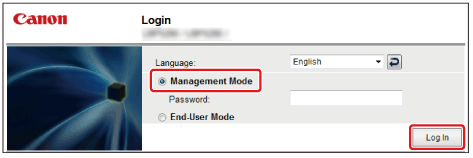
Log in to the device.
Log in by entering the following address in the Web browser.
http://<IP address of the device>/
https://<IP address of the device>/
If SSL communication is enabled for the device
2.
Select [Management Mode] → enter [Password] → click [Log In].
3.
Click [Settings/Registration].
4.
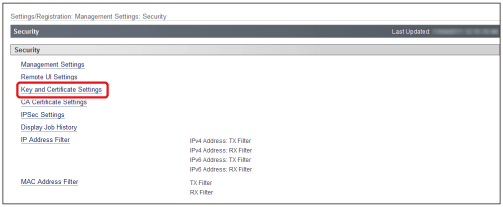
Click [Security] for [Management Settings].
5.
Click [Key and Certificate Settings].
6.
Click [Generate Key].
7.
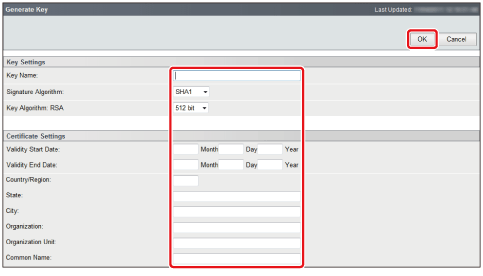
Specify each setting → click [OK].
Item
Entry Restrictions
[Key Name]
Enter a name using alphanumeric characters. (Required)
[Signature Algorithm]
Select the key length. (Required)
[Key Algorithm]
Select the key length. (Required)
[Validity Start Date]
Enter the starting day using numbers. (Required)
[Validity End Date]
Enter the ending day using numbers. (Required)
[Country/Region]
Enter this item using alphanumeric characters. (Required)
[Organization]/[Organization Unit]
Enter this item using alphanumeric characters.
[State]/[City]
Enter this item using alphanumeric characters.
[Common Name]
Enter this item using alphanumeric characters. (Required)
Set the IP address or FQDN (example: starfish.company.com) of the device.
A DNS server is required to use an FQDN.
An FQDN is required for the common name when using Safari (Mac OS).
8.
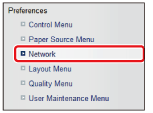
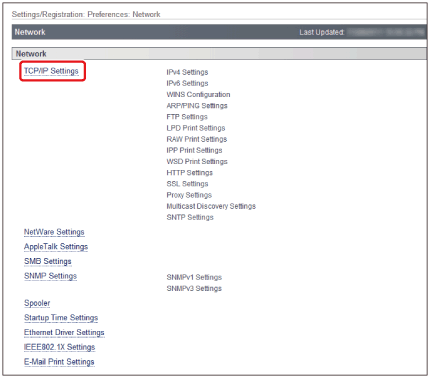
Click [Network] for [Preferences].
9.
Click [TCP/IP Settings].

10.
Click [Key and Certificate] for [SSL Settings].

11.
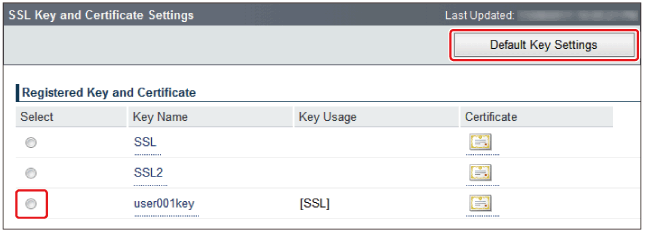
Select the created key → click [Default Key Settings].
If you cannot change the SSL key, follow the instructions on the screen.
12.
Restart the device.
Purchased Certificates
1.
Log in to the device.
Log in by entering the following address in the Web browser.
http://<IP address of the device>/
https://<IP address of the device>/
If SSL communication is enabled for the device
2.
Select [Management Mode] → enter [Password] → click [Log In].
3.
Click [Settings/Registration].
4.
Click [Security] for [Management Settings].
5.
Click [Key and Certificate Settings].
6.
Click [Register Key and Certificate].
7.
Click [Install].
8.
Click [Browse] → specify the purchased certificate in [File Path] → click [Start Installation].
9.
Enter [Key Name] → enter the password set for the private key in [Password] and [Confirm] → click [Register].
10.
Select the installed key → click [Register].
If you cannot change the SSL key, follow the instructions on the screen.
11.
Restart the device.
» Setting Up Forms Services/Print Services » Preparations for Using Print Services » Preparing the SFPs » Installing a Certificate