Creating a Forms Services Delegated User
This setting enables a Salesforce account that is not authentication linked with Canon Business Imaging Online to use Forms Services.
When a user with the [User] role for Forms Services issues a delegated user and registers the account to Salesforce, that account can use Forms Services.
Required Privileges
Administrator or general user privileges for the Tenant
[Administrator] Role for Forms Services
Information Required in Advance
User ID of a user set with the [User] role for Forms Services (the user that issues the delegated user).
IMPORTANT
The delegated user cannot use Print Services.
When changing the user setting information in the settings for linking with the device login service, make sure to do so before setting the delegated user. If you change any of the following after setting the delegated user, specify the settings for the delegated user again.
Device login service federation settings (user setting information)
Device user name
Name of the domain that the device user belongs to
1.
Log in to Canon Business Imaging Online.
For more information, see "Logging In".
2.
On the [Home] screen, click [Create Delegated User] in [Manage Form Documents].
3.
Enter [Canon Business Imaging Online User ID] → click [Search].
Search for a user that has the [User] role of Forms Services.
4.
Click [Create Delegated User].
5.
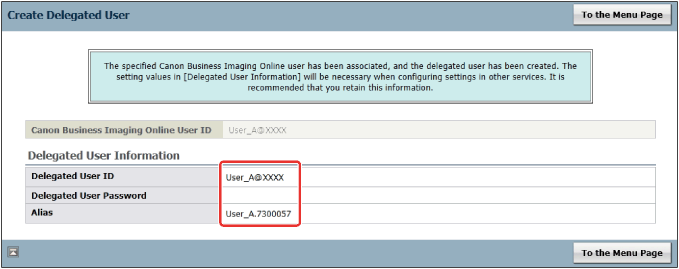
Check the created delegated user information.
Make a note of [Delegated User ID], [Delegated User Password], and [Alias].
IMPORTANT
This screen cannot be displayed again. If you close it before making a note of the settings, it is necessary to set the delegated user again.
Next, register the information for the created delegated user to a Salesforce account.
6.
Log in to Salesforce.
7.
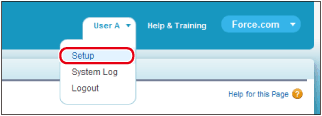
Select [Setup] from the user menu.
8.
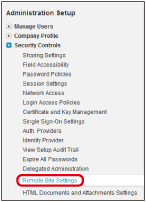
From Administration Setup, click [Security Controls] → [Remote Site Settings].
9.
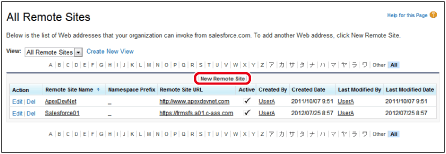
Click [New Remote Site].
10.
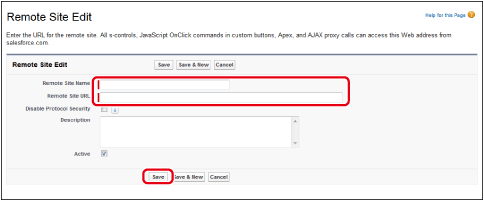
Enter the following items → click [Save].
Remote Site Name
Enter in alphanumeric characters.
Remote Site URL
https://frmsfs.a01.c-aas.com
The following screen is displayed.
11.
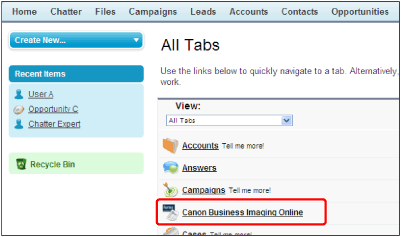
Click [Canon Business Imaging Online].
12.
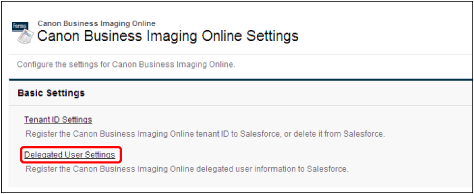
Click [Delegated User Settings].
13.
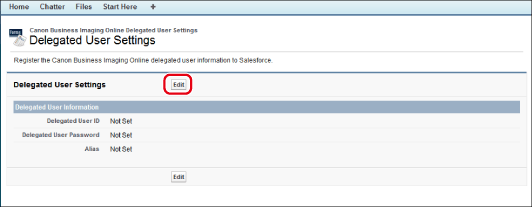
Click [Edit].
14.
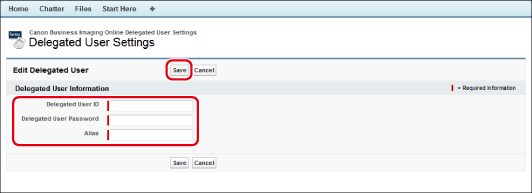
Enter each item → click [Save].
Enter the information you made a note of in step 5.
15.
Click [OK].
This completes the delegated user settings.
» How to Use Forms Services/Print Services » Tenant Settings » Creating a Forms Services Delegated User