Canon Business Imaging Online Settings
|
Required Privileges
|
|
[Administrator] role of Forms Services or [Administrator] role of Print Services
|
1.
Log in to Canon Business Imaging Online.
For more information, see
"Logging In".
2.
On the [Home] screen, click [Register and Manage ID Providers].
3.
Click [Add IDP].
4.
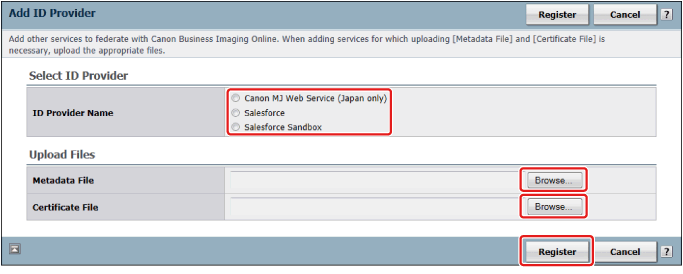
Select the ID provider in [Select ID Provider] → click [Browse] → specify the file → click [Register].
SOLTAGE does not support file uploading.
|
File Extension
|
File Content
|
|
.xml
|
Metadata
|
|
.cer
|
Certificate
|
5.
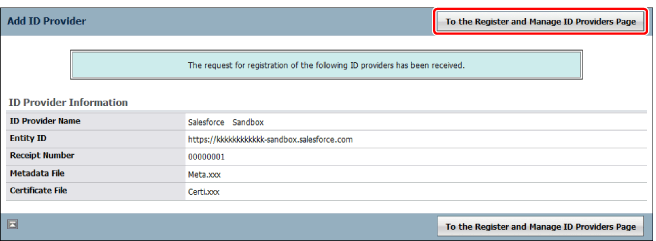
Confirm the displayed information → click [To the Register and Manage ID Providers Page].
It takes approximately four hours to complete the registration. Notification of registration completion is sent via e-mail.
6.
Log in to Canon Business Imaging Online.
For more information, see
"Logging In".
7.
On the [Home] screen, click [Register and Manage ID Providers].
8.
Confirm that [Completed] is displayed in the [Status] field of the registered ID provider → click [Download].
9.
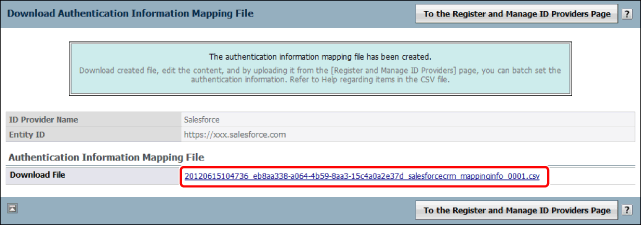
Click the file name in [Download File] → download the file to your desktop.
10.
Edit the downloaded file to enter the authentication information.
Register accounts for all the users that will create forms (all the users set with the [User] role of Forms Services) and all the users that will print form (all the users set with the [User] role of Print Services).
When Editing the File Using Spreadsheet Software
Column A is the account for Canon Business Imaging Online, and Column B is the account for Salesforce.
Canon Business Imaging Online accounts and Salesforce accounts in the same row are associated.
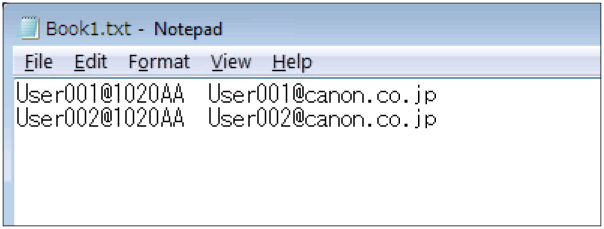
When Editing the File Using a Text Editor
The account for Canon Business Imaging Online is on the left, and the account for Salesforce is on the right.
Separate the Canon Business Imaging Online account and the Salesforce account with a tab.
Canon Business Imaging Online accounts and Salesforce accounts in the same row are associated.
11.
Save the file.
UTF-16 is used as the character encoding. Save the file as "Unicode Text (*.txt)".
12.
On the [Home] screen, click [Register and Manage ID Providers].
13.
Click [Upload] for the ID provider you registered.
14.
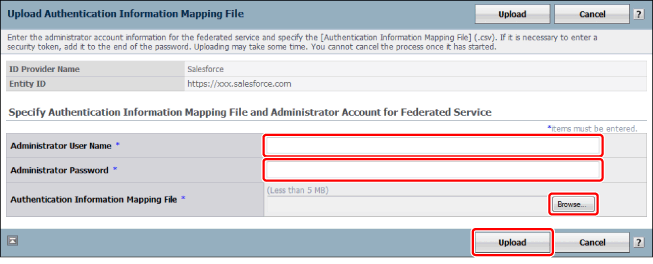
Specify the following settings → click [Upload].
|
[Administrator User Name]
|
Enter the administrator ID of Salesforce.
|
|
[Administrator Password]
|
Enter the security token after the Salesforce password.
The security token may not need to be entered, depending on the Salesforce settings.
|
|
[Authentication Information Mapping File]
|
Specify the file in which you entered the account name of Canon Business Imaging Online and the account name of Salesforce.
|
15.
Click [To the Register and Manage ID Providers Page].
16.
Click [Select Login Destination IDP].
17.
Select the Single Sign-On ID provider → click [Update].
18.
Confirm the displayed information → click [Yes].
19.
Click [To the Register and Manage ID Providers Page].
The specified ID provider is selected.


