Printing Files Stored in the USB Memory Directly from the Machine
You can print files stored in the USB memory directly from the machine. As a computer is not required for printing, you can easily carry data around, and print the data outside your office. This enables you to immediately deal with the sudden needs of print documents.
|
IMPORTANT
|
|
To print a PDF file from this machine, the PS Printer Kit or Direct Print Kit (for PDF/XPS) is necessary.
To print an XPS file from this machine, the Direct Print Kit (for PDF/XPS) is necessary.
|
|
NOTE
|
|
The following settings are required to use the USB memory.
[Store Location Display Settings] is set to 'On'.
|
(1)
|
Press  (Settings/Registration) → [Preferences] → [Display Settings] → [Store Location Display Settings]. |
|
(2)
|
Select [On] for [Memory Media] → press [OK].
|
[Use MEAP Driver for External USB Device] is set to 'Off'.
|
(1)
|
Press (Settings/Registration) → [Preferences] → [External Interface] → [USB Settings] → [Use MEAP Driver for External USB Device]. |
|
(2)
|
Select [Off] → press [OK].
|
<Use Print Function> is set to 'On' in [Use Scan/Print Function].
|
(1)
|
Press ((Settings/Registration) → [Function Settings] → [Store/Access Files] → [Memory Media Settings] → [Use Scan/Print Function]. |
|
(2)
|
Select [On] for <Use Print Function> → press [OK].
|
|
This section describes the procedure for printing files stored in the USB memory.
The screens may differ, depending on the model of the machine and on attached optional products.
Follow the procedures below.
Inserting the USB Memory
Printing from the USB Memory
Removing the USB Memory
|
IMPORTANT
|
|
The corresponding format for the USB memory is only FAT32.
Before inserting the USB memory, make sure that the USB memory is facing the correct direction. If the USB memory is inserted incorrectly, the USB memory and the machine may be damaged.
|
1.
Insert the USB memory into the USB port of the machine.
The location of the USB port differs, depending on the machine you are using.
(See "Parts and Their Functions.")A message indicating that the USB memory is connected and the removal button ([

]) are displayed on the touch panel display.
Printing from the USB Memory
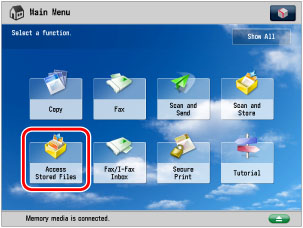
1.
Press [Access Stored Files] on the Main Menu screen.
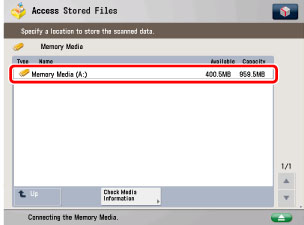
2.
Press [Memory Media].
The Memory Media Selection screen is displayed.
3.
Select the desired USB memory.
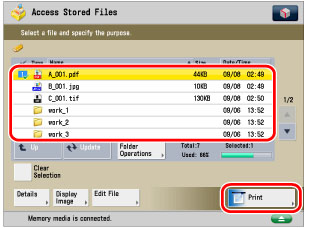
4.
Select the file that you want to print → press [Print].
If there are seven or more stored files, press[

], or [

] to scroll through the stored files.
You can select and print multiple files with the same settings if they are in the same file format. However, you can only print up to six files at a time.
You cannot select and print multiple files if their file formats, such as JPEG and TIFF, are different from each other.
|
NOTE
|
|
You can cancel a selection by selecting the file again.
To cancel all files, press [Clear Selection].
|
5.
If the Select Paper screen is displayed, select the paper source → press [OK].
6.
Select the print settings on the Print Settings screen → press [Start Printing].
When printing is complete, the display returns to the Memory Media Selection screen.
|
IMPORTANT
|
|
Make sure you follow the following procedure to remove the USB memory from the machine. If the USB memory is removed from the machine in a way other than the procedure below, the USB memory and the machine may damaged.
|
1.
Press [
].
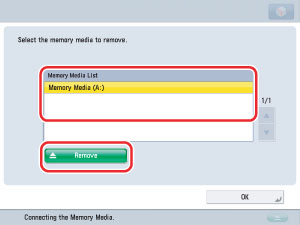
2.
Select the USB memory to remove → press [Remove].
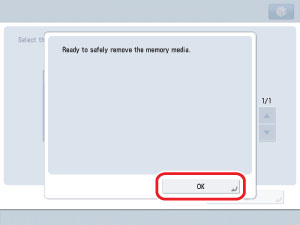
3.
Press [OK].
If the message indicating it is OK to remove the USB memory is not displayed, repeat step 2 and 3.
4.
Remove the USB memory from the USB port.
5.
Press [OK].