Specifying the Printer Driver Default Settings (Windows)
You can print using the same settings each time by specifying default print settings. For example, if the policy of your department is to output only in 2 on 1 printing, you can set the default settings to 2 on 1 printing.
Benefits of Using Profiles
Reducing effort for specifying settings
If you register default print settings, you can eliminate the effort spent specifying the settings each time you print.
Preventing misprints
You can prevent misprints occurring due to mistakes made when specifying settings.
Reducing costs
By printing two pages on one page (2 on 1) or setting the black and white color mode as the default settings, you can reduce the running costs of your office.
|
Required Condition
|
|
The printer driver is installed.
|
This section describes how to set printing both sides of the paper with two pages on each side as the printer default settings.
The screens may differ, depending on the model of the machine and on attached optional products.
The screens may differ, depending on the operating system of your computer.
1.
For Windows XP, select [Start] → [Printers and Faxes] (or [Start] → [Control Panel] → [Printers and Other Hardware] → [Printers and Faxes]).
For Windows Vista, click [

] (Start) → select [Control Panel] → [Printer].
For Windows 7, click [
] (Start) → [Devices and Printers].
For Windows Vista
For Windows 7
2.
Right-click the icon of the printer in the [Printer] folder or the [Devices and Printers] folder that you want to set default settings for → click [Printing Preferences].
For Windows 7
The printer driver properties dialog box is displayed.
3.
In the [Page Setup] sheet, select [2 on 1] from [Page Layout].
4.
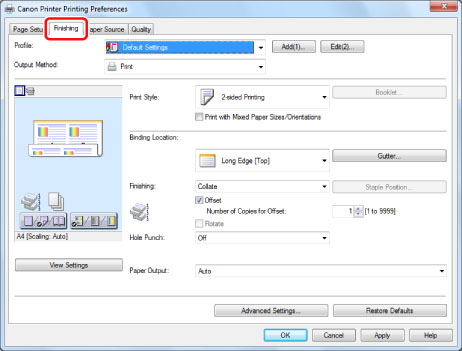
Click [Finishing].
5.
Confirm that [2-sided Printing] is selected for [Print Style]. → click [OK].
2 on 1 printing on both sides is now set as the default settings.