Sharing Sent Fax Documents in the Advanced Box
By adding the Advanced Box as a destination when sending a fax document, you can check the document after it has been sent.
Benefits of Using the Scan and Store Function when Sending Fax Documents
Fax documents can be sent not only to the destination fax number, but also to the Advanced Box for future reference.
By specifying a shared folder in the Advanced Box as the fax destination, multiple users can check the fax sent document.
|
Required Condition
|
|
Network settings are set.
The Fax function is available for use.
|
|
NOTE
|
|
The following settings are required to use the Shared Space of the Advanced Box.
[Use SMB Server] is set to 'On'.
|
(1)
|
Press  (Settings/Registration) → [Preferences] → [Network] → [SMB Server Settings]. |
|
(2)
|
Set [Use SMB Server] to 'On' → press [OK].
|
[Open to Public] is set to [By SMB].
|
(1)
|
Press (Settings/Registration) → [Function Settings] → [Store/Access Files] → [Advanced Box Settings] → [Open to Public]. |
|
(2)
|
Select [By SMB] → press [OK].
|
[Prohibit Writing from External] is set to 'Off'.
|
(1)
|
Press (Settings/Registration) → [Function Settings] → [Store/Access Files] → [Advanced Box Settings] → [Prohibit Writing from External]. |
|
(2)
|
Select [Off] → press [OK].
|
|
This section describes the procedure for sending fax documents to the Shared Space of an Advanced Box which is opened externally by SMB, enabling multiple users to view sent documents.
The screens may differ, depending on the model of the machine and the optional products available for use.
Follow the procedures below.
Creating a Folder for Sent Fax Documents in the Advanced Box
Registering the Address of the Folder for Sent Fax Documents in the Address Book
Sending a Fax
Viewing a Sent Fax Document
Creating a Folder for Sent Fax Documents in the Advanced Box
1.
Press [Scan and Store] on the Main Menu screen.
2.
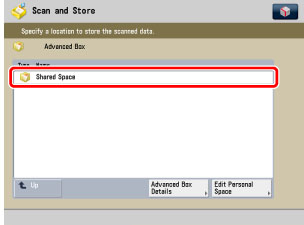
Press [Advanced Box].
3.
Select [Shared Space].
4.
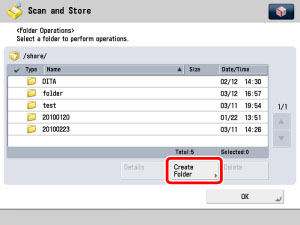
Press [Folder Operations].
5.
Press [Create Folder].
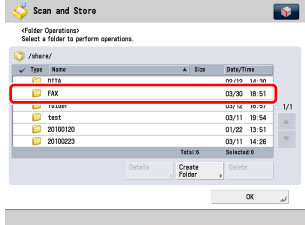
6.
Enter 'FAX' for the folder name → press [OK].
A new folder is created.
Registering the Address of the Folder for Sent Fax Documents in the Address Book
1.
Press
(Settings/Registration) → [Set Destination] → [Register Destination] → [Register New Dest.].
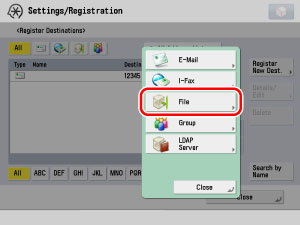
2.
Press [File].
3.
Press the Protocol drop-down list → select [Windows (SMB)] as the send protocol → enter [Name], [Host Name], and [Folder Path] of the folder for sent fax documents you created in the Advanced Box.
Enter "\\<IP address of the machine>\share" for [Host Name].
Enter "\FAX" for [Folder Path].
4.
Press [Next] → [OK] → [Close] → [Close].
The address of the folder you created for sent fax documents is registered in the Address Book.
1.
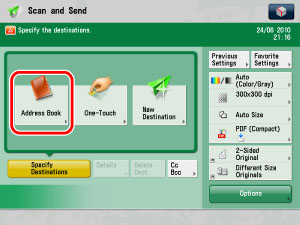
Place your original in the feeder or on the platen glass → press [Scan and Send] on the Main Menu screen.
|
NOTE
|
If the Main Menu screen is not displayed, press  (Main Menu). |
2.
Press [Address Book].
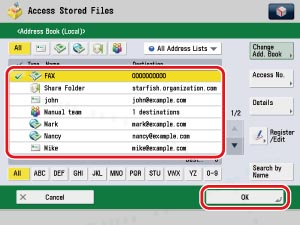
3.
Select the desired destinations → press [OK].
Select the destination to send the fax document to and the folder for sent fax documents in the Advanced Box as the destinations.
4.
Press

(Start).
Viewing a Sent Fax Document
You can access the folder for sent fax documents in the Advanced Box of the machine from a computer.
This section uses Windows 7 as an example.
1.
Click [Start] → [All Programs] → [Accessories] → [Windows Explorer] → enter the following path for <Address>. (Case sensitive.)
\\<IP address of this machine>
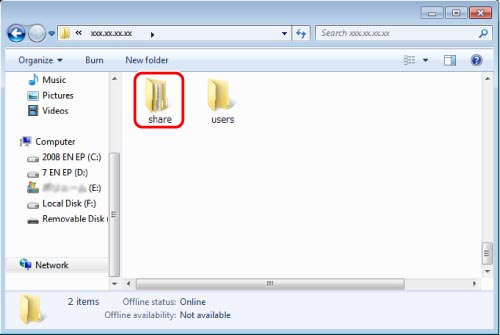
2.
Open the [share] in the Advanced Box.
3.
Open the [FAX] folder.
4.
Open and check the fax document.
To send to the Advanced Box of a machine from the same machine, it is recommended that you specify a loopback address (an address that indicates the machine on the network). Specify the loopback address as follows:
|
Using an IP address (IPv4 format):
|
127.0.0.1
|
|
Using an IP address (IPv6 format):
|
[::1]
|
|
Using a host name:
|
localhost
|
If you specify a loopback address, you can use the following functions:
You can save to the Advanced Box even if [Prohibit Writing from External] is set to 'On' in [Function Settings] (Settings/Registration).