Printing and Copying with the Original Background Images
By registering background images or frames (image forms) beforehand, you can create original printings easily.
Benefits from printing with background images or frames
You can create various printings by superimposing background images or frames scanned in advance on the originals.
The screens may differ, depending on the model of the machine and on attached optional products.
Follow the procedures below.
Preparing Image Forms
Registering Image Forms
Superimposing Image Forms and Copying or Printing from the Mail Box
1.
Prepare image forms and originals referring to the figures below.
|
|
Image forms
|
Originals
|
|
Certificates
|
|
|
|
Logos
|
|
|
|
Background images
|
|
|
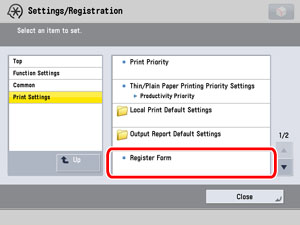
1.
Press

(Settings/Registration) → [Function Settings] → [Common] → [Print Settings] → [Register Form].
2.
Press [Register].
3.
Select the size of the original that contains the image form → press [Next].
4.
Set the desired scan settings.
You can change the scan settings for [Copy Ratio], [Background Density], [Original Type], [Nega/Posi].
5.
Place the original that contains the image form on the platen glass → press

(Start).
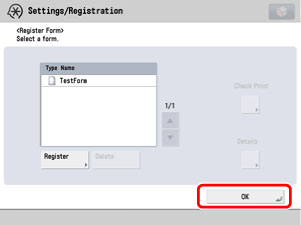
6.
After registering the original as an image form, press [OK].
7.
Press [Close].
Superimposing Image Forms and Copying or Printing from the Mail Box
1.
Place your originals → display the [Superimpose Image] screen.
Place your originals → press [Copy] → [Options] → [Superimpose Image].
For printing from the Mail Box
Press [Access Stored Files] on the Main Menu screen → [Mail Box] → select the desired Mail Box.
Select the document that you want to print → press [Print] → [Change Print Settings] → [Options] → [Superimpose Image].
This section uses the procedure for copying as an example.
2.
Press [Set] for the side of the paper you want to superimpose.
To superimpose a different image on both sides of a sheet, it is necessary to set the 2-Sided Printing mode.
To superimpose the same image on both sides of the sheet, specify the settings for the front side → press [Same as Front Side].
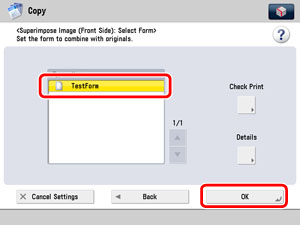
3.
Select the image form to be superimposed over the original → press [OK].
To check images registered as forms, press [Check Print] to print a sample of the image.
To display the detailed information of the image, press [Details].
4.
Press [OK] → [Close].
5.
Press
(Start).
The superimposed printing is output.