Automatically Forwarding Received Faxes to a Computer
You can automatically forward faxes from your machine to a computer.
Benefits of Forwarding to a Computer
By digitizing your documents, you can reduce the space required to store documents, improve search performance, and promote the productive reuse of your documents.
Junk faxes can be viewed and erased on the computer, enabling you to save on machine-related paper, toner, and maintenance costs.
You can check faxes without leaving your desk.
|
Required Condition
|
|
The Fax function is available for use.
The Send function is available for use.
Network settings are set.
You are logged in as the administrator.
|
This section describes how to set conditions to automatically forward faxes received from Company A to a shared folder accessible by employee B, and forward all faxes received from unspecified destinations to the Administration Division computer.
The screens may differ, depending on the model of the machine and on attached optional products.
Follow the procedures below.
Registering a Forwarding Destination
Setting a Forwarding Condition
Forwarding Faxes from Unrecognized Senders
Registering a Forwarding Destination
Register employee B's shared folder from the Remote UI.
1.
Start your Web browser → enter the IP address of the machine in [Address].
http://<IP address of this machine>/
The portal page of the Remote UI is displayed.
2.
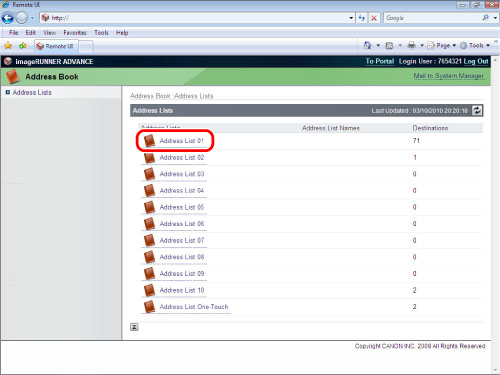
Click [Address Book] → [Address List 01] on the address list screen.
3.
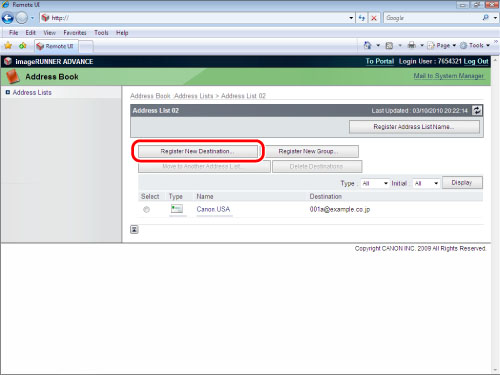
Click [Register New Destination].
The screen for registering new destinations is displayed.
4.
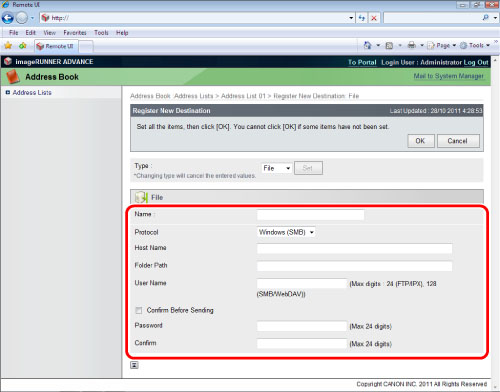
From the <Type> drop-down list, select [File] → specify the information for each item on the register destinations screen.
5.
Specify each setting.
|
Name
|
Enter a name for the destination.
|
|
Protocol
|
Select [Windows (SMB)].
|
|
Host Name
|
\\Computer name\PDF-Scan (Enter the computer name that you checked in step 1 in " Creating a Shared Folder ( For Windows)", or step 2 in " Creating a Shared Folder ( For Mac).") |
|
Folder Path
|
If you want to create a folder named "Temporary" in the PDF-Scan folder, enter '\Temporary'. You can send without entering this field.
|
|
User Name
|
Enter the sender's user name (the name used to log in to the computer).
|
|
Password
|
Enter the password that corresponds with the user name.
|
|
Confirm
|
Enter the password again.
|
6.
Press [OK].
The destination you entered is registered.
Setting a Forwarding Condition
Specify the settings to automatically forward faxes received from Company A.
You can operate this procedure using the touch panel display or the Remote UI.
Using the Touch Panel Display
1.
Press

(Settings/Registration) → [Function Settings] → [Receive/Forward] → [Common Settings] → [Forwarding Settings] → [Register].
2.
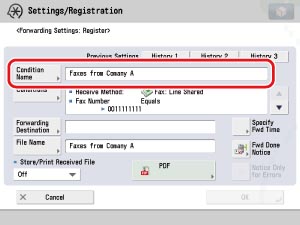
Press [Conditions].
3.
Select [Fax: Line Shared] from the <Receive Method:> drop-down list → select [Equals] from the <Fax Number> drop-down list.
4.
Enter the fax number for Company A using

-

(numeric keys) → press [OK].
Example: 0011111111
|
NOTE
|
|
The registered fax number for the sender may contain irregularities such as "dial zero", spaces, or the country code. Forwarding conditions may change depending on such irregularities. If you are unsure of the presence of irregularities, select [Contains] instead of [Equals].
For example, if you are unsure whether the sender's fax number is '03-3123-4567' or '003-3123-4567', select [Contains] and enter '03-3123-4567' for the fax number.
You can omit hyphens and spaces. In this case, enter '0331234567' for '03-3123-4567'.
|
5.
Press [Condition Name] → enter 'Faxes from Company A'.
6.
Press [Forwarding Destination].
7.
Select [Address Book].
8.
Select employee B's shared folder for the forwarding destination → press [OK].
9.
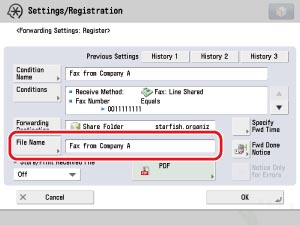
Press [File Name] → enter 'Fax from Company A'.
You can enter a desired file name. The specified name will be used for files forwarded to and stored in the shared folder.
The date and time (e.g. 201209011230) are appended to each file name. If no name is set, the date and time are appended, and cannot be deleted.
10.
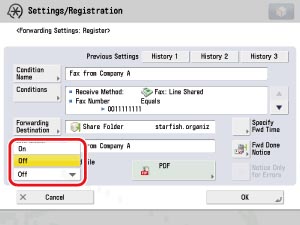
You can also print while forwarding. Select [On] from the [Store/Print Received File].
11.
Press [OK] to close.
12.
Select the registered forwarding condition → press [Validate/Invalidate] to set the forwarding condition to 'On'.
|
NOTE
|
|
Take note that if the forwarding condition is set to 'Off', faxes are output instead of automatically forwarding to a computer.
|
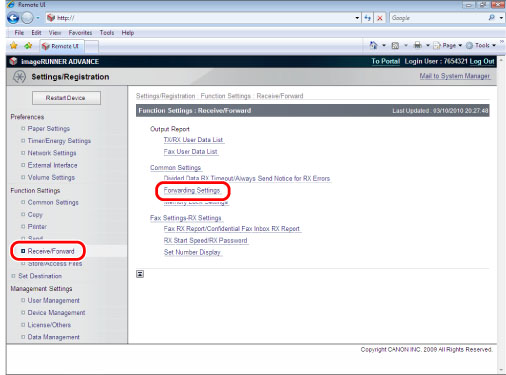
You can specify the forwarding settings using the Remote UI.
1.
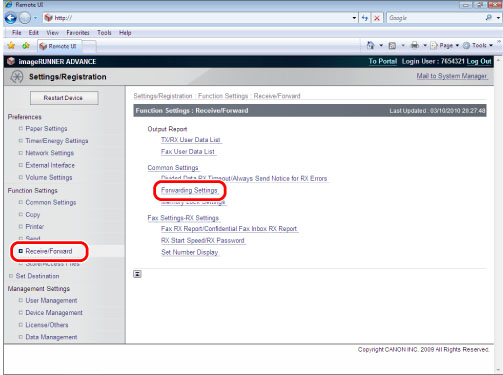
Access the Remote UI → select [Settings/Registration] → [Receive/Forward] → [Forwarding Settings].
2.
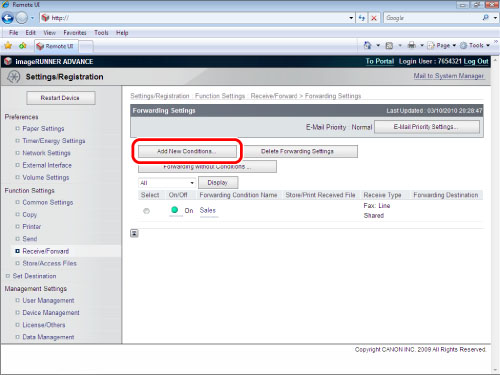
Register forwarding settings via [Add New Conditions].
Forwarding Faxes from Unrecognized Senders
You can operate this procedure using the touch panel display or the Remote UI.
Using the Touch Panel Display
1.
Press
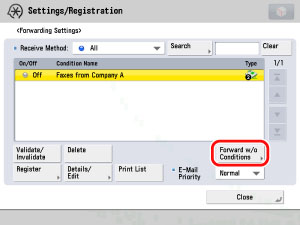
(Settings/Registration) → [Function Settings] → [Receive/Forward] → [Common Settings] → [Forwarding Settings] → [Forward w/o Conditions].
2.
Press [Forwarding Destination].
3.
Press [Address Book].
4.
Select the Administration Division computer for the destination → press [OK] → [OK].
5.
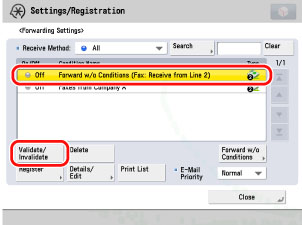
[Forward w/o Conditions] is displayed in the forwarding settings. Select [Forward w/o Conditions] → press [Validate/Invalidate] to set it to 'On'.
You can set the Forward w/o Conditions using the Remote UI.
1.
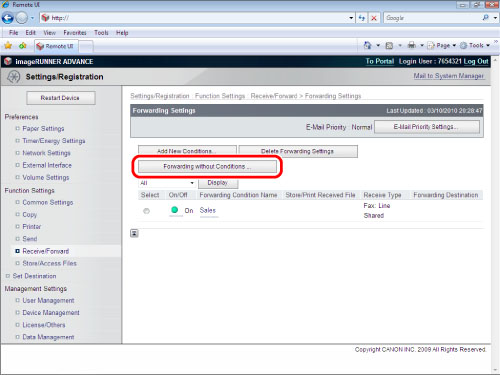
Access the Remote UI → click [Settings/Registration] → [Receive/Forward] → [Forwarding Settings].
2.
Click [Forwarding without Conditions] → specify the receive method, forwarding destination, forwarding done notice, and other settings.
[Enable This Forwarding Condition] is equivalent to the [Validate/Invalidate] button in the forwarding settings screen on your imageRUNNER ADVANCE machine.
Forwarding by Fax Line (Optional)
If the Super G3 2nd Line Fax Board is installed, you can specify different forwarding settings for each fax line (Fax Lines 1 and 2).
Example: If the fax lines for the Administration and Accounting Divisions are different.
Fax Line 1: 0000-1111 (Administration Division)
Fax Line 2: 0000-2222 (Accounting Division)