|
IMPORTANT
|
|
If you scan different sized originals without setting the Different Size Originals mode or selecting a non-standard paper size as the paper size, the machine may not be able to detect whether your originals are color or black-and-white.
|


|
IMPORTANT
|
|
When the Auto (Color/B&W) mode is set, black-and-white copies are output at the same speed as color copies.
When the Auto (Color/B&W) mode is set and your originals contain color sections, the machine scans them in the Full Color mode. However, the machine may scan the color originals in the Black & White mode under the following conditions. To avoid this, set the color mode to 'Full Color'.
If the originals contain a few color sections.
If the color sections are located only in the areas of the originals, as indicated by the shaded portions of the illustrations below, when loading the originals in the feeder.
 If the color sections of the originals are close to black.
If the originals contain light color densities.
You can select Red, Green, Blue, Yellow, Magenta, or Cyan as the color in the Single Color mode and the Two Colors mode.
|
|
NOTE
|
|
If [Use Auto (Color/Black & White)] in [Select Color Settings for Copy] is set to 'Off', [Auto (Color/B&W)] is not displayed. (See "Restricting Use of Auto-Color Select.")
If [Use Full Color] in [Select Color Settings for Copy] is set to 'Off', [Full Color] is not displayed. (See "Restricting the Use of Full Color.")
If a black-and-white document is copied in the Full Color mode, the Single Color mode, and the Two Colors mode, it is counted as a color copy.
|
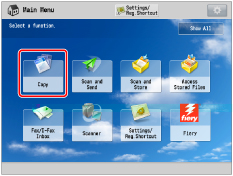
 (Main Menu) → [Copy].


|
NOTE
|
|
If color printing is performed after black printing, a message may appear indicating the machine is preparing for color printing. Please wait for a moment until the message disappears. Color printing will start when the message disappears.
If you select [Sepia Tone] in the One Touch Color mode, the color mode is automatically set to 'Single Color'.
The default setting is 'Auto (Color/B&W)' for all the Copy functions.
If you want to use a desired color mode as the default setting, you can register the desired color mode in [Change Default Settings]. (See "Changing/Initializing the Default Settings for the Copy Function.")
If you set the Poster mode while the color mode is set to 'Auto (Color/B&W)', the color mode is automatically set to 'Full Color'.
|