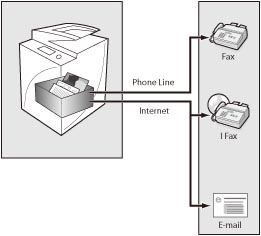
By storing the documents in the Mail Box of this machine, you can print and send at a later date. For example, even if each branch mailed the original contract with the client to the headquarters, each branch can store the contract as a data on this machine.
You can save paper and storage space because you do not need to have duplicate papers.
You can delete desired pages and unnecessary pages.
You can send necessary stored documents via e-mail or fax.
|
Required Condition
|
|
Network settings are set.
E-mail settings are set.
|
This section describes how to store 30 page document in the Mail Box and send the data via e-mail.
The screens may differ, depending on the model of the machine and on attached optional products.
The screens may differ, depending on the operating system of your computer.
Follow the procedures below.
Storing Documents in the Mail Box
Sending Documents via E-mail
Confirming the Sending Result
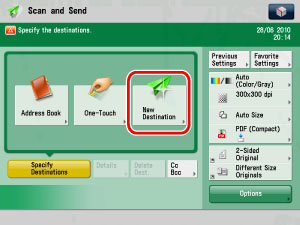
1.
Press [Scan and Send] on the Main Menu screen → [New Destination].
|
NOTE
|
|
If the Main Menu screen is not displayed, press
 (Main Menu). (Main Menu). |
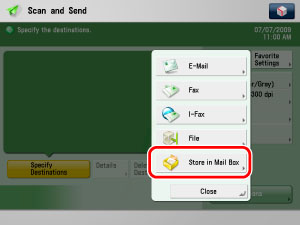
2.
Press [Store in Mail Box] → select the Mail Box number you want to store in → press [OK].
3.
Place the 30 page originals in the feeder → press  (Start).
(Start). The document is stored in the Mail Box of this machine.
|
NOTE
|
|
The file format is exclusively supported by the imageRUNNER ADVANCE.
If you store a document without giving it a name, the document is automatically assigned a name using the year, month, day, and time such as [20090912152010].
|
You can operate this procedure using the touch panel display or the Remote UI.
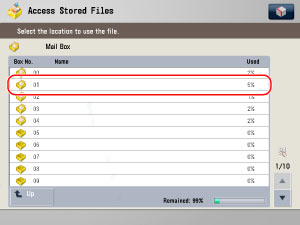
1.
On the Main Menu screen, press [Access Stored Files] → [Mail Box] → select the Mail Box number where the document is stored.
|
NOTE
|
|
If the Main Menu screen is not displayed, press
(Main Menu). |
2.
Select the stored document → press [Send].

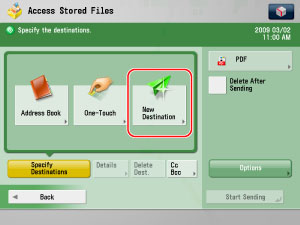
3.
Press [New Destination] → [E-Mail] → [E-mail Address].
4.
Enter the recipient's e-mail address → press [OK] → [OK].
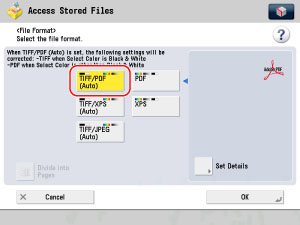
5.
Select the file format to send. As an example, [TIFF/PDF (Auto)] is selected.
6.
Press [Set Details] → [Compact] → [OK] → [OK] → [Start Sending].
Document is sent to the recipient.
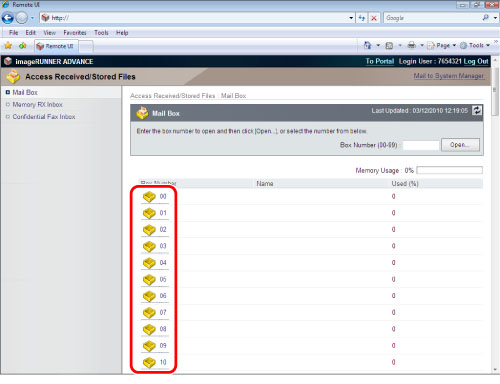
1.
Access the Remote UI → click [Access Received/Stored Files] → [Mail Box] → select the Mail Box number where the document is stored.
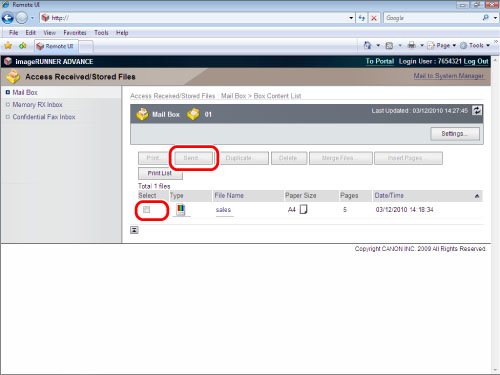
2.
Select the documents that you want to send → click [Send].
3.
Set the recipient address on the Send screen → click [OK].

1.
Press  (Status Monitor/Cancel) → [Send] → [Log] → check that the e-mail was sent successfully.
(Status Monitor/Cancel) → [Send] → [Log] → check that the e-mail was sent successfully.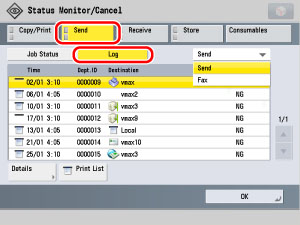
If the result is [OK], the e-mail was sent successfully.
If the result is [NG], the e-mail was not received because of an error.
By using the previous settings, you can store the send settings and recall.
You can store documents created on your computer in the Mail Box. You can send fax without paper.
|
1.
|
Click [File] of the application software you are using for the document to print → select [Print] to display the [print] dialog box → click [Properties].
|
|
2.
|
Select [Output Method] → [Store].
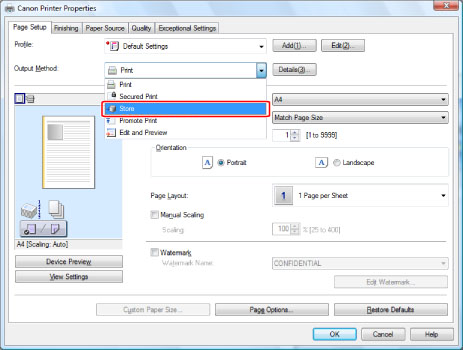 When a message appears asking for your confirmation to switch to the store mode, click [OK].
|
|
3.
|
Click [Details] to display the [Store Details] dialog box.
|
|
4.
|
Select the Mail Box number you want to store in → click [OK].
 |
If you use Workflow Composer, you can register a set of operations as a workflow and execute the workflow by pressing one button. For details, see "Performing Complex Tasks at the Touch of a Button: Workflow Composer."