By using Secured Print function, you can prevent others from seeing the printed documents because the print job cannot be started until the password is entered.

|
Required Condition
|
|
Printer Driver is installed.
|
This section describes how to use the Secured Print function and enter the password to print the document.
The screens may differ, depending on the model of the machine and on attached optional products.
The screens may differ, depending on the operating system of your computer.
Follow the procedures below.
Setting the Password for the Document to Print
Entering the Password and Printing
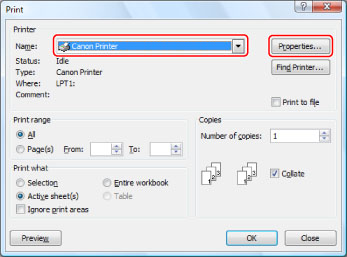
1.
Select [Print] from the [File] menu of the application software you are using for the document to print → display the [Print] dialog box → click [Properties].
|
NOTE
|
|
The print screen may differ, depending on the type of application you are using.
|
2.
Select [Secured Print] from [Output Method].
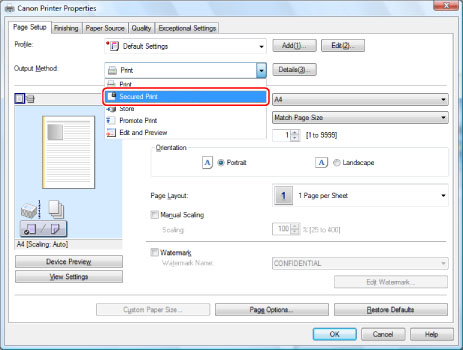
3.
Click [OK] in the message box to switch to the Secured Print mode.

Printing method is changed to [Secured Print].
4.
Click [OK] to close the printer driver screen → click [OK] in the [Print] dialog box.
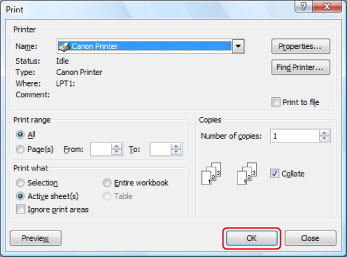
The [Confirm Password] dialog box is displayed.
|
NOTE
|
|
The print screen may differ, depending on the type of application you are using.
|
5.
Enter the user name and password → click [OK].
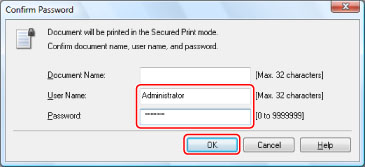
File name is displayed for [Document Name], but you can change it to a desired name. The Secured Print job sent from the computer is stored in the printer.
|
NOTE
|
|
User name is displayed on the touch panel display of the machine. To use the Secured Print mode, register a user name that can be distinguished from other users.
You must enter the password again to print from the machine. After the password is set on the document, write down the password and keep it in a safe place.
|
1.
From the [File] menu of the application software you are using to print the document → select [Print].
2.
Select the printer to use → select [Special Features].
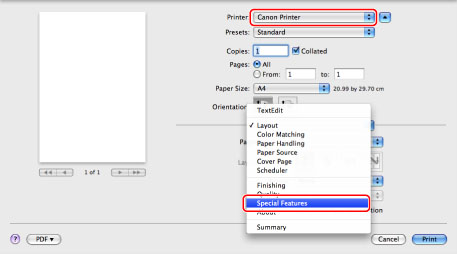
The [Special Features] preferences panel is displayed.
|
NOTE
|
|
The screen may differ, depending on the type and version of the printer driver and the application software you are using.
|
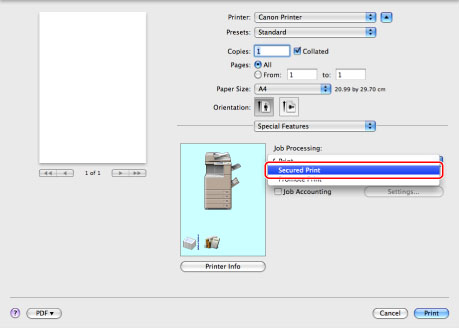
3.
Select [Secured Print] from [Job Processing].
4.
Click [Print].
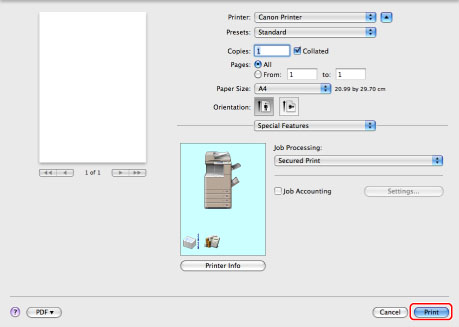
The [Secured Print] dialog box is displayed.
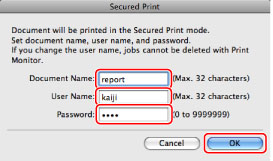
5.
Enter the document name, user name, and password in the [Secured Print] dialog box → click [OK].
The Secured Print job sent from the computer is stored in the machine.
|
NOTE
|
|
Up to 32 alphanumeric characters can be entered for [Document Name] and [User Name].
Up to seven digits (0-9999999) can be entered for [Password].
|
You can enter the password on the control panel of the machine and print.
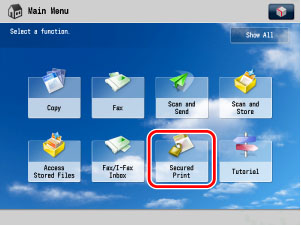
1.
Press [Secured Print] on the Main Menu screen.
|
NOTE
|
|
If the Main Menu screen is not displayed, press
 (Main Menu). (Main Menu). |
2.
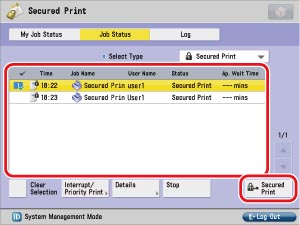
Select the secured job to print → press [Secured Print].
|
NOTE
|
|
A locked icon is displayed on the left side of the print job number for the secured print job.
|
3.
Enter the password that was entered in the computer → press [OK].
If the management mode for the machine is set to SSO-H (Single Sign-On H), only the logged in user can print.