|
|
Top ContentsHelpGlossary ContentsHelpGlossary |
||
|---|---|---|---|
|
Category
|
|
 Category TopPreface
 Digitizing Paper DocumentsScanning the Original and Sending to a ComputerAdding the Scanned Image via Network Scanner onto a DocumentEnabling PDF Documents to be Edited with Adobe Reader (Reader Extensions)Converting Scanned Documents into the Encrypted Searchable PDFPrinter DriverMerging and Printing Multiple DocumentsPrinting a Booklet (Windows)Printing a Booklet (Mac)Using Profiles to Print (Windows)Selecting Presets for Printing (Mac)Specifying the Printer Driver Default Settings (Windows)
 FaxTemporarily Storing and Viewing Received ImageHandling Junk FaxesAutomatically Forwarding Received FaxesAutomatically Forwarding Received Faxes to a ComputerForwarding to a Mobile Computing DeviceForwarding Received FaxesHandling Files with Forwarding ErrorsSharing Received Fax Documents in the Advanced BoxSharing Sent Fax Documents in the Advanced BoxChecking That the Sent Fax Was Delivered SuccessfullyAccessing the Fax Function of a Server MachineE-MailSending an E-mail to Multiple DestinationsUsing a Shared Address BookInternet Fax/Intranet FaxSending a Document via Internet FaxReceiving a Document via Internet FaxDepartment ID ManagementSetting a Department ID for CopyingSetting the Department ID Management on the Printer DriverMail Box and Advanced BoxStoring and Sending a DocumentCreating a Personal Space in the Advanced Box (Open to Public by WebDAV)Creating a Personal Space in the Advanced Box (Open to Public by SMB)Practically Applying Print DataBacking Up the Data Stored in the Mail BoxSecuritySystem ManagementSpecifying Copy Security SettingsPreventing Other Users to See the Printed DocumentsHard Disk Data SecuritySpecifying Send/Fax Security SettingsMail Box SecurityRestricting Access to the Machine (IPv4)Restricting Access to the Machine (IPv6)Advanced Copying and PrintingScanning Originals while the Machine is Processing a Job (Reserve Copy)Copying a Large Number of Documents Effectively with Two imageRUNNER ADVANCE (Cascade Copying)Printing and Copying with the Original Background ImagesPrinting Files Stored in the USB Memory Directly from the MachinePrinting Files Created with Different Applications as a Single FileCreating Address Labels by Scanning Business CardsCustomizing the Screen DisplayMaking Favorite Keys Highly VisibleRegistering a Series of Frequently Used Functions in One Button (Quick Menu)Recalling the Quick Menu of Another MachineLinkage between imageRUNNER ADVANCE Desktop and imageRUNNER ADVANCEUsing Advanced Box (imageRUNNER ADVANCE Desktop)Importing Received FAX Documents into Library (imageRUNNER ADVANCE Desktop)Sending Fax from a Computer (imageRUNNER ADVANCE Desktop)Performing Saddle Stitch Printing (imageRUNNER ADVANCE Desktop)Performing Complex Tasks at the Touch of a Button: Workflow ComposerCreating a Flow on a Computer (Workflow Composer)Duplicating/Editing a Flow to Create a Personal Flow (Workflow Composer)Executing a Flow on the Machine (Workflow Composer)
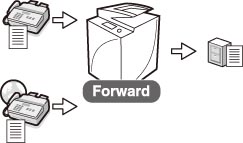
|
Required Condition
|
|
The Fax function is available for use.
The Send function is available for use.
Network settings are set.
You are logged in as the administrator.
|
|
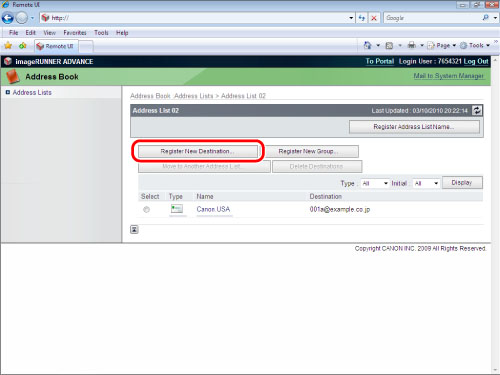
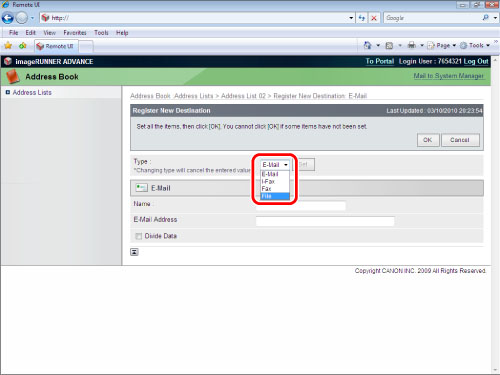
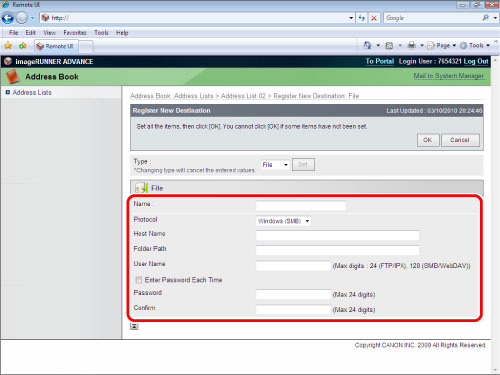
Name
|
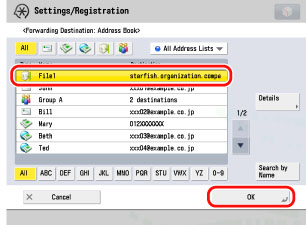
Enter a name for the destination.
|
|
Protocol
|
Select [Windows SMB].
|
|
Host Name
|
\\Computer name\PDF-Scan (Enter the computer name that you checked in step 1 in " Creating a Shared Folder (For Windows)", or step 2 in "Creating a Shared Folder (For Mac).")
|
|
Folder Path
|
If you want to create a folder named "Temporary" in the PDF-Scan folder, enter '\Temporary'. You can send without entering this field.
|
|
User Name
|
Enter the sender's user name (the name used to log in to the computer).
|
|
Password
|
Enter the password that corresponds with the user name.
|
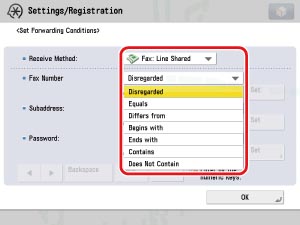
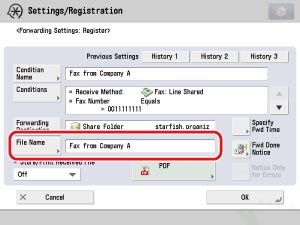
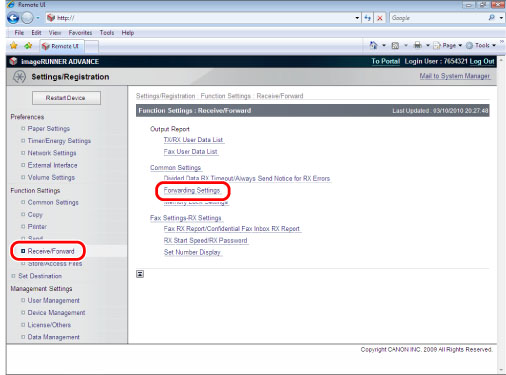
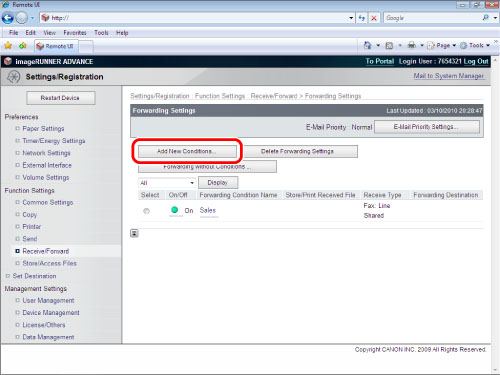
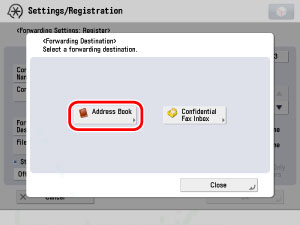
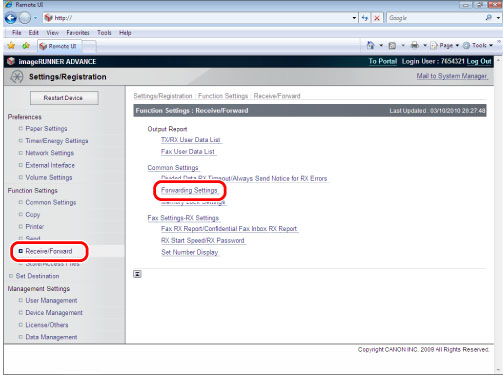
 (Settings/Registration) → [Function Settings] → [Receive/Forward] → [Common Settings] → [Forwarding Settings] → [Register].
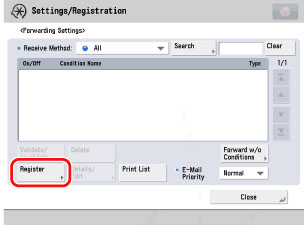
 -
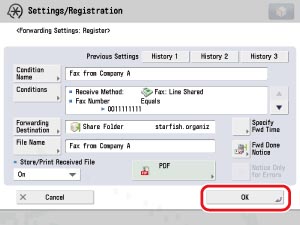
-  (numeric keys) → press [OK].
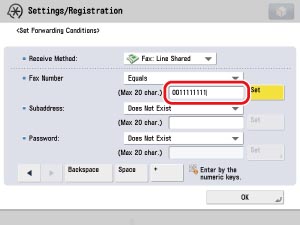
|
NOTE
|
|
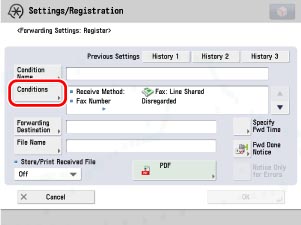
The registered fax number for the sender may contain irregularities such as "dial zero", spaces, or the country code. Forwarding conditions may change depending on such irregularities. If you are unsure of the presence of irregularities, select [Contains] instead of [Equals].
For example, if you are unsure whether the sender's fax number is '03-3123-4567' or '003-3123-4567', select [Contains] and enter '03-3123-4567' for the fax number.
You can omit hyphens and spaces. In this case, enter '0331234567' for '03-3123-4567'.
|


|
NOTE
|
|
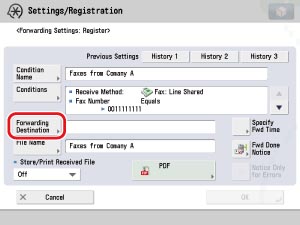
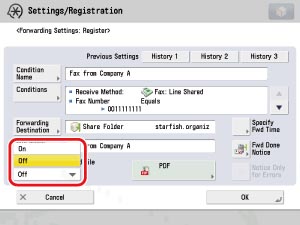
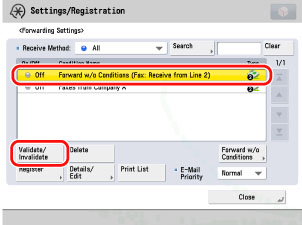
Take note that if the forwarding condition is set to 'Off', faxes are output instead of automatically forwarding to a computer.
|
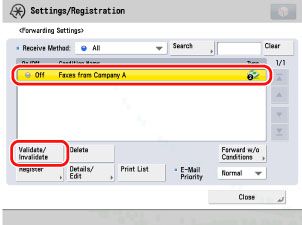
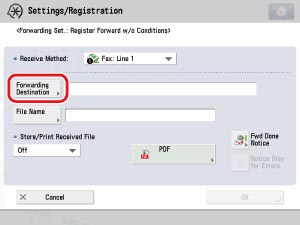
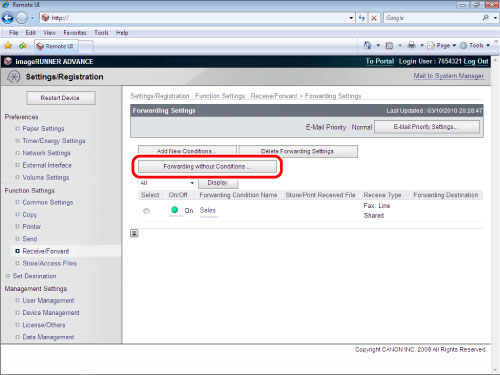
 (Settings/Registration) → [Function Settings] → [Receive/Forward] → [Common Settings] → [Forwarding Settings] → [Forward w/o Conditions].
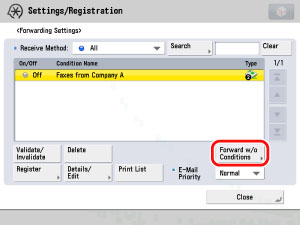
| © CANON Inc. 2011 All Rights Reserved. | Disclaimer CopyrightTrademarksOffice LocationsUSRM1-9634-00 CopyrightTrademarksOffice LocationsUSRM1-9634-00 |
|---|