Client machines without the Fax function can use the Fax function of a server machine (another imageRUNNER ADVANCE machine) on the same network.
By sharing the Fax function of a single machine with multiple machines, you can avoid the cost of fitting multiple machines with the Fax function.
|
Required Condition
|
|
[Dedicated Port Settings] (Preferences) is set to 'On' for the server machine.
The Remote Fax Kit is activated for the server machine.
Both the server and client machines can access the network.
|
This section describes the procedures for setting the server machine followed by the client machine.
The screens may differ, depending on the model of the machine and on attached optional products.
Follow the procedures below.
Server Settings
Client Settings
Remote Fax Settings
1.
Press  (Settings/Registration) → [Function Settings] → [Send] → [Fax Settings] → [Remote Fax Settings].
(Settings/Registration) → [Function Settings] → [Send] → [Fax Settings] → [Remote Fax Settings].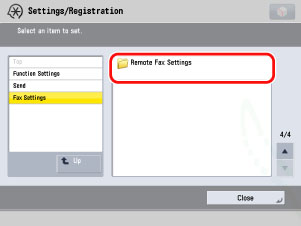
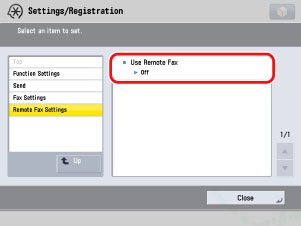
2.
Press [Use Remote Fax].
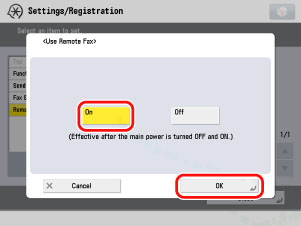
3.
Select [On] for <Use Remote Fax> → press [OK].
1.
Press (Settings/Registration) → [Function Settings] → [Send] → [Fax Settings] → [Remote Fax TX Settings].
(Settings/Registration) → [Function Settings] → [Send] → [Fax Settings] → [Remote Fax TX Settings].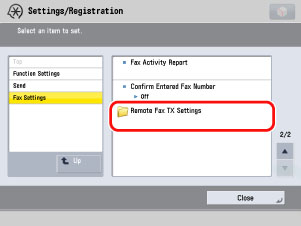
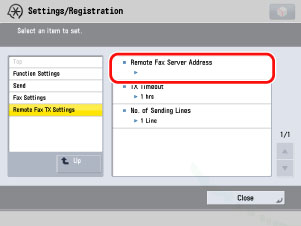
2.
Press [Remote Fax Server Address].
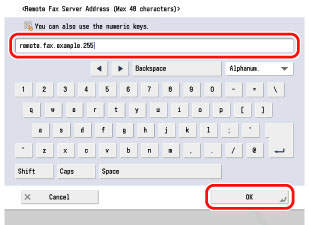
3.
Enter the host name or the IP address → press [OK].
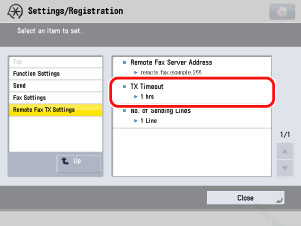
4.
Press [TX Timeout].
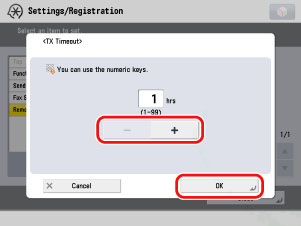
5.
Specify the TX timeout time by pressing [-] or [+] → press [OK].
6.
Press [No. of Sending Lines].
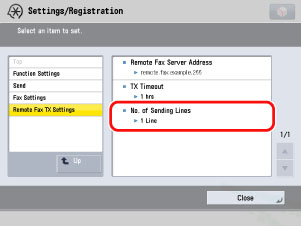
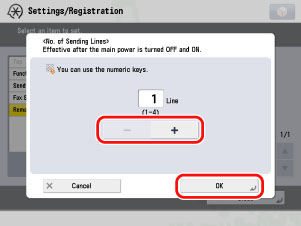
7.
Press [-] or [+] to set the number of telephone lines to use → press [OK].
8.
Press [Select Priority Line].
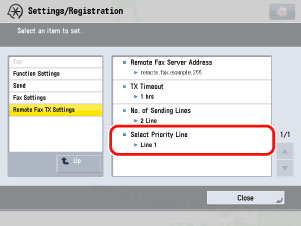
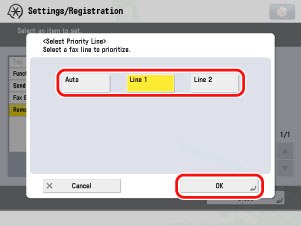
9.
Select [Auto] or the line to use as a priority → press [OK] → [Close].
1.
Select [Fax] on the Main Menu screen to start using the Fax function.
|
NOTE
|
|
If the Main Menu screen is not displayed, press
 (Main Menu). (Main Menu). |