Using Canon PageComposer, you can edit and print multiple documents created using different applications, as one document.
Edit Documents
You can print documents created using different applications as one document.
Delete Unnecessary Pages
You can edit/delete unnecessary pages before printing.
Check with Preview
You can check the edit result with Preview before printing.
|
Required Condition
|
|
Printer driver is installed.
|
This section describes how to print five sets of 2-sided document created by different application software.
The screens may differ, depending on the model of the machine and on attached optional products.
The screens may differ, depending on the operating system of your computer.
Follow the procedures below.
Printing Document from Application Software
Editing Documents on the Canon PageComposer
1.
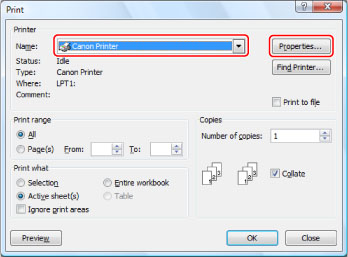
Click [File] of the application software you are using for the document to print →select [Print] to display the [Print] dialog box → click [Properties].
|
NOTE
|
|
The print screen may differ, depending on the type of computer you are using.
|
2.
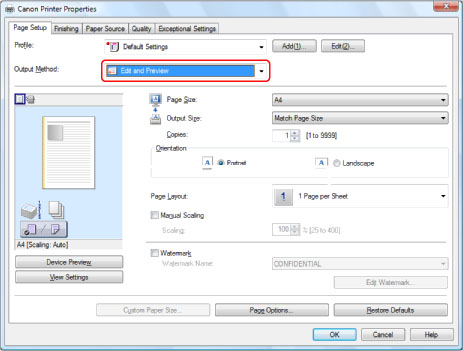
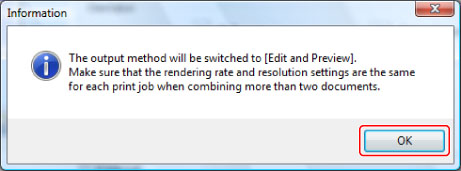
Select [Output Method] → [Edit and Preview].
3.
Click [OK].
4.
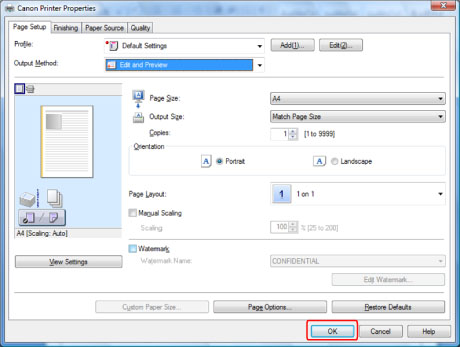
Specify the print settings on each sheet of the printer driver screen → click [OK].
5.
Click [OK] on the [Print] dialog box.
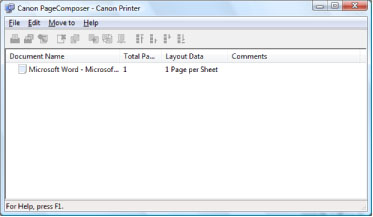
The [Canon PageComposer] dialog box is displayed.
|
NOTE
|
|
The print screen may differ, depending on the type of computer you are using.
|
6.
Repeat steps 1 to 5 for the documents you want to output.
1.
From the [Document Name] list on [Canon PageComposer] dialog box, select the documents you want to merge into one document → click [ ] (Combine Documents).
] (Combine Documents).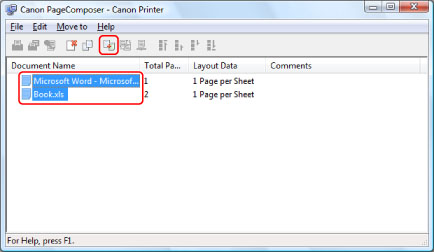
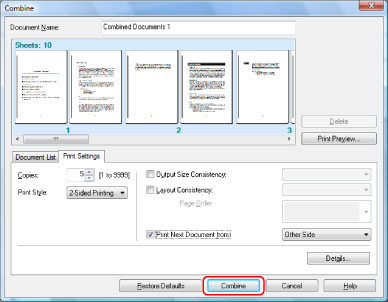
The [Combine] dialog box is displayed.
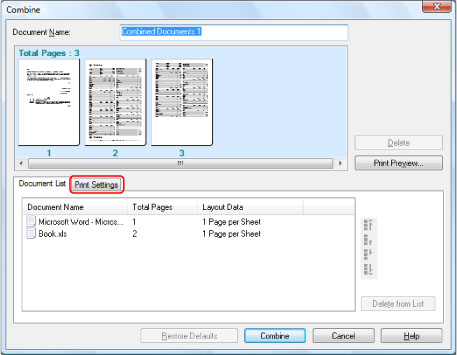
2.
Click the [Print Settings] tab to display the [Print Settings] page.
3.
Select [5] for [Copies] and [2-sided Printing] for [Print Style].

If you want to continue to print the next document after a document with odd number of pages, select [Print Next Document from] → [Other Side].
4.
To check print preview, click [Print Preview].
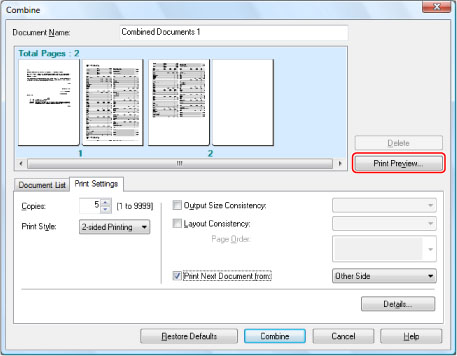
Print preview is displayed. Check the preview → click [Done] to return to the [Combine] dialog box.
5.
Click [Combine].
The [Canon PageComposer] dialog box is displayed. Combined documents are displayed on the list of documents.
6.
From the [Document Name] list, select the documents you want to print → click [ ](Print).
](Print).
You can specify settings for number of copies, print style (one-sided prints/2-sided prints/booklet printing), output paper size, layout (N in 1), and staple mode. The settings you can specify may differ, depending on the application software and printer you are using.
By adding print settings to profiles, you can recall the same settings. To add settings to profiles, click [Add] for [Profile] on the printer driver screen → set the name and icon → click [OK].
By specifying the print settings in the printer driver screen on the Control Panel, instead of in an application, you can register the settings as the default settings. To display the printer driver screen in the Control Panel for Windows XP, click [Start] → [Printers and Faxes] (or [Start] → [Control Panel] → [Printers and Other Hardware] → [Printers and Faxes]) → right-click the printer icon → click [Printing Preferences]. For Windows Vista, click [ ] (Start) → [Control Panel] → [Printer] → right-click the printer icon → click [Printing Preferences]. For Windows 7, click [] (Start) → [Devices and Printers] → right-click the printer icon → click [Printing Preferences].
] (Start) → [Control Panel] → [Printer] → right-click the printer icon → click [Printing Preferences]. For Windows 7, click [] (Start) → [Devices and Printers] → right-click the printer icon → click [Printing Preferences].