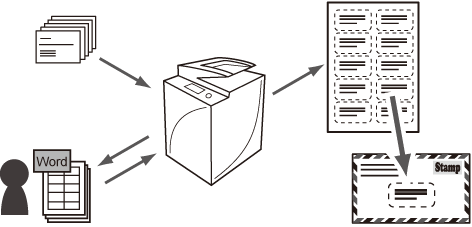
By performing the OCR (Text Searchable) function, you can convert scanned business cards into PDF which is text searchable. The Searchable PDF mode is useful in various situations. This section explains how to create address labels using [Mail Merge] function of Microsoft Word 2003.
The searchable PDF mode enables you to perform OCR (optical character recognition) to extract data that can be recognized as text from the scanned image, and add it as a transparent layer of text to create a PDF file that is searchable. This mode enables you to search necessary information quickly from PDF files. To use this function, the Universal Send Advanced Feature Set is required.
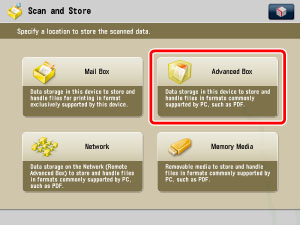
Store the scanned business card in the Advanced Box of the machine, the Advanced Box of another machine on the network, or the memory media.
This section uses the procedure for storing data in the Advanced Box as an example.
The screens may differ, depending on the model of the machine and on attached optional products.
|
Required Condition
|
|
Network settings are set.
The Open to Public settings of the Advanced Box is set.
The Universal Send Advanced Feature Set is activated.
|
|
IMPORTANT
|
|
Text may not be detected correctly, depending on the background color, style and size of the characters in the image.
|
|
NOTE
|
||||
|
The following settings are required to use the Searchable PDF mode.
[Format PDF to PDF/A] is set to 'Off'.
|
 (Settings/Registration) → [Function Settings] → [Common] → [Generate File] → [Format PDF to PDF/A].
Follow the procedures below.
Converting Business Cards into the Searchable PDF
Creating Address Label Data by Copying Texts from the PDF to Microsoft Word
Printing Address Labels
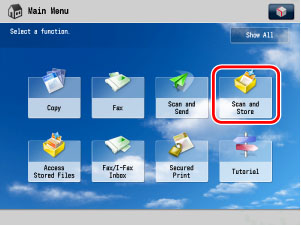
1.
Press [Scan and Store] on the Main Menu screen.
2.
Press [Advanced Box].
3.
If the Log In screen is displayed, enter the user name and password → press [OK].
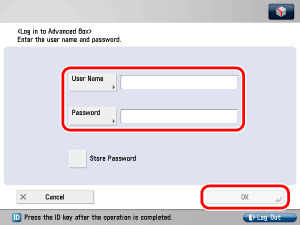
If the Log In screen is not displayed, this step is not necessary.
After you finish using the machine, press  (Log In/Out) to log out.
(Log In/Out) to log out.4.
Select [Shared Space] or [Personal Space].
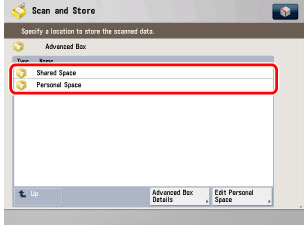
If the Log In screen is not displayed, you cannot select [Personal Space].
5.
Select a folder you want to store the scanned data.
The [folder] folder is located in the Shared Space by default.
6.
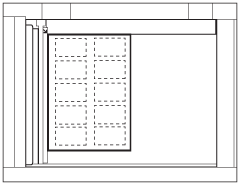
Place business cards on the platen glass.
If you set business cards on a board, you can scan several cards at one time.
7.
Press [Scan].
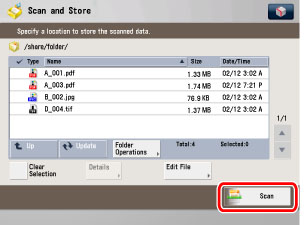
8.
Specify the desired scan settings.
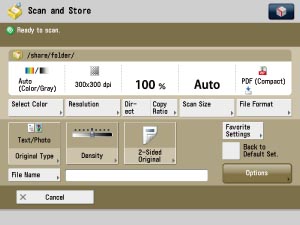
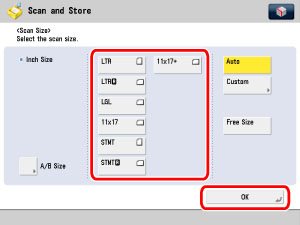
Press [Scan Size].
Select [LTR] → press [OK].
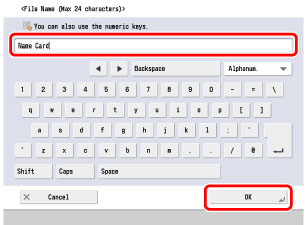
Press [File Name].
Enter a name for the scanned data → press [OK].
9.
Press [File Format].
10.
Select [PDF] → press [Set Details].
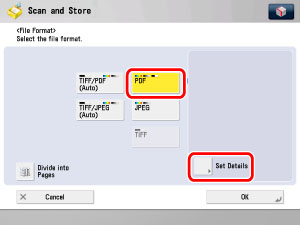
If [Set Details] is not displayed, press [OCR(Text Searchable)] on the File Format screen → proceed to step 12.
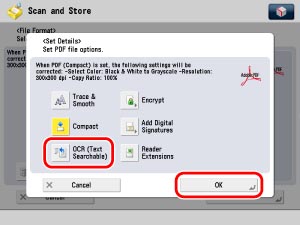
11.
Press [OCR(Text Searchable)] → [OK].
12.
Press  (Start).
(Start).A searchable PDF file is stored in the Advanced Box.
13.
Access the Advanced Box where the searchable PDF is stored.
This section uses Windows 7 as an example.
Press [Start] → [Program] → [Accessories] → [Windows Explorer] →enter the following path in [Address]. (case sensitive)
\\<IP address of this machine>

If the Log In screen is displayed, enter the user name and password → press [OK].

If the Log In screen is not displayed, this step is not necessary.
Select the [share] or [users] folder in the Advanced Box.
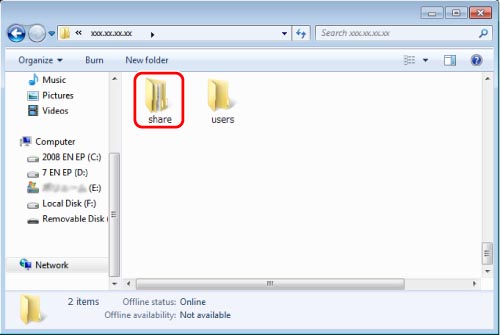
Select [share] folder to access the Shared Space.
Select [users] folder to access the Personal Space.
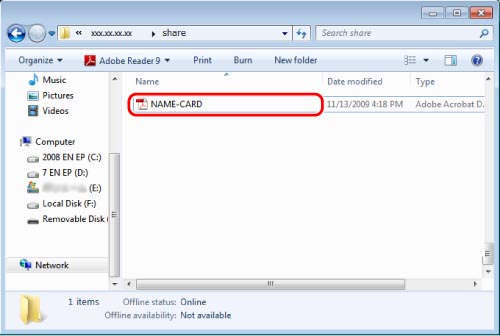
Open the folder where the searchable PDF file is stored.
14.
Open the searchable PDF file.
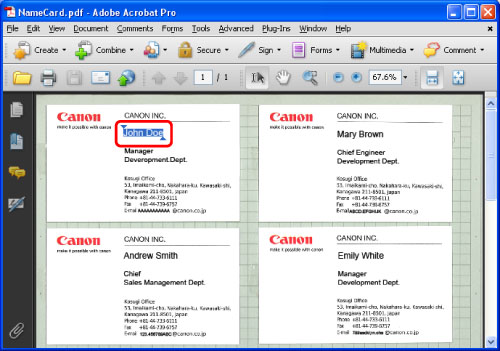
Confirm that text is selectable.
This section uses Microsoft Word 2003 as an example.
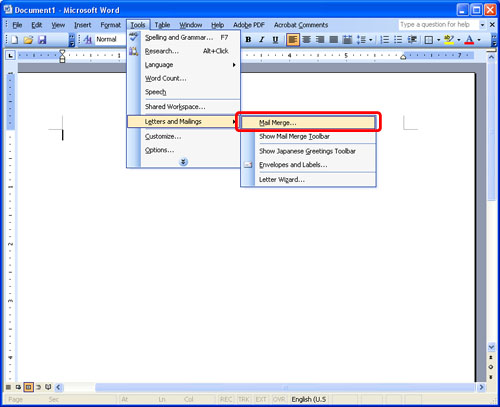
1.
Open a new document on Microsoft Word → click [Tools] → [Letters and Mailings] → [Mail Merge].
2.
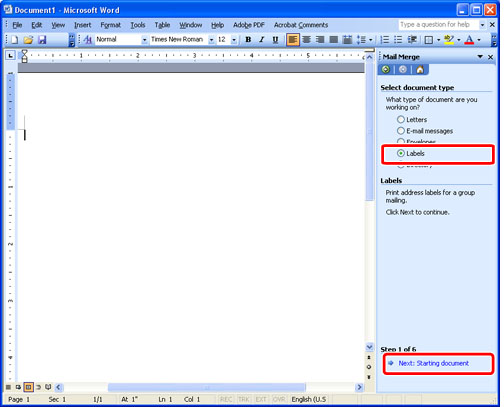
Select [Labels] for [Select document type] → click [Next].
3.
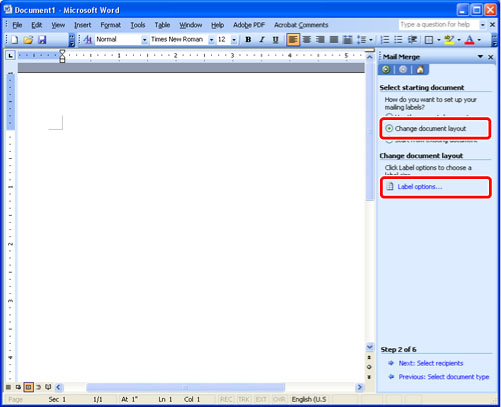
Select [Change document layout] for [Select starting document] → click [Label options].
4.
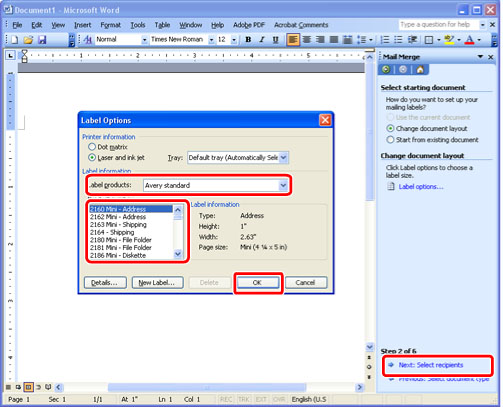
Select the size of labels for [Label products] → click [OK] → [Next].
5.
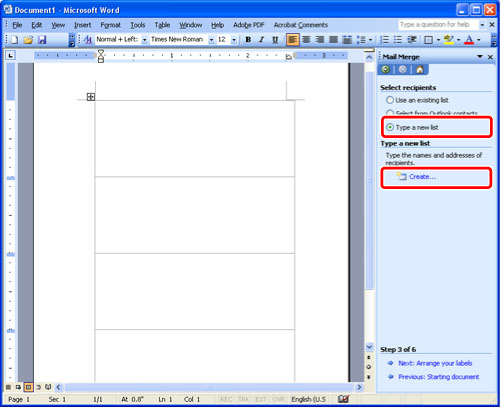
Select [Type a new list] for [Select recipients] → click [Create].
6.
Copy necessary texts from the searchable PDF file into the [New Address List] dialog box to create an address list.
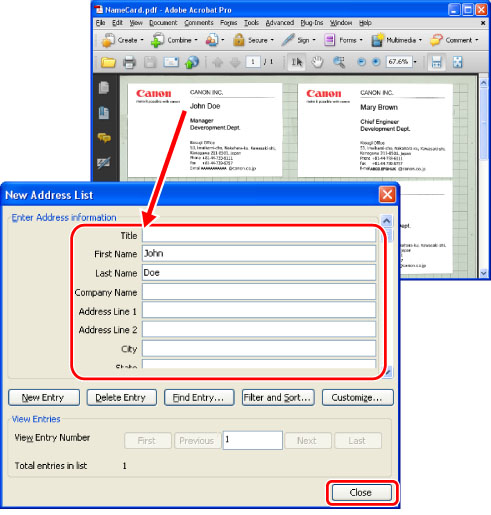
Confirm that small characters are correctly detected.
After entering information of one business card, click [New Entry] to proceed to the next card.
If you finish entering all business cards, click [Close].
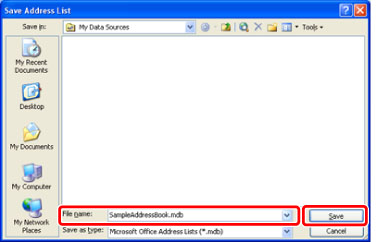
7.
Enter a file name → click [Save].
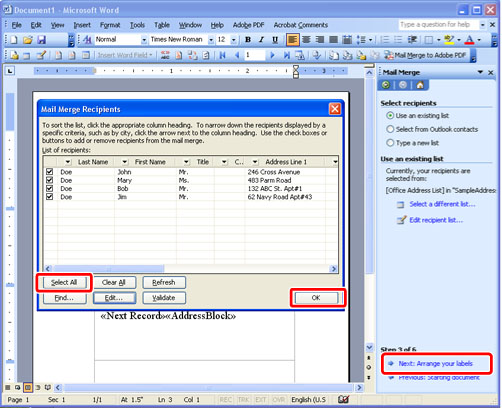
8.
Click [Select All] → [OK] → [Next].
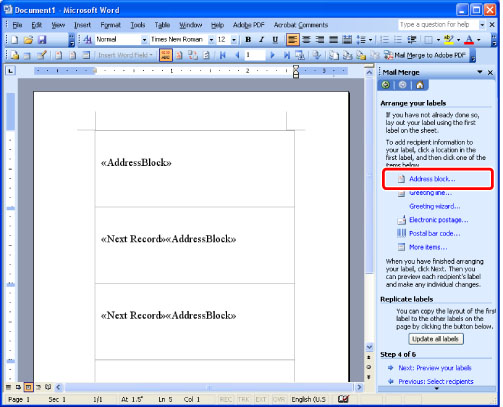
9.
Click [Address block] in [Arrange your labels].
10.
Specify the layout of the label → click [OK] → [Next].
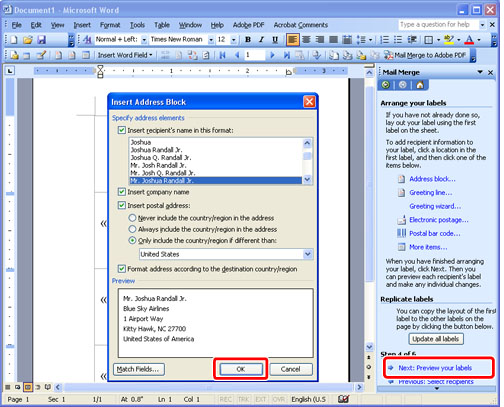
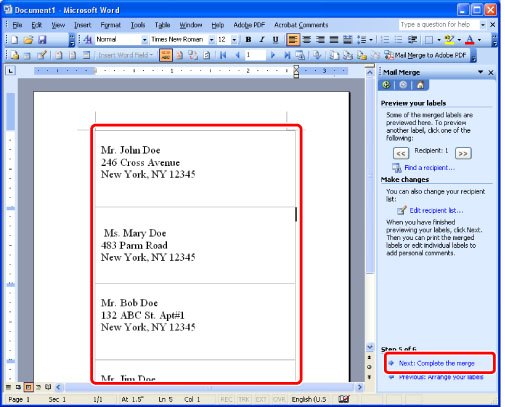
11.
Check the preview of the label, and click [Next] if the preview is adequate.
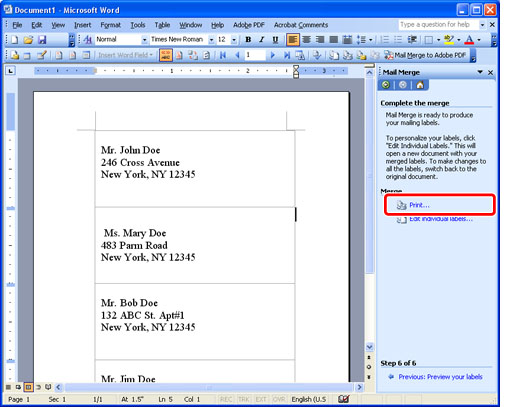
1.
Click [Print] in [Complete the merge].
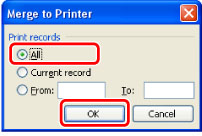
2.
Select [All] for [Print records] → click [OK].
3.
Click [Properties].
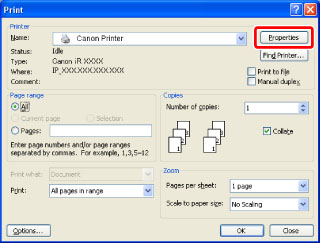
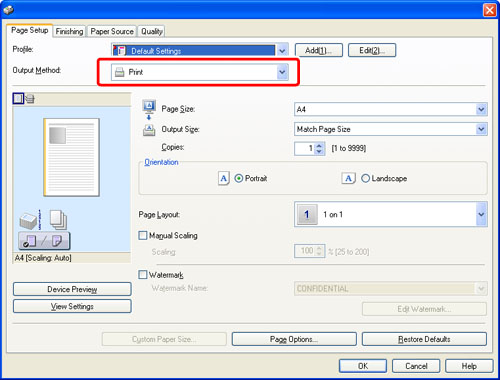
4.
Select [Print] for [Output Method].
5.
Click [Paper Source].
6.
Select the paper source that contains labels → click [OK].
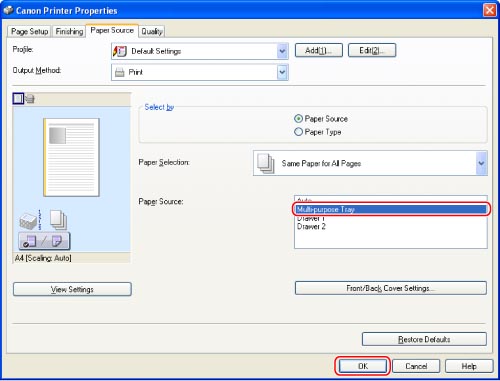
7.
Click [OK].
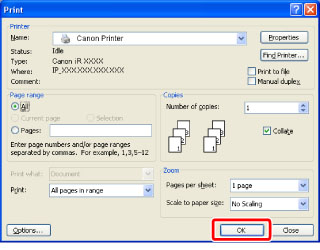
Address labels are output.
You can make use of the printed address labels, such as for envelopes.