Top Site mapHelpGlossary Site mapHelpGlossary | |
 Category TopOverview of This FunctionFlow of Copy OperationsCanceling a Copy JobReserved CopyingChanging Color ModesCopy SampleRecalling Previous Copy Jobs (Previous Settings)
 Storing, Recalling, and Deleting Favorite Settings (Favorite Settings)Storing Favorite SettingsRecalling and Deleting Favorite SettingsAssigning ShortcutsChanging and Canceling Copy SettingsInterrupt ModeChanging Copy RatiosZoom by LengthSetting the X and Y Axes IndependentlyPosterPaper SelectionBook→2 PagesTwo-Sided CopyingCollating CopiesBooklet ModeJob BuildN on 1Add CoverInserting SheetsDifferent Size OriginalsAdjusting Density ManuallyAdjusting Background DensitySelecting the Original TypeInserting Sheets When Copying Onto TransparenciesAdding a Secure WatermarkDocument Scan Lock
 Adjusting the ColorOne Touch Color ModePage NumberingCopy Set NumberingAdjusting the Image SharpnessErase FrameWatermark PrintingDate PrintingShifting the Original ImageGutter ModePrint & CheckInverting Images (Nega/Posi)Repeat ImagesMirror ImageJob Done NoticeMaking ID Card Copies (Copy ID Card)Area DesignationAppendix
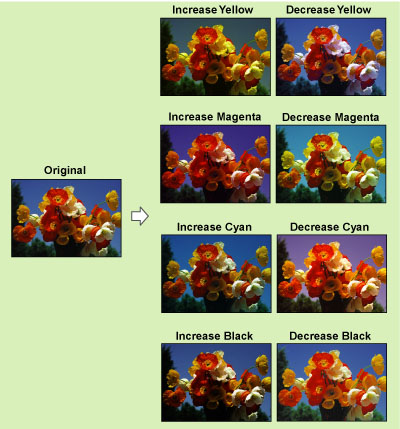
|
IMPORTANT
|
|
For information on the modes which cannot be set in combination with this mode, see "Unavailable Combination of Functions."
|
|
NOTE
|
|
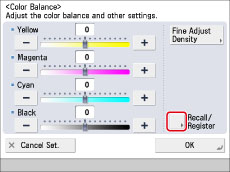
You can change the color (and its tone) for the Full Color mode in [Full Color Printing Vividness Settings]. (See "Making the Color More Vivid When Printing with Full Color.")
|

|
NOTE
|
|
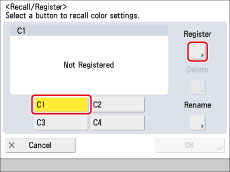
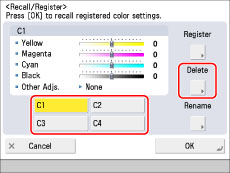
If you select a key that already has settings stored in it, the settings are displayed.
|
|
NOTE
|
|
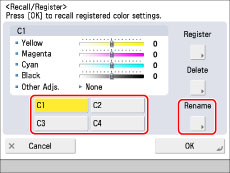
You can also name keys with no settings stored in them.
|
|
NOTE
|
|
If you press [OK] without entering any characters, the key name reverts to its current name (default C1 to C4).
|
|
NOTE
|
|
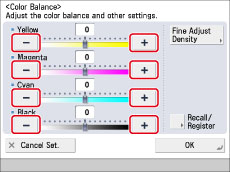
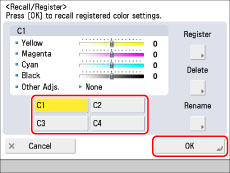
Recalling color balance settings from memory cancels the current color balance settings.
You can make changes to the recalled color balance settings.
If you press another key, the color balance settings stored in that key are recalled.
|
|
IMPORTANT
|
|
Make sure to check the settings first before erasing them.
|
|
NOTE
|
|
Key names are not erased. For instructions on changing a key name, see "Naming a Color Balance Key."
|
| Copyright CANON INC. 2015 | Disclaimers CopyrightTrademarksThird Party SoftwareOffice LocationsUSRM2-5563-00 CopyrightTrademarksThird Party SoftwareOffice LocationsUSRM2-5563-00 |
|---|
 Expand all
 Collapse all
 Search options