Top Site mapHelpGlossary Site mapHelpGlossary | |
 Category Top
 Clearing Paper JamsLocations of Paper JamsMain UnitInside the Upper and Lower Right CoversFixing Transport UnitPaper SourcesMulti-Purpose TrayPaper Drawers 3 and 4Paper Drawers (Right/Left)Paper Deck Unit-C1/POD Deck Lite-A1 (Optional)Procedure to Remove the Jammed Paper Effectively from the Paper DrawersDuplex Color Image Reader Unit-G1 (Optional)Document Insertion Unit-K1 (Optional)Professional Puncher Integration Unit-B1 (Optional)Paper Folding Unit-H1 (Optional)Staple Finisher-Q1 PRO/Booklet Finisher-Q1 PRO (Optional)Inside the Top CoverInside the Front CoverSaddle Stitcher Unit of the Booklet Finisher-Q1 PROStaple Finisher-N1 (Optional)Booklet Finisher-N1 (Optional)Inside the Front CoverSaddle Stitcher UnitReducing the Frequency of Paper Jams
 Clearing Staple Jams (For Optional Products)Locations of Staple Jams
 Stapler Unit of the Staple Finisher-Q1 PRO/Booklet Finisher-Q1 PROSaddle Stitcher Unit of the Booklet Finisher-Q1 PROStapler Unit of the Staple Finisher-N1/Booklet Finisher-N1Saddle Stitcher Unit of the Booklet Finisher-N1If Memory Becomes Full During ScanningIf OCR (Text Searchable) Performs InadequatelyPrinter/Fax Driver TroubleshootingService Call MessageList of Error MessagesGeneralFaxScan and SendScan and Store/Access Stored FilesQuick MenuPrinterNetwork/SecurityMEAPUser Setting Information ManagementList of Error Codes without Messages
|
IMPORTANT
|
|
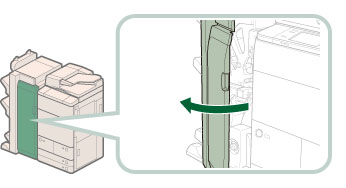
Take care when handling the optional equipment that is attached to the machine. When an optional unit's cover is opened to replace a staple cartridge, discard the punch waste, discard the trim waste, discard the staple waste, or clear paper or staple jams, prints may still be output if other optional units are operating normally, and are not involved in the paper or staple jam removal procedure.
|
|
NOTE
|
|
The Staple Finisher-Q1 PRO and Booklet Finisher-Q1 PRO are optional products.
|


|
NOTE
|
|
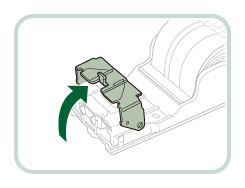
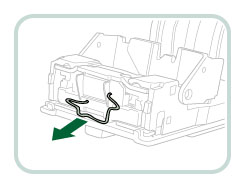
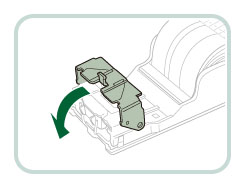
When the stapler unit is at the back and it is difficult to pull out the staple cartridge, turn the dial on the bottom left hand side to the left to move the stapler unit.
|

 CAUTION CAUTION |
|
When closing the cover, be careful not to get your fingers caught, as this may result in personal injury.
|
| © CANON Inc. 2012 All Rights Reserved | Disclaimers CopyrightTrademarksOffice LocationsUSRM2-2664-00 CopyrightTrademarksOffice LocationsUSRM2-2664-00 |
|---|
 Expand All
 Collapse All
 Search options