|
Basis weight
|
No. of output sheets
|
|
16-20 lb bond (60-79 g/m2)
|
100 sheets
|
|
21-40 lb bond (80-150 g/m2)
|
50 sheets
|
|
56-95 lb cover (151-256 g/m2)
|
25 sheets
|
|
IMPORTANT
|
|
Paper which has been rolled or curled must be straightened out prior to use, to allow the paper to feed smoothly through the LONG SHEET TRAY-A1. Some types of paper stock cannot be fed into the LONG SHEET TRAY-A1. (See "Caution for Paper Curl.")
For information on paper that can be loaded, see "Available Paper Stock."
Be sure to correctly set the paper type. When printing on special types of paper, such as heavy paper or transparencies, be sure to correctly set the paper type, especially if you are using heavy paper. If the type of paper is not set correctly, it could adversely affect the quality of the image. Moreover, the fixing unit may become dirty and require a service repair, or the paper could jam.
Post processes such as folding and stapling are not available.
Check that the extension supply tray is attached correctly. Paper jams may occur if it is not attached correctly.
  Feed vellum paper one sheet at a time, and remove each sheet as it is delivered to the output tray. Loading several sheets together may cause paper jams.
Some thick paper, depending on the paper type, may cause paper jams if several sheets are loaded into the LONG SHEET TRAY-A1. In this case, adjust the curl correction level to the plus side. (The curl amount should be set to 1/4" (5 mm) or less.) (See "Curl Correction for Each Paper Deck.")
|
|
NOTE
|
|
The LONG SHEET TRAY-A1 is an optional product.
For high-quality printouts, use paper recommended by Canon.
|
 |
1. Loosen the 2 screws on each right and left sides.
|
|
2. Adjust the slide guides to match the paper.
Also, adjust the slide guides near the paper feeding slot.
|
|
|
3. Tighten the screws.
|

|
IMPORTANT
|
|
When loading paper into the LONG SHEET TRAY-A1, align the paper stack evenly between the slide guides. The paper may not be fed if the slide guides are set to a position narrower than the paper, causing the paper to curl.
|
|
NOTE
|
|
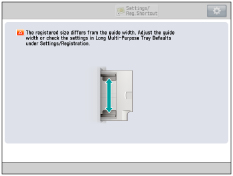
If a screen prompting you to adjust the slide guides or check [Long Multi-Purpose Tray Defaults] in Settings/Registration is displayed, adjust the width of the slide guides to match the paper size stored in [Long Multi-Purpose Tray Defaults], or set [Long Multi-Purpose Tray Defaults] to 'Off' in [Preferences] (Settings/Registration). (See "Registering Long Sheet Tray Defaults.")
 If there are instructions on the paper package about which side of the paper to load, follow those instructions.
When the paper is loaded into the LONG SHEET TRAY-A1, the side facing up is the one printed on.
If problems, such as poor print quality or paper jams occur, try turning the paper stack over and reload it. However, you cannot turn the texture paper and 1-Sided Coated paper over. Change to the new paper.
|


|
NOTE
|
|
For more information on paper types, see "Available Paper Stock."
You can register paper types that are not listed in Detailed Settings for Selecting the Paper Type. For information on registering a custom paper type, see "Registering Custom Paper Types."
|
|
IMPORTANT
|
|
Set the paper size to the same size as the paper loaded in the LONG SHEET TRAY-A1.
|
|
NOTE
|
|
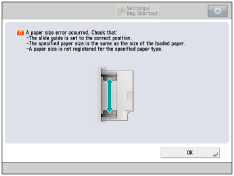
If a screen prompting you to adjust the slide guides is displayed, adjust the width of the slide guides → specify the paper size → press [OK].
 If you make a mistake when entering values, press
To select a registered paper size stored in a size button ([S1] to [S5]), you must store the irregular paper size in the size button beforehand. For instructions on storing irregular paper sizes, see "Registering/Editing/Deleting Custom Paper Sizes."
|
