|
Required Condition
|
|
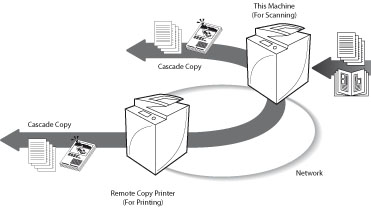
Network settings of this machine and a cascade copy printer are set.
|
|
IMPORTANT
|
|
If <Use IPv4> in [IPv4 Settings] in [TCP/IP Settings] in Network Settings in Preferences (from the Settings/Registration screen) is set to 'Off', you cannot register a cascade copy printer. (See "TCP/IPv4 Settings.")
|
 (Settings/Registration) → [Function Settings] → [Copy] → [Register Remote Device for Cascade Copy].
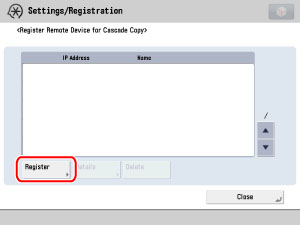
 -
-  (numeric keys) → press [OK].
|
NOTE
|
|
If you set Department IDs and Passwords for the registered cascade copy printers, make sure their settings are the same as this machine. (See "Specifying Department ID Management.")
|
(Settings/Registration) → [Function Settings] → [Copy] → [Cascade Copy Communication Timeout].|
NOTE
|
|
Jobs that reach the timeout limit (without arriving at the remote copy printer) are deleted.
|
|
NOTE
|
|
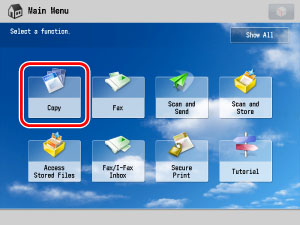
If the Main Menu screen is not displayed, press
 (Main Menu). (Main Menu). |
|
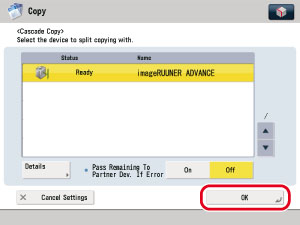
[On]:
|
If an error occurs in either this machine or the cascade copy printer, the remaining copy jobs are assigned to the machine which is operating normally.
|
|
[Off]:
|
If an error occurs in either this machine or the cascade copy printer, the remaining copy jobs are not assigned to the machine which is operating normally.
|
|
IMPORTANT
|
|
Error Recovery is performed only if the Finishing mode is set.
|
|
NOTE
|
|
If Pass Remaining To Partner Dcv. If Error is set to 'On', the remaining copy job is not processed in the following cases:
The machine is scanning originals for the Cascade Copy mode.
The Cascade Copy mode is used in combination with the Cover/Sheet Insertion or Copy Set Numbering mode.
The Cascade Copy mode is used in combination with all three of the Different Size Originals, Auto Paper Selection, and 2-sided modes.
The printer which is operating normally has completed the cascade copy job.
An error occurs in the printer which is operating normally.
The cascade copy job has almost finished.
The number of copies is fewer than six.
If Pass Remaining To Partner Dcv. If Error is set to 'On', a machine in which an error occurs cannot resume the remaining copy job even after the error has been resolved, if the copy job has already been reassigned.
It is impossible to choose two different machines other than this machine for the Cascade Copy mode. You must include this machine as one of the output devices.
|
|
NOTE
|
|
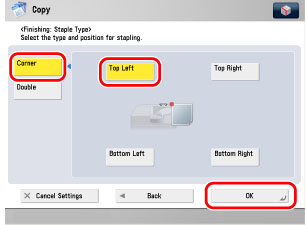
This function is available only if the Staple Finisher or Booklet Finisher is attached to the machine or the cascade copy printer.
|
- (numeric keys). (Start).