Top Site mapHelpGlossary Site mapHelpGlossary | |
|
1.
|
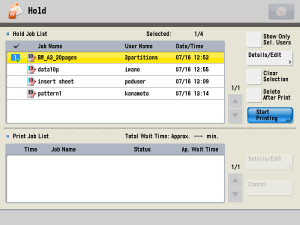
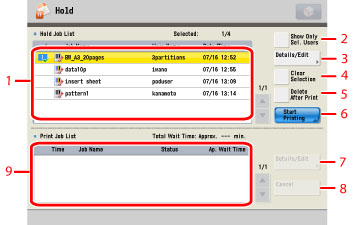
Hold Job List
Jobs stored in the Hold Queue are displayed. |
|
2.
|
Display All Users/Show Only Sel. Users
Press to select the jobs to display based on the user name. You can display the jobs under all user names or only those under specified users.
|
|
3.
|
Details/Edit(Hold Job List)
Press to display [Print Sample], [Details], [Preview], [Move/Dup. to Mail Box], and [Delete]. |
|
4.
|
Select All (Max 100)/Clear Selection
Press to select all of the jobs in the Hold Job List, or to clear all of the selected jobs.
|
|
5.
|
Delete After Print
Press to delete a job automatically after printing is complete. |
|
6.
|
Start Printing
Press to start printing a selected job. |
|
7.
|
Details/Edit(Print Job List)
Press to display [Priority Print] and [Details]. |
|
8.
|
Cancel
Press to stop a selected processing job. |
|
9.
|
Print Job List
The job that is currently printing and jobs that are waiting to print are displayed. |
|
1.
|
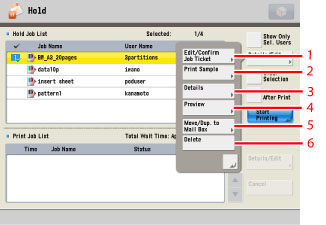
Edit/Confirm Job Ticket
Press to edit/confirm the job ticket of a selected job.(See "Job Hold Function.")
This button is activated only if the selected job has a job ticket. Jobs submitted from the printer driver do not have a job ticket.
|
|
2.
|
|
|
3.
|
Details
Press to dislay the detailed information for a job or to change the name of a job. (See "Checking a Job's Detailed Information.") |
|
4.
|
|
|
5.
|
Move/Dup. to Mail Box
Press to move selected jobs into a mail box, or to make duplicates. (See "Moving/Duplicating a Job into the Mail Box.") |
|
6.
|
Delete
Press to delete a selected job |
|
1.
|
|
|
2.
|
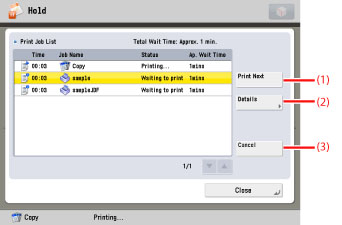
Details
Press [Pause] to temporarily stop the job. Press [Paper Feed] to forcibly print the print data remaining in the memory. Press [Skip Error] to temporarily disable errors and continue printing. For information on the errors that can be temporarily disabled by pressing [Skip Error] after you select a job, see "Printer(List of Error Messages)." |
|
3.
|
Cancel
Press to stop a selected processing job. |
| © CANON Inc. 2012 All Rights Reserved | Disclaimers CopyrightTrademarksOffice LocationsUSRM2-2664-00 CopyrightTrademarksOffice LocationsUSRM2-2664-00 |
|---|
 Expand All
 Collapse All

 Search options