|
IMPORTANT
|
|
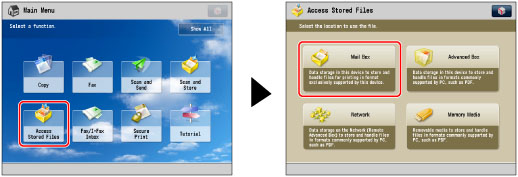
This mode can be used only for printing a file stored in a mail box or a PDF or XPS file.
The Saddle Stitch, Fold, and Face Up/Down Setting modes can be used only for printing a file stored in a mail box.
Be sure to correctly set the paper type. If the type of paper is not set correctly, it could adversely affect the quality of the image. Moreover, the fixing unit may become dirty, or the paper could jam, and a service repair may be needed.
The Finishing modes cannot be set if free size, custom size, transparencies, tracing paper, or labels is selected.
If you set the Staple, Hole Punch, or Z-Fold mode, the side of the paper which is printed on will always be output face down.
|

|
IMPORTANT
|
|
The paper used for the cover page must be the same size as that which is used for the main document.
If you are loading preprinted paper to use as the cover page into the document insertion unit, you must load the paper face up.
Only 16 lb bond to 80 lb cover (60 to 220 g/m2) paper can be used for the main document.
Only more than the paper weight of main document, and 16 lb bond to 140 lb index (60 to 256 g/m2) or more can be used for the cover paper.
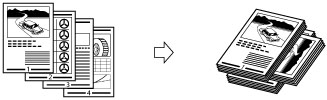
The [Saddle Stitch] mode can be set only if 2-Sided Copying is set.
The accuracy of folds created in the Saddle Stitch mode may vary, depending on the paper type and the number of sheets.
|
|
IMPORTANT
|
|
If you specify the Z-Fold mode with the Staple mode, and the number of sheets that are Z-folded exceeds 10, the prints will be collated, but not stapled.
|
|
IMPORTANT
|
|
If you want the printed side to be folded inside, select [Up (Reverse Order)] for [Face Up/Face Down].
|
|
IMPORTANT
|
|
The Saddle Fold mode can be set only if 2-Sided Printing is set.
The paper is saddle folded one sheet at a time, and then output.
|
|
IMPORTANT
|
|
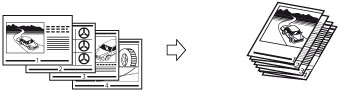
You can only set [Rotate 90 Degrees] in the following cases:
If you select the available paper size manually
If the paper size compatible with Rotate 90 Degrees is loaded in both the horizontal and vertical directions
If [Paper Drawer Auto Selection On/Off] for the selected paper source is set to 'On' (See "Enabling Paper Drawer Auto Selection.")
If there is no paper which can be rotated, the output is collated.
|
|
[Auto]:
|
If you are printing a single page original, the printed sheets are output face up. Otherwise, the printed sheets are output face down.
|
|
[Face Down (Normal Order)]:
|
Printed sheets are always output face down.
|
|
[Face Up (Reverse Order)]:
|
Printed sheets are always output face up.
|
 : Available
|
Optional Unit
|
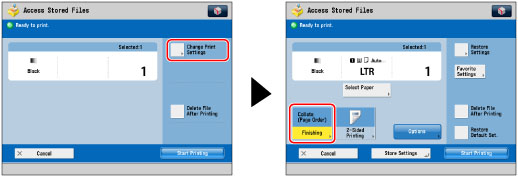
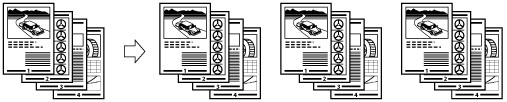
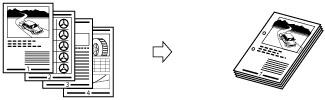
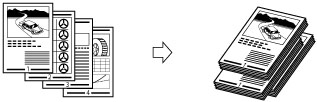
Collate (Page order)
|
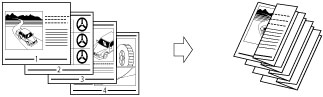
Group (Same Pages)
|
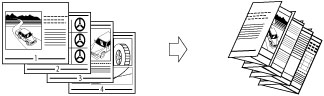
Offset
|
Rotate 90 Degrees
|
Staple
|
Hole Punch
|
Fold
|
Trim
|
Face Up/Face Down
|
|||
|
Corner
|
Double
|
Saddle Stitch
|
Saddle Fold
|
Z-Fold,
C-Fold |
||||||||
|
None
|
|
|
-
|
|
-
|
-
|
-
|
-
|
-
|
-
|
-
|
|
|
Copy Tray-Q1
|
|
|
-
|
|
-
|
-
|
-
|
-
|
-
|
-
|
-
|
|
|
Staple Finisher-P1
|
|
|
|
-
|
|
|
-
|
-
|
-
|
-
|
-
|
|
|
Staple Finisher-P1 and Puncher
|
|
|
|
-
|
|
|
-
|
|
-
|
-
|
-
|
|
|
Staple Finisher-P1 / Document Insertion/Folding Unit-H1
|
|
|
|
-
|
|
|
|
-
|
-
|
|
-
|
|
|
Booklet Finisher-P1
|
|
|
|
-
|
|
|
|
-
|
|
-
|
-
|
|
|
Booklet Finisher-P1 and Puncher
|
|
|
|
-
|
|
|
|
|
|
-
|
-
|
|
|
Booklet Finisher-P1 / Document Insertion/Folding Unit-H1
|
|
|
|
-
|
|
|
|
-
|
|
|
-
|
|
|
Paper Size
|
Corner
|
Double
|
Saddle Stitch*
|
|
12" x 18"
|
-
|
-
|
16 sheets
|
|
12 5/8" x 17 11/16"
|
-
|
-
|
-
|
|
11" x 17"
|
30 sheets
|
30 sheets
|
16 sheets
|
|
LGL
|
30 sheets
|
30 sheets
|
16 sheets
|
|
LTRR
|
30 sheets
|
30 sheets
|
16 sheets
|
|
LTR
|
50 sheets
|
50 sheets
|
-
|
|
EXEC
|
50 sheets
|
50 sheets
|
-
|
|
STMTR
|
-
|
-
|
-
|
|
STMT
|
-
|
-
|
-
|
|
NOTE
|
|
For information on the original orientation and paper orientation when performing stapling, see "Relationship Between the Original Orientation and Paper Orientation."
|
|
IMPORTANT
|
|
For information on the modes which cannot be set in combination with this mode, see "Unavailable Combination of Functions."
|
|
NOTE
|
|
For information on optional products, see the following:
If [Finishing] is not set, the settings are the same as when [Group (Same Pages)] is set.
You can display the detailed information of the selected paper by pressing
 . . |
