When the punch waste tray of the Puncher becomes full, a screen prompting you to remove the punch waste appears on the touch panel display.
Follow the procedure described below to remove the punch waste.
|
NOTE
|
|
The Inner 2/3 Hole Puncher-A1 is an optional product.
The Inner 2/3 Hole Puncher-A1 is available only if the Inner Finisher-D1 is attached.
|
1.
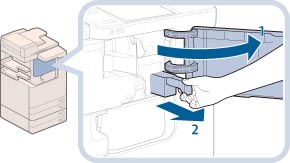
Pull out the punch waste tray.
 |
1. Open the front cover of the inner finisher.
|
|
2. Pull out the punch waste tray.
|
2.
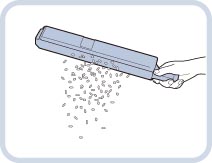
Discard the punch waste.

|
NOTE
|
|
Make sure that the punch waste tray is completely emptied.
|
3.
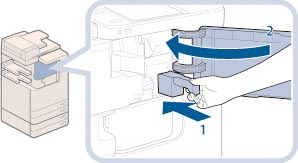
Return the punch waste tray to its original position.
 |
1. Push the punch waste tray back into its original position.
|
|
2. Close the front cover of the inner finisher.
|
 CAUTION CAUTION |
|
When closing the cover, be careful not to get your fingers caught, as this may result in personal injury.
|
|
NOTE
|
|
If the punch waste tray is not securely in place, you cannot make prints in the Hole Punch mode.
|