Check the location of the paper jam, and follow the procedure described below, while referring to the directions that appear on the touch panel display, to remove the jammed paper.
1.
Open the right cover.
|
|
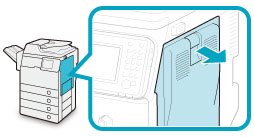
1. Pull the lever on the right cover of the main unit. |
|
|
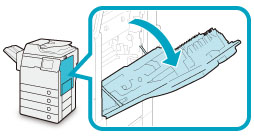
2. Gently open the cover downward until it stops. |
If the multi-purpose tray is opened, close it before opening the right cover.
2.
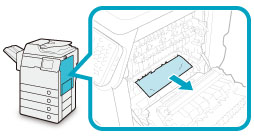
Remove any jammed paper inside the right cover of the main unit.
3.
Close the right cover.
|
|
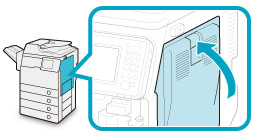
1. Place your hand where the hand symbol (  ) is located on the right cover of the main unit. |
2. Gently close the right cover until it clicks into place. |
 CAUTION |
|
When closing the cover, be careful not to get your fingers caught, as this may result in personal injury.
|
4.
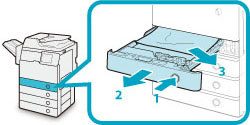
Press the button on the paper drawer that the paper is fed from, and pull out the drawer until it stops.
The paper drawer that the paper is fed from may differ from the one that is indicated on the display. If you do not know which drawer the paper is fed from, open each drawer to check for any jammed paper.
|
|
1. Press and release the button on the paper drawer 1. |
2. Grip the handle, and pull out the paper drawer until it stops. |
3. Remove any jammed paper. |
5.
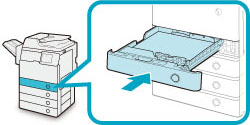
Gently push the drawer back into the machine until it clicks into place.
 CAUTION |
|
When returning the paper drawer to its original position, be careful not to get your fingers caught, as this may result in personal injury.
|
|
IMPORTANT
|
|
After you have cleared all the paper jams, make sure to return all the covers to their original positions. Once you have removed all of the jammed paper, printing resumes.
|
 CAUTION
 CAUTION