e-Manual TopContentsHelpGlossary
Category
Top » Scan and Send » Job Build

Category Top

What This Machine Can Do

Overview of This Function

Things You Must Do Before Using This Machine

Flow of Sending Operations

Canceling a Job

Specifying Destinations

Specifying Destinations Using the Address Book (Local)

Specifying Destinations Using the Address Book (Remote)

Specifying Destinations Using the Address Book (LDAP Server)

Specifying Destinations Using the One-Touch Buttons

Specifying a Destination by Entering an E-mail Address

Specifying Destinations by Entering an I-Fax Address

Specifying a Destination by Entering a File Server

Specifying a File Server Using the Keyboard

Specifying a File Server Using the Browse Key (Windows (SMB))

Specifying a File Server Using the Search Host Key (Windows (SMB))

Storing in a Mail Box

Storing in an Advanced Box

Setting Your Own E-Mail Address as the Destination

Setting Cc and Bcc Addresses

Checking/Editing/Deleting the Information for a Destination

Favorite Settings

Recalling Previous Send Jobs

Storing New Addresses

Registering an E-Mail Address

Registering an I-Fax Address

Registering a File Server Address

Registering a Group Address

Registering an Address Obtained via an LDAP Server

Registering an Advanced Box Address

Storing/Editing/Deleting One-Touch Buttons

Checking/Editing/Deleting a Stored Address

Registering/Editing/Deleting Favorite Settings

Registering/Editing Favorite Settings

Checking Favorite Settings

Editing a Name/Comment

Deleting Favorite Settings

Assigning Shortcuts

Switching the Color Mode

Setting the Resolution

Specifying/Registering Scan Sizes

Setting the File Format

Trace and Smooth

Compact PDF or XPS

Searchable PDF/XPS

Adding a Digital Signature to a PDF or XPS

Encrypting PDF Files

Reader Extensions

Applying a Policy

Selecting the Original Type

2-Sided Original

Book → 2 Pages

Different Size Originals

Adjusting Density Manually

Adjusting Background Density

Adjusting the Image Sharpness

Changing the Zoom Ratio

Erase Frame

Job Build

Delayed Send

Preview

Finished Stamp

Job Done Notice

File Name

Subject/Message

Reply-to

Setting E-Mail Priority

Receiving I-Fax Documents

Processing Received Documents

Receiving Documents

Setting the Memory Lock Mode

Forwarding Received Documents

Available Paper Sizes

When Problems Occur

Questions & Answers

Collapse all|Expand all
Job Build
This mode enables you to scan originals that are too many to be placed at once, by dividing them into multiple batches. You can use both the feeder and the platen glass for scanning.
If you are using the imageRUNNER ADVANCE 4035/4025, this mode can be set only when the DADF-AG1 is attached. (See "DADF-AG1.")
1.
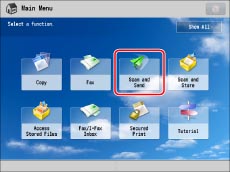
Press [Scan and Send].
2.
Specify the destination → press [Options] → [Job Build].
3.
Press [Close].
4.
Press (Start).
NOTE
To cancel scanning, press [Stop] or (Stop).
5.
When scanning is complete, place your next batch of originals → press (Start).
If you want to change the settings, change them before pressing (Start).
You can press [Change Settings] to change the following settings:
Select Color: See Switching the Color Mode
Scan Size: See Specifying/Registering Scan Sizes
2-Sided Original: See 2-Sided Original
Density: See Adjusting Density Manually
Original Type: See Selecting the Original Type
6.
After the last batch of originals is scanned, press [Start Sending].

IMPORTANT
You can change only those settings appearing in [Change Settings] while in the Job Build mode. You need to specify the necessary scan settings in advance.
If you place your originals in the feeder, remove the originals from the original output area when the scanning of each batch is complete.
The maximum number of pages that can be sent at one time is 999. When using [Job Build], a message appears to ask you if you want to send the job when 999 pages of originals have been scanned. If you select to send the job, the scanned 999 pages are sent. If you cancel the job, the scanned pages are not sent.
NOTE
If you place different size originals into the feeder, set [Different Size Originals]. (See "Different Size Originals.")
If you want to scan 1-sided originals with 2-sided originals and store them as 2-sided documents, divide the originals into 1-sided and 2-sided batches. For example, if the first batch consists of 2-sided originals, set [2-Sided Original]. Thereafter, you have to manually set or cancel [2-Sided Original] for each batch of originals that you scan.