1.
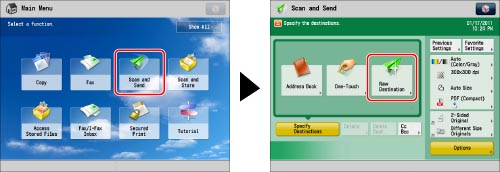
Press [Scan and Send] → [New Destination].

2.
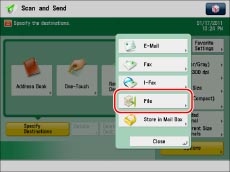
Press [File].

3.
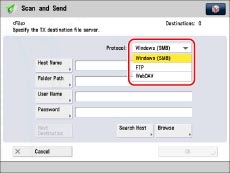
Press the drop-down list → select [Windows (SMB)].

4.
Press [Search Host].
5.
Enter the search conditions → press [Start Searching].
|
[Workgroup Name]:
|
Press [Workgroup Name] → enter the workgroup name → press [OK].
|
|
[Host Name]:
|
Press [Host Name] → enter any of the IP address, FQDN, or NetBIOS name → press [OK].
|
|
NOTE
|
|
When entering a NetBIOS name, you can also enter wildcard characters, such as * and ?, as part of your search.
When searching for the host name using wildcard characters, make sure to also enter a workgroup name.
Wildcard characters:
* (asterisk): Replaces one or more characters (up to 15 characters).
Example: tri* → trinity, trinity1, trinity0002 ?: Replaces only one character.
Example: tr?nity → trinity |
6.
Select the file server from the search results.
Specify the file server in accordance with step 6 of "Specifying a File Server Using the Browse Key (Windows (SMB))."
Specify the file server in accordance with steps 4 to 6 of "Specifying a File Server Using the Browse Key (Windows (SMB))."
To add another destination, press [Next Destination] → repeat steps 3 to 6.
7.
Press [OK].