Loading Paper in the Multi-Purpose Tray
When you want to print on paper that is not loaded in the paper deck or drawer, load the paper in the multi-purpose tray.
1
Open the multi-purpose tray.

Hold the top center of the cover to open it.
Pull out the tray extension when loading large-sized paper.

2
Adjust the paper guides to match the size of the paper.

3
Prepare paper.
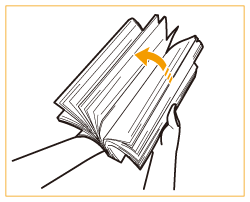
Fan the paper stack well, and tap it on a flat surface to align the edges.

IMPORTANT:
Fan all four sides of the paper stack well.
Make sure that there is enough air between them.
4
Insert the paper into the multi-purpose tray until the paper stops.

Load the paper with the print side face up.
Fan the paper stack well, and tap it on a flat surface to align the edges.
The screen for specifying the paper size and type is displayed when the paper is fully inserted.
IMPORTANT:
Do not exceed the load limit line when loading paper
Make sure that the paper stack does not exceed the load limit line ( ). Loading too much paper can cause paper jams.
 ). Loading too much paper can cause paper jams.
NOTE:
If you use paper with a logo mark, pay attention to the orientation when loading it in the paper source. Loading Preprinted Paper
5
Check the paper size and paper type, and press <OK>.

If you load free size paper, or if the displayed size or type is different from the actual paper that is loaded, see Specifying Paper Size and Type in the Multi-purpose Tray.
|
Printing on the back side of printed paper (2nd Side of 2-Sided Page)
|
|
You can print on the back side of printed paper. Flatten any curls on the printed paper and insert it into the multi-purpose tray, with the side to print face up (previously printed side face down). Then press <2nd Side of 2-Sided Page> on the screen for selecting the paper type.
Use only the paper printed with this machine.
|