This section describes sending a secure print job from a computer, select the job on the operation panel, and then enter PIN to finish printing.
|
IMPORTANT
|
|
When the secure print document job is saved in the device
If the secure print document is saved in the device, other print jobs may not be printed. In this case, print the secure print job. If you still cannot print the job, print the job again from the computer.
|
|
NOTE
|
|
Printer driver screen
For details on displaying the printer driver, see the following.
"Printing"
|
1
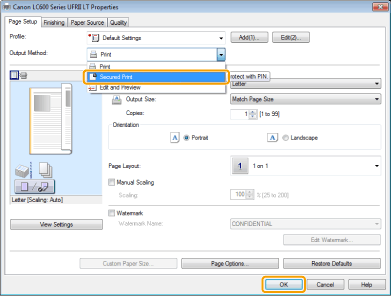
Click [Page Setup] at the printer driver screen.

2
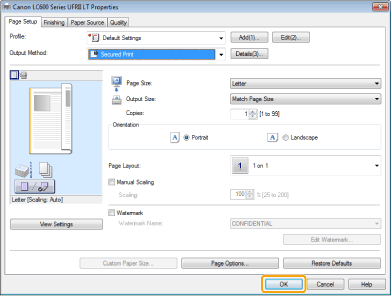
Select [Secured Print] from [Output Method] and click [OK].

3
Click [Yes].

4
Specify the desired settings for the secure print job and click [OK].

|
[User Name]
|
Enter up to 32 alphanumeric characters.
|
|
[PIN]
|
Enter the numbers up to 7 digits.
|
5
Click [OK].

6
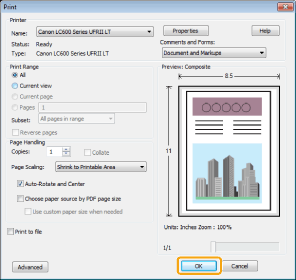
Click [OK] (or [Print]).

7
Specify the desired settings for the secure print job and click [OK].
A secure print job is sent.

|
[Document Name]
|
Enter up to 32 alphanumeric characters.
|
|
[User Name]
|
|
|
[PIN]
|
Enter the numbers up to 7 digits.
|
1
Press [ ] (Secure Print).
 ] (Secure Print).
You cannot perform the secure print while waiting to scan (while <Remote Scanner> is selected for the scan type on the basic scan screen). Click [ ] (Back) before you perform the secure print.
 ] (Back) before you perform the secure print.
2
Select a user using [ ] or [
 ] and press [OK].
 ] or [
 ] and press [OK].
If you do not have any secure print job sent from other users, proceed to Step 3.
3
Select a document to print using [ ] or [
 ] and press [OK].
 ] or [
 ] and press [OK].
4
Enter PIN and press [OK].
Start printing.

5
Press [ ] (Status Monitor/Cancel) to close the Copy/Print Job screen.
 ] (Status Monitor/Cancel) to close the Copy/Print Job screen.