|
NOTE
|
|
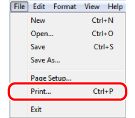
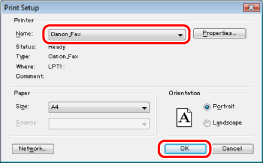
Faxing methods may vary according to the application you are using. For details, see the instruction manuals provided with the application.
|
|
NOTE
|
|
In Windows 8/Server 2012, if you want to send a fax from the Windows Store app, display the charm bar to the right of the screen, and tap [
 Devices] → the printer you are using → [Print]. If the message [The printer requires your attention. Go to the desktop to take care of it.] is displayed, move to the desktop and proceed to step 3. Devices] → the printer you are using → [Print]. If the message [The printer requires your attention. Go to the desktop to take care of it.] is displayed, move to the desktop and proceed to step 3. |
|
NOTE
|
|
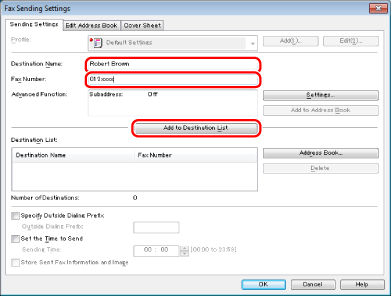
If you have selected [Reenter Fax Number before adding Destination to [Destination List]] in the [Security Settings] dialog box of the [Special] tab, the [Confirm Password] dialog box is displayed when you click [Add to Destination List]. For details, see the online help (see "Viewing the Online Help").
|

|
NOTE
|
|
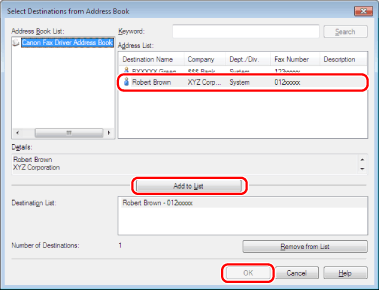
For information on using the address book, see "Registering a Person in an Address Book," "Registering a Group in an Address Book," "Importing Address Book Entries," "Exporting Address Book Entries," and "Changing the Address Book Export Destination."
|
|
NOTE
|
|
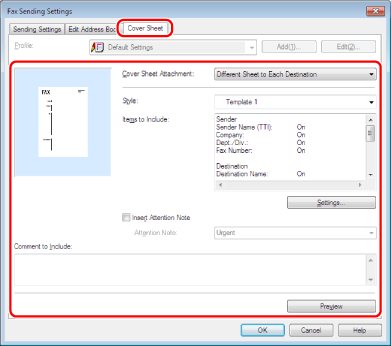
For details about cover sheet attachment, see "Attaching a Cover Sheet."
|

|
NOTE
|
|
Some printer models enable you to confirm the status of the printer and stop printing from a print cancelation display (see "Checking and Canceling Jobs from the Job Status Screen").
If a printer icon is displayed in the task tray at the bottom right of your computer monitor, you can stop sending a fax from your computer. Double-click the printer icon → click the name of the file you want to stop sending → click [Document] → [Cancel].
You cannot access or edit the address book if you do not have access permission to the destination folder of the address book. If this is the case, log on as user having access permission to the folder, or click [Specify a Folder] in the [Edit Address Book] tab, and specify a folder, such as the [My Documents] folder, that you have write permission for as the destination folder of the address book. For details, see "Changing the Address Book Export Destination."
The number of destinations that you can send to at one time depends on the conditions under which the cover sheet has been attached. For details, view the online help (see "Viewing the Online Help").
The display may vary according to the operating system and fax driver version you are using.
|