Paper Jams in the Staple Finisher-W1 PRO/Booklet Finisher-W1 PRO
Check the location of the paper jam on the touch panel display, and remove it. The Staple Finisher-W1 PRO/Booklet Finisher-W1 PRO are optional. Optional Equipment
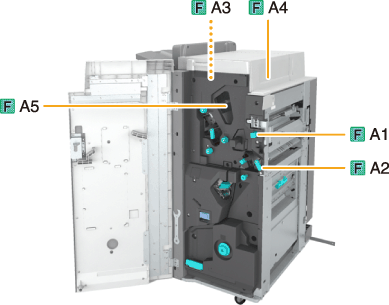
Inside the Top Cover
Follow the procedure described in this section to clear the paper jam. Paper jam locations are indicated by numbers such as F-A1 or F-A2, which are shown in the illustration below.
|
IMPORTANT
|
|
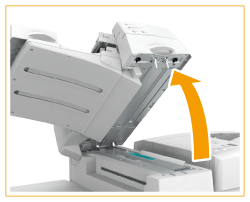
If the Document Insertion Unit-N1 is adjacently attached to the finisher, part of the document insertion unit may interfere with the finisher when clearing jams. Lift up the document insertion unit before removing jams from the finisher.
|
1
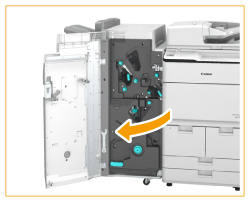
Open the front cover of the finisher.
2
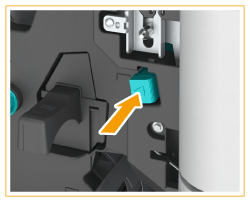
If the Puncher Unit-BS1 is attached, press the button (F-A1) as far as it will go.
3
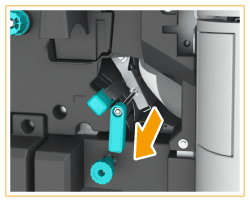
Open the guide (F-A2).

4
Remove the jammed paper.
5
Close the guide (F-A2).
6
If the Document Insertion Unit-N1 is adjacently attached to the finisher, open the document insertion unit.
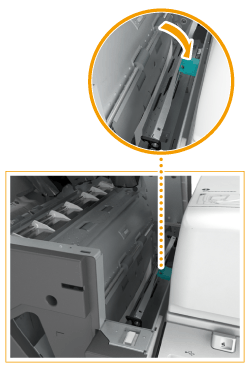
7
Remove the jammed paper from the upper cover (F-A3).
 |
 |
Open the upper cover (F-A3).
|
 |
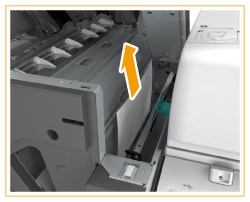
Remove the jammed paper.
|
8
Open the guide (F-A4).
9
Remove the jammed paper.
 |
|
Remove the jammed paper.
|
|
|
Close the guide (F-A4).
|
10
Close the upper cover (F-A3).
After closing the upper cover of the finisher, press down on the location indicated by the labels to make sure the cover is securely closed.
11
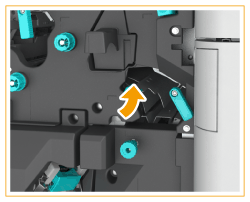
Remove the jammed paper from the guide (F-A5).
12
Close the front cover of the finisher.
13
Follow the instructions on the touch panel display.
Resume the procedure that was interrupted.
Inside the Front Cover
Follow the procedure described in this section to clear the paper jam. Paper jam locations are indicated by numbers such as F-B1 or F-B2, which are shown in the illustration below.
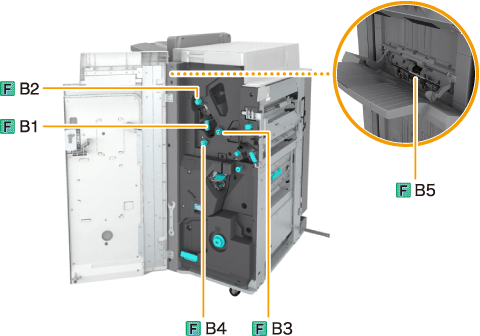
1
Open the front cover of the finisher.
2
Open the guide (F-B1).

3
Turn the knob (F-B2), and remove the jammed paper.
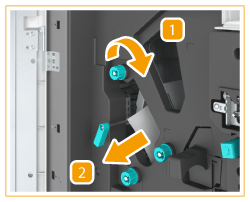 |
|
Turn the knob (F-B2).
|
|
|
Remove the jammed paper.
|
4
Close the guide (F-B1).
5
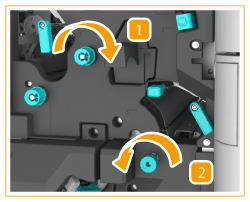
Turn the knobs (F-B3, F-B4) to feed the jammed paper to the output slot.
 |
|
Turn the knob (F-B3) to feed the jammed paper to the output slot.
|
|
|
Turn the knob (F-B4) to feed the jammed paper to the output slot.
|
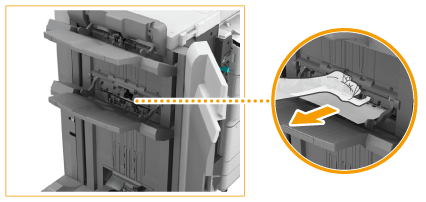
6
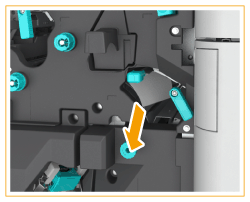
Lift and hold the output slot (F-B5), and remove the jammed paper.
7
Close the front cover of the finisher.
8
Follow the instructions on the touch panel display.
Resume the procedure that was interrupted.
Saddle Stitcher Unit of the Booklet Finisher-W1 PRO
Follow the procedure described in this section to clear the paper jam. Paper jam locations are indicated by numbers such as F-C1 or F-C2, which are shown in the illustration below.
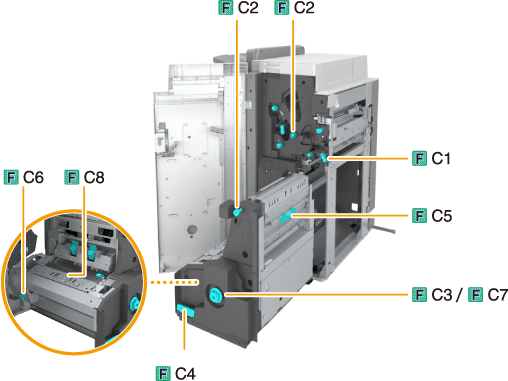
1
Open the front cover of the finisher.
2
Open the guide (F-C1).
3
Turn the dial to feed the jammed paper to the guide (F-C1).
 |
|
Turn the upper dial (F-C2) in the direction of the arrow to feed the jammed paper to the guide (F-C1).
|
|
|
Turn the lower dial (F-C2) in the direction of the arrow to feed the jammed paper to the guide (F-C1).
|
4
Remove the jammed paper from the guide (F-C1).
5
Close the guide (F-C1).
6
While pushing in the dial (F-C3), turn it in the direction of the arrow until the lamp turns off.
This procedure is not required if the lamp is off.

* Lamp
Turning the dial (F-C3) feeds the jammed paper to the delivery guide of the booklet tray.
If the Booklet Trimmer-D1 is attached, turning the dial feeds the jammed paper to the feeding belt of the booklet trimmer.
7
Remove the jammed paper protruding from the booklet tray.

If the Booklet Trimmer-D1 is attached, remove the jammed paper protruding from the feeding belt.
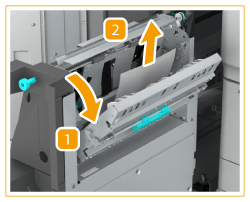
8
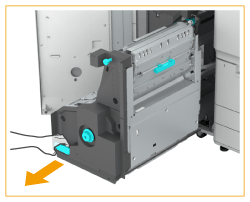
Pull out the saddle stitcher unit (F-C4).
9
Remove the jammed paper inside the saddle stitcher unit.
 |
|
Open the right cover of the saddle stitcher unit (F-C5).
|
|
|
Remove the jammed paper.
|
|
 |
Close the right cover of the stitcher unit (F-C5).
|
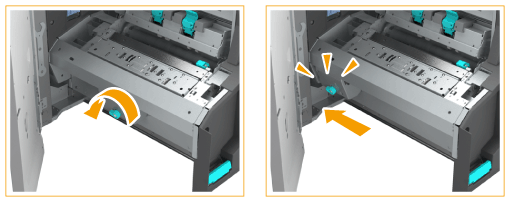
10
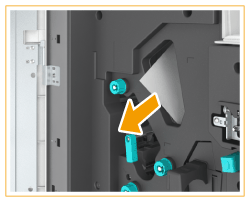
Check that the pressing unit is fully in position.
If the pressing unit is not fully in position, turn the dial (F-C6) to move it all the way in.
The pressing unit is for ensuring a clean fold in the center of the paper to create a booklet. If the pressing unit is not in its proper position, the paper to be saddle stitched cannot be fed to the booklet tray.
11
Remove the jammed paper in the output area of the saddle stitcher unit.
 |
|
While pushing in the dial (F-C7), turn it in the direction of the arrow until the lamp turns off.
|
|
|
Remove the jammed paper in the output area of the saddle stitcher unit.
|
* Lamp
12
While opening the guide (F-C8), remove the jammed paper.
13
Close the guide (F-C8).
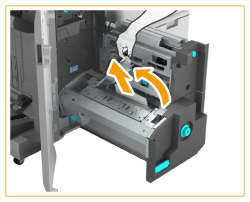
14
Push the saddle stitcher unit and close the front cover of the finisher.
15
Follow the instructions on the touch panel display.
Resume the procedure that was interrupted.