
Replacing the Staple Cartridge in the Saddle Stitcher Unit (Booklet Finisher-W1 PRO)
Follow the procedure described in this section to replace the staple cartridge in the saddle stitcher unit for the optional Booklet Finisher-W1 PRO.
|
|
|
Take care not to be injured by staples.
|
1
Open the front cover of the finisher.

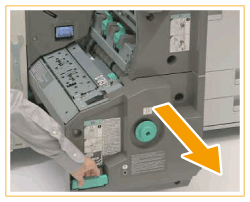
2
Pull out the saddle stitcher unit.
3
Pull out the two staple cases.
4
Press the blue parts on both sides of the staple case cover, and open it.

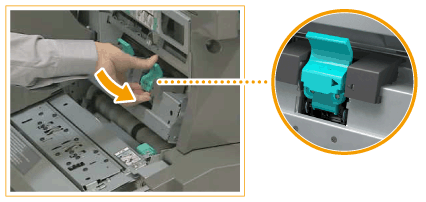
5
Remove the empty staple cartridge.
 |
 |
Hold both sides of the empty staple cartridge.
|
 |
Lift and pull out the empty staple cartridge.
|
6
Take out a new staple cartridge from the box.

7
Insert the new staple cartridge in the staple case.
 |
|
Diagonally insert the tab on the front of the staple cartridge into the hole in the staple case, as shown in the illustration.
|
|
|
Push down on the back of the staple cartridge until it clicks into place.
|
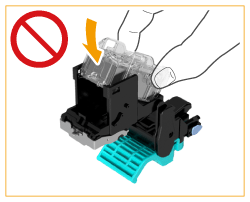
IMPORTANT:
Make sure to insert the front part of the staple cartridge first. Do not attempt to insert the back side of the staple cartridge first, as shown in the illustration below.
8
Close the staple case cover.

9
Insert the two staple cases into the saddle stitcher unit.
Make sure that the staple cases are inserted so that the setting position marks are aligned as shown in the illustration above.
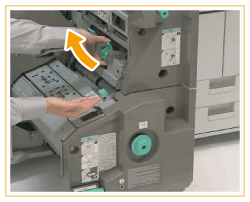
10
Push the saddle stitcher unit back into the machine, and close the front cover of the finisher.