Customizing the Main Menu
The Main Menu is the start screen for the functions. Although the Main Menu is configured for easy operation at the time of purchase, you can customize it to better suit your daily operations. To customize the Main Menu, you must log in with Administrator privileges. Logging into the Machine
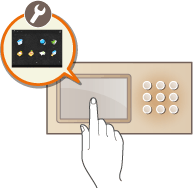
Selecting Buttons Displayed on the Main Menu
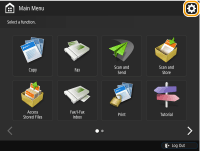
1
Press  on the Main Menu.
 on the Main Menu.
2
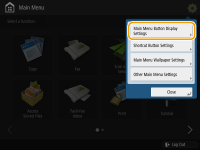
Press <Main Menu Button Display Settings>.
3
Select the number of buttons and the layout.
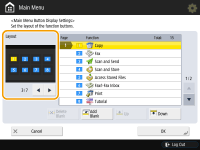
Press  /
/ to select the number of buttons and the layout. You can check the layout on the preview screen located above
  /
/ . The button sizes and layout vary depending on the number of buttons that are displayed.
 /
/ to select the number of buttons and the layout. You can check the layout on the preview screen located above
  /
/ . The button sizes and layout vary depending on the number of buttons that are displayed.
4
Select the functions to display on the Main Menu.
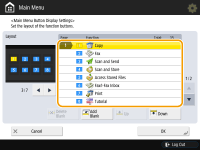
The numbers in the list correspond to the items in the layout preview. Select a function from a list and press <Up> or <Down> until it moves to the position where you want to display it.
NOTE:
The type of functions you can select differ depending on the options installed.
A blank button space can be placed on the Main Menu. Select the position from the list where you want to insert a blank space and press <Add Blank>. If you want to delete a blank space, select the position from the list where you want to delete it, and press <Delete Blank>. A button following the blank is carried forward to the position to be located there.
5
Press <OK>.
The Main Menu in which the new layout is reflected is displayed.
|
NOTE
|
|
To display only the first page of setting buttons on the Main Menu, press
  <Other Main Menu Settings>, and set <Only Use 1st Page> to <On>. <Other Main Menu Settings>, and set <Only Use 1st Page> to <On>. |
Changing the Background of the Main Menu
You can change the background image of the Main Menu.
1
Press  on the Main Menu
  <Main Menu Wallpaper Settings>.
 on the Main Menu
  <Main Menu Wallpaper Settings>.
2
Select a background image from the list and press <OK>.
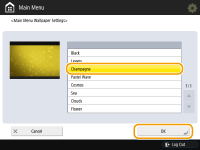
You can check the background image on the preview screen on the left of the list.
|
NOTE
|
|
You can specify whether to display/hide the <Settings/Regist. Shortcut> button in
  <Other Main Menu Settings. <Other Main Menu Settings.For more information on <Settings/Regist. Shortcut>, see Customizing Settings/Registration.
|