 ] (Reset) is pressed to revert to the default settings.
The default settings are a set of standard settings predetermined by the machine. These settings become effective when the machine is turned ON and OFF, or when [] (Reset) is pressed to revert to the default settings.
] (Reset) is pressed to revert to the default settings.You can change the following default settings based on your needs.
Resolution
Density
2-Sided Original
Sharpness
1
Press [ ] (Menu).
] (Menu).2
Select <Fax Settings> using [ ] or [
 ] and press [OK].
] or [] and press [OK].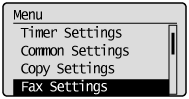
3
Select <TX Function Settings> using [] or [] and press [OK].
] or [] and press [OK].
4
Select <Change Defaults> using [] or [] and press [OK].
] or [] and press [OK].
5
Select the item using [] or [] and press [OK].
] or [] and press [OK].Resolution/Density/Sharpness
For more information, see "Changing the Scan Settings (Fax)."
For more information, see "Changing the Scan Settings (Fax)."

6
Select <Apply> using [] or [] after you have specified the setting and press [OK].
] or [] after you have specified the setting and press [OK].
7
Press [] (Menu) to close the menu screen.
] (Menu) to close the menu screen.