Specify whether to print only on the front side of paper for 1-sided printing so that the odd pages are always printed on the front side for both 1-sided and 2-sided printing.
The print side for 1-sided printing varies depending on the setting specified. To use preprinted paper, read "Paper Loading Orientation" carefully to place the paper stack in the correct orientation.
|
IMPORTANT
|
|
Paper Size and Paper Type
If you select unsupported paper size or paper type for 2-sided printing, the settings applied in this section will be invalid.
|
When <Print Speed Priority> is selected (the default setting)
All pages (odd and even) are printed on the back side for 1-sided printing while the odd pages are printed on the first side for 2-sided printing, as shown below.
|
|
 |
Make sure to place the stack correctly to use preprinted paper, as the side to be placed face up varies between 1-sided and 2-sided printing.
|

Select this setting when
using paper types other than preprinted paper
using preprinted paper only for 1-sided printing
When <Print Side Priority> is selected
All pages are printed on the first side for 1-sided printing so the odd pages are always printed on the first side for both 1-sided and 2-sided printing, as shown below.
|
|
|
The side to be placed face up is the same between 1-sided and 2-sided printing, even when using preprinted paper.
|

Select this setting when
using preprinted paper for both 1-sided and 2-sided printing
1
Press [ ] (Menu).
] (Menu).2
Select <Common Settings> using [ ] or [
 ] and press [OK].
] or [] and press [OK].
3
Select <Switch Paper Feed Method> using [] or [] and press [OK].
] or [] and press [OK].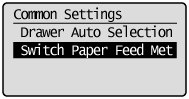
4
Select the paper source using [] or [] and press [OK].
] or [] and press [OK].
5
Select <Print Speed Priority> or <Print Side Priority> using [] or [] and press [OK].
] or [] and press [OK].
|
<Print Speed Priority>
|
Place the paper stack as shown below when <Print Speed Priority> is selected.
(
|
||||||
|
<Print Side Priority>
|
Place the paper stack as shown below when <Print Side Priority> is selected.
(
|


6
Press [] (Menu) to close the menu screen.
] (Menu) to close the menu screen.