
|
NOTE
|
|
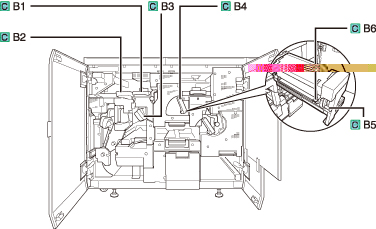
The following illustration indicates the location of the paper jam. Please refer to it to remove the jammed paper.
 |

 CAUTION CAUTION |
|
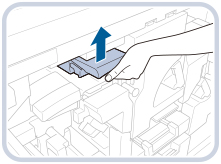
When opening the guide, be careful not to get your fingers caught, as this may result in personal injury.
|

|
CAUTION |
|
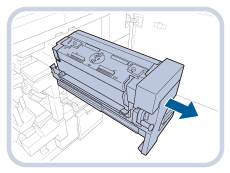
When opening the guide, be careful not to get your fingers caught, as this may result in personal injury.
|


|
CAUTION |
|
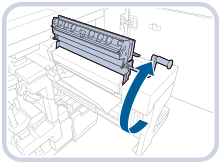
When closing the guide, be careful not to get your fingers caught, as this may result in personal injury.
|

|
CAUTION |
|
When closing the guide, be careful not to get your fingers caught, as this may result in personal injury.
|

|
CAUTION |
|
When opening the guide, be careful not to get your fingers caught, as this may result in personal injury.
|


|
CAUTION |
|
The parts located around the fixing unit are subject to high-temperatures. When removing jammed paper, take care not to touch anything in this area, except for the cover.
|


|
CAUTION |
|
When closing the cover, be careful not to get your fingers caught, as this may result in personal injury.
|


|
NOTE
|
|
The screen indicating the directions on how to clear the paper jam is displayed repeatedly until the paper jam is cleared. (See "Clearing Paper Jams.")
|
