e-ManualTopSite mapHelp

Category Top

Printing from a Computer (Windows)

Printing Functions

[Basic Settings] Tab

[Page Setup] Tab

[Finishing] Tab

[Paper Source] Tab

[Quality] Tab

Common Functions

[Device Settings] Tab

System Requirements

Before Printing from a Computer

Selecting the Appropriate Printer Driver

Installation

Setting the Printer Options

Other Software Programs

Printing Fundamentals

Printing

Configuring the Default Print Settings

Viewing Help

Scaling Documents

Printing Multiple Pages on One Sheet

1-sided and 2-sided Printing

Booklet Printing

Poster Printing

Watermark Printing

Combining and Printing Multiple Files

Selecting a Profile for Printing

Registering a Profile for Printing

Setting the Color Mode for Printing

Printing with the Two Colors Mode

Printing from a Computer (Mac OS)

Printing Functions

Common Functions

[Layout] Preferences Pane

[Finishing] Preferences Pane

[Paper Source] Preferences Pane

[Quality] Preferences Pane

[Special Features] Preferences Pane

System Requirements

Before Printing from a Computer

Selecting the Appropriate Printer Driver

Installation

Setting the Printer Options

Verifying the Printer Information

Manually Setting the Printer Options

Other Software Programs

Printing Fundamentals

Printing

Configuring the Default Page Settings

Viewing Help

Scaling Documents

Setting Custom Paper Sizes

Printing Multiple Pages on One Sheet

1-sided and 2-sided Printing

Booklet Printing

Using [Presets] for Printing

Setting the Color Mode for Printing

Printing with the Two Colors Mode

Setting the Machine (PS/PCL/UFR II Printer)

Printing Flow with This Machine

Differences in Operation with UFR II, PCL, PS, and Direct Print Printers

Personality

Menu Functions

Accessing the Settings Menu

Canceling Print Jobs

Report Settings

Settings Menu (Common Settings)

Copies

2-Sided Printing

Paper Feed

Paper Output

Print Quality

Layout

Auto Error Skip

Secure Print Delete Time

Timeout

Print After Completing RIP

Booklet

Saddle Stitch

Creep Correction

Use Cover Inserter

Transparency Interleaving

Copy Set Numbering

Personality

Mode Priority

Color Mode

Compressed Image Output

Initialize

UFR II Settings

Halftones

RGB Source Profile

Output Profile

Matching Method

Gray Compensation

CMS (Matching) Selection

CMS (Matching)/Gamma

Gamma Correction

Paper Save

PCL Settings

Paper Save

Orientation

Font Number

Point Size

Pitch

Form Lines

Character Code

Custom Paper

Unit of Measure

X Dimension

Y Dimension

Append CR to LF

Enlarge A4 Print Width

Halftones

RGB Source Profile

Output Profile

Matching Method

Gray Compensation

CMS (Matching) Selection

CMS (Matching)/Gamma

Gamma Correction

PS Settings

Job Timeout

Print PS Errors

Pure Black Text

Black Overprint

Matching Mode

RGB Source Profile

CMYK Simulation Profile

Use Grayscale Profile

Output Profile

Matching Method

Device Link Profile

RGB Pure Black Process

CMYK Pure Black Process

Halftones

Brightness

Spot Color Matching

Composite Overprint

Grayscale Conversion

Imaging Settings

Image Orientation

Zoom Mode

Print Position

Show Warnings

Enlarge Print Area

Matching Mode

Device Link Profile

ICC Profile Settings

Photo Correct. (Color Only)

RGB Pure Black Process

CMYK Pure Black Process

Halftones

Grayscale Conversion

PDF Settings

Enlarge/Reduce to Fit Size

Enlarge Print Area

N on 1

Comment Print

Pure Black Text

Black Overprint

Matching Mode

RGB Source Profile

CMYK Simulation Profile

Use Grayscale Profile

Output Profile

Matching Method

Device Link Profile

RGB Pure Black Process

CMYK Pure Black Process

Halftones

Brightness

Spot Color Matching

Composite Overprint

Grayscale Conversion

Utility Settings

Restricting Printer Jobs

PDL Selection (Plug and Play)

Printing Directly Using the Command Prompt

Printing Problems

If Trouble Occurs When Downloading Fonts or Macros from a Personal Computer

Some Basic Facts about Fonts

What Is a Font?

Attributes of Fonts

Fonts and Scalable Fonts

Checking the Font Lists for Available Fonts

Typeface Samples

Symbol Sets 1

Symbol Sets 2

Symbol Sets 3

Symbol Sets 4

Symbol Sets 5

Configuration Page

Release Notes

Bar Code Printing

Introduction

Menus and Their Functions

Building/Printing a Bar Code

Control Codes

Font Parameters

Bar Code Format Parameters

Bar Code Usages and Formats

Troubleshooting

List of Error Messages

Printing Problems

Top » Print » Setting the Machine (PS/PCL/UFR II Printer) » Settings Menu (Common Settings) » Print Quality
Print Quality
0L3X-1JW
Density

[Cyan]
-8 to +8; 0*
[Magenta]
-8 to +8; 0*
[Yellow]
-8 to +8; 0*
[Black]
-8 to +8; 0*

This mode is not available if you set [Toner Save] to [On].
This setting adjusts the print density of the respective colors.
Pressing [Dark] makes the print image darker, pressing [Light] makes the image lighter. This setting has 17 levels you can adjust, with level '0' (middle level) being the default setting.
Density (Fine Adjust)

[Cyan]
[High]
-8 to +8; 0*
[Medium]
-8 to +8; 0*
[Low]
-8 to +8; 0*
[Magenta]
[High]
-8 to +8; 0*
[Medium]
-8 to +8; 0*
[Low]
-8 to +8; 0*
[Yellow]
[High]
-8 to +8; 0*
[Medium]
-8 to +8; 0*
[Low]
-8 to +8; 0*
[Black]
[High]
-8 to +8; 0*
[Medium]
-8 to +8; 0*
[Low]
-8 to +8; 0*

This mode is not available if you set [Toner Save] to [On].
This setting adjusts the print density of the respective colors.
Pressing [Dark] makes the print image darker, pressing [Light] makes the image lighter. This setting has 17 levels you can adjust, with level '0' (middle level) being the default setting.
Toner Save

[On], [Off]*

This setting enables you to set the Toner Save mode. Toner Save uses less toner to print documents and may result in longer toner life.
Resolution

[1200 dpi], [600 dpi]*

This setting specifies the resolution for printing.
Resolution is expressed in units of dpi (dots per inch), indicating the number of dots in one inch. The higher the value, the greater the resolution, allowing finer expression of detail.
[1200 dpi]
The outline of characters and diagrams can be finely printed. This is suited to printing data containing fine lines and small characters.
[600 dpi]
You can perform printing suited to general documents and tables.

IMPORTANT
If you select [1200 dpi] for [Resolution], you cannot specify the following settings: rotate collate, different paper sizes (LTR/LGL), and double stapling on the short edge of A4 and LTR size paper.
Img Compress. Optimization

[On]*, [Off]

This setting specifies the compression method when printing image data.
Image data is compressed to be stored in the machine's memory when printing with this machine.
[On]
Depending on the type of the image data, the suitable compression method is automatically selected so that the image data will be printed with an optimized balance between the image quality and the compression ratio.This is suited for printing data containing text and photo.
[Off]
Regardless of the type of the image data, you can print the image data using the compression method already specified in this machine. This is suited for printing data containing only photo.

NOTE
For all selections within this setting, if the data is too large to be stored in the machine's memory, it will be recompressed at a high compression ratio.
To avoid deterioration in image quality resulting from repeated recompression, select [Display Error] for "Compressed Image Output." This allows you to cancel a job before an image with deterioration is printed out.
Depending on the image data, the image quality may not change even if the compression method is changed.
Sharpness

-3 to +3; 0*

This setting allows you to adjust image sharpness. Pressing [High] makes image outlines clearer, pressing [Low] blurs images. This setting has 7 levels you can adjust, with level '0' (middle level) as the default setting.
Trapping

[Trapping]
[On], [Off]*
[Trapping Width]
[Upper]
0 to 3; 1* pixel
[Lower]
0 to 3; 1* pixel
[Left]
0 to 3; 1* pixel
[Right]
0 to 3; 1* pixel
[Trapping Density]
[Cyan]
0 to 100; 100* %
[Magenta]
0 to 100; 100* %
[Yellow]
0 to 100; 100* %

You can prevent image deterioration caused by misaligned images by creating overlaps between the emphasized image and the color plate that surrounds the image.
NOTE
You cannot use this function in combination with 'Width Adjustment'.
Toner Volume Correction

[Normal]*, [Grad. Priority], [Text Priority]

This setting enables you to set the Toner Save function. Toner Save uses less toner to print documents and may result in longer toner life.
[Normal]
Text and line data are printed with a toner volume that upholds the resolution for text and lines. Other types of data are printed with a toner volume that upholds the color.
[Grad. Priority]
All data is printed with a toner volume that upholds the color.
[Text Priority]
All data is printed with a toner volume that upholds the resolution.

NOTE
The internal restriction value cannot be changed.
This setting can only be applied to jobs in the PS mode and PDF mode.
If [Grad. Priority] is selected, characters and lines may bleed.
If [Text Priority] is selected, the color may not match.
Line Control

[Res. Priority]*, [Grad. Priority]

This setting enables you to specify the image processing for lines. Under most circumstances, it is preferable to leave this setting as [Res. Priority].
[Res. Priority]
Image processing is performed that upholds the same resolution as text for lines.
[Grad. Priority]
Image processing is performed that upholds the same color and gradation as graphics for lines.

NOTE
This setting can only be applied to jobs in the UFR II mode, PCL6 mode, PS mode, and PDF mode.
Width Adjustment

[Width Adjustment]
[On], [Off]*
[Horizontal]
[Off], [Level 1]*, [Level 2]
[Vertical]
[Off], [Level 1]*, [Level 2]
[Target Color]
[All]*, [Black Only]

This setting enables you to adjust the width of the character and lines.
Settings can be applied separately for 'Horizontal' and 'Vertical'.
Setting to [Level 2] makes the character and lines wider than setting to [Level 1]. Set to [Level 1] at first, and then check the changed width. If the width is not wide enough that you intended to, set to [Level 2].
By switching [All] and [Black Only] for 'Target Color', you can select whether to apply width adjustment to all colors of characters and lines or to only black part of characters and lines.

NOTE
You cannot use this function in combination with 'Trapping'.
"Horizontal", "Vertical", and "Target Color" can only be selected when [On] is selected for 'Width Adjustment'.
Advanced Smoothing

[Advanced Smoothing]: [Off], [Level 1]*, [Level 2]
[Apply to Graphics]: [On], [Off]*
[Apply to Text]: [On]*, [Off]

This setting smoothes jagged outlines of graphics (illustrations created by application software) and characters.
[Level 2] performs a higher level of smoothing than [Level 1]. If [Level 1] is selected and the results are still not printed smoothly, select [Level 2].
By switching the on/off for 'Graphics' and 'Text', you can select whether to apply smoothing to graphics or text data.

IMPORTANT
This setting allows you to apply smoothing to graphics data and text data. Smoothing is not applied to image data.
The setting for 'Apply to Text' is invalid if 'Resolution' is set to [1200 dpi].
NOTE
"Apply to Graphics" and "Apply to Text" can only be selected when [Level 1] or [Level 2] is selected for Advanced Smoothing.
Settings for "Apply to Graphics" and "Apply to Text" on the touch panel display will be effective only if 'Printer Default' is set for Advanced Smoothing in the printer driver.
The results of Advanced Smoothing may differ depending on the characters and graphics patterns.
Gradation Smoothing

[Gradation Smoothing]: [Off]*, [Level 1], [Level 2]
[Apply to Graphics]: [On]*, [Off]
[Apply to Images]: [On]*, [Off]

Set this function when the gradation of graphics (illustrations made by software applications) or images (bitmap images) does not print smoothly (the color changes stand out).
[Level 2] performs a smoother gradation than [Level 1]. If [Level 1] is selected and gradation is still not printed smoothly, select [Level 2]. You can select whether to apply smoothing to graphics or image data.

IMPORTANT
This setting does not apply to text data.
NOTE
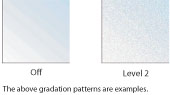
If [Level 1] or [Level 2] is selected, and gradation is applied to halftones, graphics and images may appear grainy.
"Apply to Graphics" and "Apply to Images" are only displayed when [Level 1] or [Level 2] is selected.