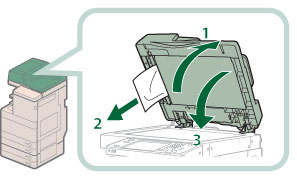
Check the location of the paper jam, and follow the procedure described below, while referring to the directions that appear on the touch panel display, to remove the jammed original.
|
NOTE
|
|
When removing jammed originals, take care not to cut your hands on the edges of the originals.
|
For the imageRUNNER ADVANCE C5255/C5250
1.
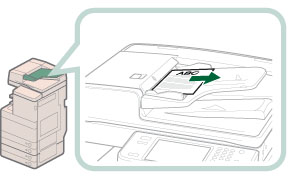
Remove originals from the original supply tray.
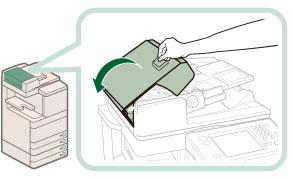
2.
Pull the lever, and open the feeder cover.
3.
Remove any jammed original.
If there is difficulty in removing jammed original, do not try to remove it forcibly, and proceed to step 4.
4.
Turn the green tab in the direction of the arrow (counterclockwise), and remove the jammed original from the output tray.
5.
Close the feeder cover.
 CAUTION |
|
When closing the cover, be careful not to get your fingers caught, as this may result in personal injury.
|
6.
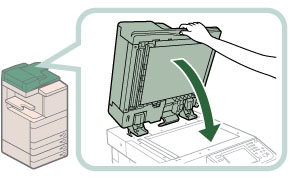
Open the feeder, and remove any jammed paper.
7.
Close the feeder.
 CAUTION |
|
When closing the feeder, be careful not to get your fingers caught, as this may result in personal injury.
Be aware that the light emitted from the platen glass may be very bright when closing the feeder.
|
8.
Follow the instructions on the screen.
|
NOTE
|
|
The screen indicating the directions on how to clear the paper jam is displayed repeatedly until the paper jam is cleared.
|
For the imageRUNNER ADVANCE C5240/C5235
1.
Remove originals from the original supply tray.
2.
Remove any original jammed in the feeder cover.
If there is difficulty in removing jammed original, do not try to remove it forcibly, and proceed to step 3.
|
|
1. Pull the lever, and open the feeder cover. |
2. Remove any jammed original. |
3.
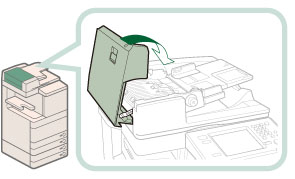
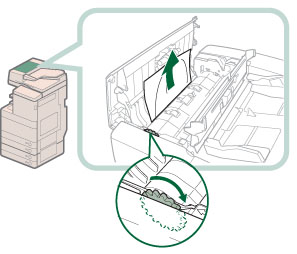
Open the inner cover, holding it by its front tab.
4.
Turn the feed dial inside the feeder cover in the direction of the arrow (clockwise), and remove any original jammed in the feeder cover.
5.
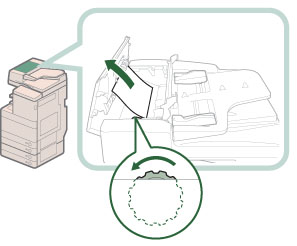
Turn the feed dial in the direction of the arrow (counterclockwise), and remove any original jammed in the inner cover.
6.
Remove any original jammed in the output tray.
|
|
1. Lift up the original supply tray. |
2. Turn the feed dial in the direction of the arrow (counterclockwise), and remove the jammed original. |
7.
Close the feeder cover.
|
|
1. Close the inner cover. |
2. Close the feeder cover. |
 CAUTION |
|
When closing the covers, be careful not to get your fingers caught, as this may result in personal injury.
|
8.
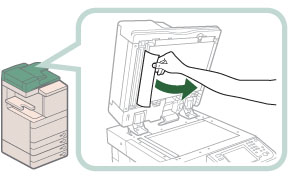
Remove any paper jammed in the feeder.
|
|
|
2. Remove any jammed original. |
|
NOTE
|
|
If it is difficult to remove the jammed original, turn the feed dial counterclockwise.
|
|
|
|
 CAUTION |
|
When closing the feeder, be careful not to get your fingers caught, as this may result in personal injury.
|
|
9.
Follow the instructions on the screen.
|
NOTE
|
|
The screen indicating the directions on how to clear the paper jam is displayed repeatedly until the paper jam is cleared.
|



 CAUTION
 CAUTION


 CAUTION