|
IMPORTANT
|
|
To change the default fax settings, you must log on to your computer as a member of the Administrators group.
|
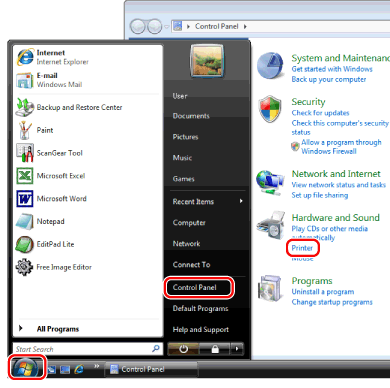
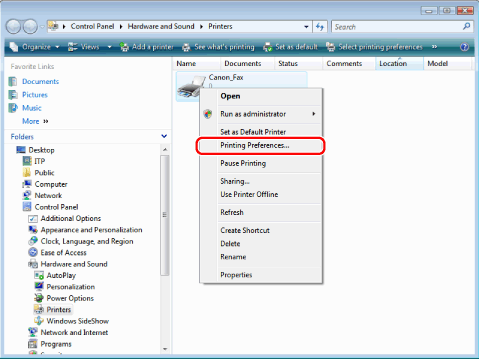
 ] (Start) → [Control Panel] → [Printer].
|
NOTE
|
|
For Windows 8 and Server 2012: From the desktop, display the charm bar to the right of the screen, and click or tap [
 Settings] → [Control Panel] → [Devices and printers]. Settings] → [Control Panel] → [Devices and printers].For Windows 7, click [
 ] (Start) → [Devices and Printers]. ] (Start) → [Devices and Printers].For Windows XP Professional/Server 2003, click [Start] → [Printers and Faxes].
For Windows XP Home Edition, click [Start] → [Control Panel] → [Printers and Other Hardware] → [Printers and Faxes].
|


|
NOTE
|
|
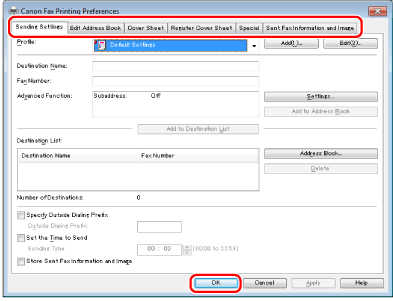
When faxing, you can change the default settings in the fax driver screen whenever required.
The display may vary according to the operating system and fax driver version you are using.
|