|
Selected File
|
Print A
([Secure Watermark] Is Set)
|
Copy B
(Copy of Print A)
|
||
 |
 |
 |
|
 |
|
Selected File
|
Print C
([Print Vertically] Is Selected)
|
Copy D
(Copy of Print C)
|
||
|
|
|
|
|
 |
|
IMPORTANT
|
|
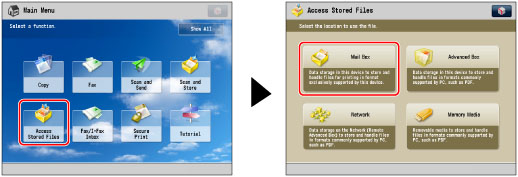
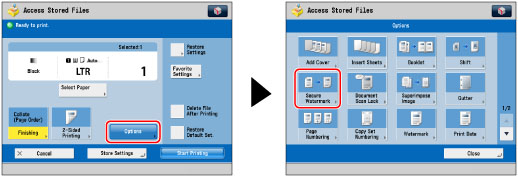
This mode can be used only for printing a file stored in a mail box.
|

|
NOTE
|
|
[ID/User Name] is grayed out and cannot be selected if you are not using a login service.
|
|
IMPORTANT
|
|
Text that you enter in [Custom] is not automatically saved. If you want to register your newly created secure watermark to be selected whenever necessary, press [Register] → enter the text to be registered.
|
 -
-  (numeric keys).
|
NOTE
|
|
If no date is set, the date set in [Date/Time Settings] is printed. Confirm that the date and time settings are correct. (See "Current Date and Time.")
|
- (numeric keys). (Counter Check) on the control panel is printed.
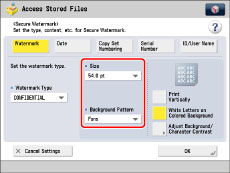
|
NOTE
|
|
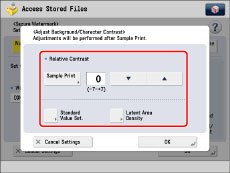
The sample print includes the hidden text and the background for each relative contrast value.
The area within the frame on the sample print is the output sample for the currently set relative contrast value.
|
|
Standard Value Settings
|
Relative Contrast Value
|
|
1
|
0 to +7
|
|
4
|
-3 to +7
|
|
8 to 56
|
-7 to +7
|
|
60
|
-7 to +4
|
|
64
|
-7 to 0
|
|
NOTE
|
|
The sample print includes the hidden text and the background for each relative contrast value.
The area within the frame on the sample print is the output sample for the currently set standard value.
|
 and
and  to adjust the standard value → press [OK].
|
IMPORTANT
|
|
For information on the modes which cannot be set in combination with this mode, see "Unavailable Combination of Functions."
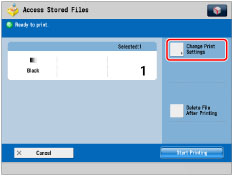
You cannot change the print density while printing with [Secure Watermark] set.
Printing performance may not be optimal, depending on the file content and combination of settings.
|
