For information on the optional products required to use this function, see
"Optional Products Required for Each Function."You can set the following items when fax is used on the machine:
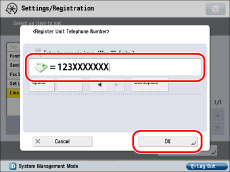
Register Unit Telephone Number
You can register the fax number to use when fax is used on the machine. You can also set the fax numbers for added fax lines.
The registered fax numbers are printed at the receiving party's fax machine when you send a fax.
The unit's name appears on the receiving party's fax machine, or is printed on the received document as the Sender Name. You can register the name of your company or department as the unit name.
You can also register unit names for added fax lines.
You can register the method for selecting the line to use for sending. If this setting is incorrect, you will be unable to communicate with other machines.
If this setting is incorrect, you will be unable to communicate with other machines. Be sure to check the type of telephone line that you are using, and make the correct setting. You can also register the type of telephone line for added fax lines.
Edit Line Name for Select Line Screen
You can edit the line name displayed on the Select Line screen.
Default Address List When Selecting Line
You can select the default address list which appears on the Fax Basic Features screen when selecting the telephone line on the Select Line screen.
1.
Press

(Settings/Registration).
2.
Press [Function Settings] → [Send] → [Fax Settings].
3.
Press [Set Line] → [Line 1].
To set telephone line settings for the added fax line, press [Set Line] → select the added fax line.
To register the fax number for the machine:
Press [Register Unit Telephone Number].
Enter the fax number to register → press [OK].
Details of each item are shown below:
|
[Space]:
|
Press to insert a space between the area code and the local fax number.
|
|
[+]:
|
Use to insert a country code. Press [+] after the country code, before the fax number.
|
  : |
Press to move the position of the cursor.
|
|
[Backspace]:
|
Press to delete the last number entered.
|
To register the unit name:
Press [Register Unit Name].
Enter a name → press [OK].
To select the telephone line:
Press [Select Line Type].
Select the line type → press [OK].
If you do not know the telephone line type, call your telephone service provider for details.
To edit the line name for the Select Line screen:
Press [Edit Line Name for Select Line Screen].
Enter a name → press [OK].
To select the default address list when selecting the line:
Press [Default Address List When Selecting Line].
Select the address list → press [OK].
|
NOTE
|
|
Depending on the fax board installed, the lines that you can register the unit's telephone number and name for vary as shown below:
If the Super G3 FAX Board is installed: Line 1
If the Super G3 FAX Board and Super G3 2nd Line Fax Board are installed: Line 1, Line 2
If the Super G3 FAX Board, Super G3 2nd Line Fax Board, and Super G3 3rd/4th Line Fax Board are installed: Line 1, Line 2, Line 3, Line 4
The unit's name can be printed on the received documents as the Sender Name.
Depending on the fax board installed, the lines that you can register the telephone line type for vary as shown below:
If the Super G3 FAX Board is installed: Line 1
If the Super G3 FAX Board and Super G3 2nd Line Fax Board are installed: Line 1, Line 2
If the Super G3 FAX Board, Super G3 2nd Line Fax Board, and Super G3 3rd/4th Line Fax Board are installed: Line 1, Line 2, Line 3, Line 4
|