|
IMPORTANT
|
|
If you import an Address List (Delete and Overwrite), Forwarding Settings, or Settings/Registration settings, the information stored in [Favorite Settings] from the control panel of the machine and Recall memory are erased.
|
You can load an Address List into the machine from saved files.
1.
Click [Settings/Registration] → select [Data Management] for <Management Settings>.
2.
Click [Import/Export] → [Address Lists] → [Import...].
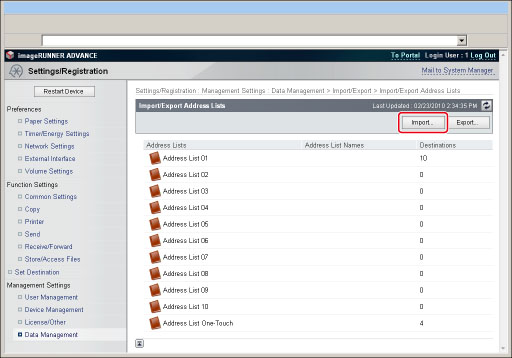
If a PIN is set for the Address List, a dialog box prompting you to enter the PIN appears. Enter the Address List PIN → click [OK].
3.
Specify the desired settings → click [Start Importing].
If you want to import an encrypted Address List file, select [Decode Address List Certified Information] → enter the correct password.
Details of each item are shown below.
|
Address List:
|
Select the Address List to be imported.
|
|
Import Method:
|
Select the import method for the Address List selected in <Address Lists>.
[Add]: The addresses in the file are added to the address list selected in <Address Lists>. No changes are made to the pre-existing addresses. Addresses in the file that have the same name as those already stored on the machine will treated as new registrations with the same name.
[Delete and Overwrite]: All addresses stored in the Address List selected in <Address Lists> are deleted, and the contents of the file are loaded into the machine.
|
|
File Path:
|
Specify the location of the file to load.
|
|
File Format:
|
Select the format specified when the file was exported.
[Custom Format]: The dedicated file format for Canon machines.
[LDAP Format]: Select this if the file is to be used by another application (e.g., Microsoft Internet Explorer, Netscape Navigator, Microsoft Outlook, Eudora, etc.).
|
|
IMPORTANT
|
|
If you select [Address List One-Touch] for <Address Lists>, you cannot select [Add] for <Import Method>. Therefore, each one-touch button destination registered in the machine is overwritten when you perform the import procedure. You can also only import files exported with [Custom Format] selected.
|
|
NOTE
|
|
You can register up to 1,800 addresses in an Address List. (200 of these are addresses assigned to the one-touch buttons.) Each address is treated as a separate item. When importing additional addresses, make sure that you do not exceed an overall total of 1,800 addresses.
When importing an LDAP format file, entries with e-mail addresses are imported into the machine. Make sure that the number of destinations to register does not exceed 1,800.
The name of the Address List is not imported.
|
You can load device settings into the machine from saved files.
1.
Click [Settings/Registration] → select [Data Management] for <Management Settings>.
2.
Click [Import/Export] → [Device Settings (Forwarding Settings, Address Book, Send Function Favorite Settings)] → [Import...].
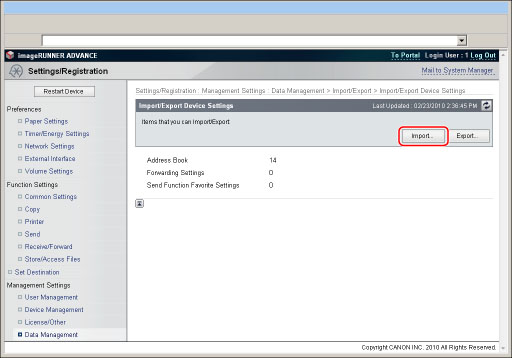
3.
Specify the desired settings → click [Start Importing].
If you want to import an encrypted Address List file, select [Decode Address List Certified Information] → enter the correct password.
Details of each item are shown below.
|
File Format:
|
Select the format of the file that is to be exported. The file format for exported device settings differs according to the model of your machine. Check the exported file.
[FIM Format (Forwarding Settings, Address Book and Send Function Favorite Settings)]:
The file extension is ".fim." Files saved in this format include the Address List, forwarding settings, and Favorite Settings. When you export the device settings of the machine, the file is saved in this format.
[FIA Format (Forwarding Settings and Address Book)]/[FIL Format (Forwarding Settings and Address Book)]:
The file extension is ".fia"/".fil." Files saved in this format include the Address List and forwarding settings. When you export the device settings of a different model machine, the file may be saved in this format.
|
|
File Path:
|
Specify the location of the file to load.
|
|
IMPORTANT
|
|
If you import the device settings, the Address List is also imported, causing the registered destinations to be deleted and overwritten with the destinations in the imported file.
The machine must be restarted to enable the imported device settings. After importing, turn OFF the main power of the machine, and turn the main power back ON again.
After importing device settings, the Remote UI cannot be used to perform other operations until the machine is restarted. Turn OFF the main power of the machine, and turn the main power back ON again.
If the data exported from this machine is imported by models other than imageRUNNER ADVANCE 4051/4045/4035/4025, [Favorite Settings] on the control panel is not updated.
|
|
NOTE
|
|
Do not import any files while the machine is executing other jobs.
For instructions on turning ON/OFF the machine, see "Main Power and Control Panel Power."
|
You can load Settings/Registration settings saved as a file into the machine.
1.
Click [Settings/Registration] → select [Data Management] for <Management Settings>.
2.
Click [Import/Export] → [Settings/Registration] → [Import...].
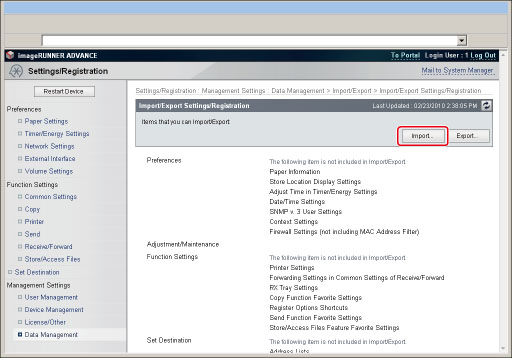
3.
Enter the path for the file to import in <File Path>.
4.
Click [Start Importing].
|
IMPORTANT
|
|
You cannot import data exported from models other than imageRUNNER ADVANCE 4051/4045/4035/4025. You can import stored data between imageRUNNER ADVANCE 4051/4045/4035/4025 machines with the same optional products available for use.
When Settings/Registration settings are imported, the System Manager ID, Department IDs, Address Book PIN, and Network settings are automatically overwritten.
The machine must be restarted to enable the imported Settings/Registration settings. After importing, turn OFF the main power of the machine, and turn the main power back ON again.
After importing Settings/Registration settings, the Remote UI cannot be used to perform other operations until the machine is restarted. Turn OFF the main power of the machine, and turn the main power back ON again.
SNMP v. 3 User and Context Settings in SNMP Settings in Network Settings cannot be imported/exported.
|
|
NOTE
|
|
Do not import any files while the machine is executing other jobs.
For instructions on turning ON/OFF the machine, see "Before You Start Using This Machine."
|
You can load printer settings saved as a file into the machine.
1.
Click [Settings/Registration] → select [Data Management] for <Management Settings>.
2.
Click [Import/Export] → [Printer Settings] → [Import...].
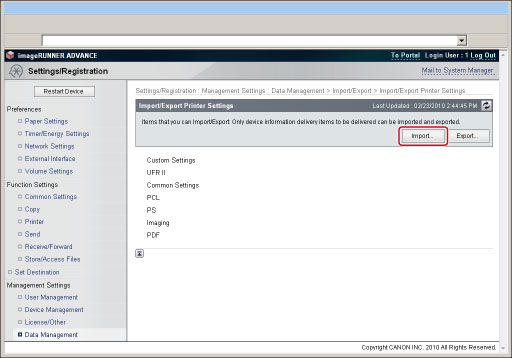
3.
Enter the path for the file to import in <File Path>.
4.
Click [Start Importing].
You can load paper information settings into the machine from files saved to a computer.
1.
Click [Settings/Registration] → select [Data Management] for <Management Settings>.
2.
Click [Import/Export] → [Paper Information] → [Import...].
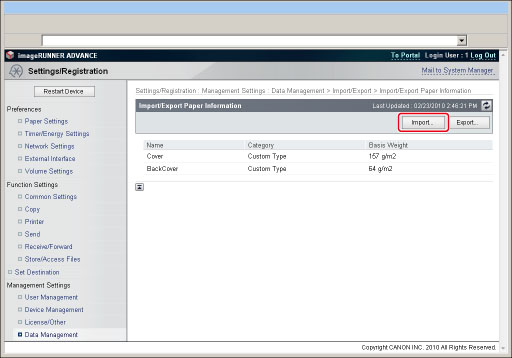
3.
Specify the desired settings → click [Start Importing].
Details of each item are shown below.
|
Category:
|
Select the category of paper information to update.
|
|
File Path:
|
Specify the location of the file to load.
|
|
IMPORTANT
|
|
You cannot import a file while the machine is scanning.
|