Specifying the Stored File Settings
You can configure the [Access Stored Files] screen for printing. As an example, the procedure for selecting memory media as the storage location is explained in this section.
Registering and Editing Favorite Settings
You can register up to nine setting combinations for both JPEG/TIFF and PDF/XPS files (18 in total). This feature is useful for storing frequently used settings.
Changing the Default Settings
You can change the default settings for [Access Stored Files].
Initializing the Default Settings
You can restore [Access Stored Files] settings from the registered default settings to the factory settings.
Registering and Editing Favorite Settings
1.
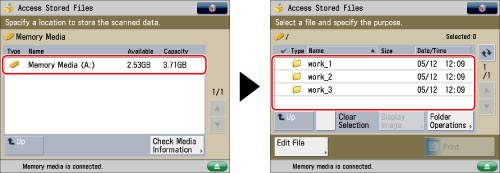
Press [Access Stored Files] → [Memory Media].
2.
Select the desired memory media → select the location where the file you want to print is stored.
3.
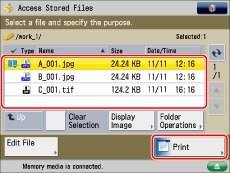
Select the desired file → press [Print].
To register a favorite settings button, set the print mode that you want to register.
4.
Press

(Settings/Registration).
5.
Press [Function Settings] → [Store/Access Files] → [Common Settings].
6.
Press [Access Stored Files Settings] → [Register/Edit Favorite Settings].
To register a favorite settings button:
If you want to change the name of a button, select the button to change → press [Rename] → enter the new name.
Select a button ([M1] to [M9]) to register settings → press [Register].
Press [Yes].
|
NOTE
|
|
If you press [Check Content], the existing registered settings appear.
|
To edit a favorite settings button:
If you want to change the name of a button, select the button to change → press [Rename] → enter the new name.
Select a button ([M1] to [M9]) to overwrite settings → press [Register].
Press [Yes].
|
NOTE
|
|
If you press [Check Content], the existing registered settings appear.
|
To delete a favorite settings button:
Select a button ([M1] to [M9]) to delete → press [Delete].
|
IMPORTANT
|
|
Confirm the settings to be deleted.
|
Press [Yes].
|
NOTE
|
|
The name for the button is not deleted. To rename a button, press [Rename].
|
7.
Press [Close].
Changing the Default Settings
1.
Press [Access Stored Files] → [Memory Media].
2.
Select the desired memory media → select the location where the file you want to print is stored.
3.
Select the desired file → press [Print].
To register changes to the default settings, set the print mode that you want to register as the default settings.
4.
Press
(Settings/Registration).
5.
Press [Function Settings] → [Store/Access Files] → [Common Settings].
6.
Press [Access Stored Files Settings] → [Change Default Settings].
7.
Select [Register].
8.
Press [Yes].
Initializing the Default Settings
1.
Press [Access Stored Files] → [Memory Media].
2.
Select the desired memory media → select the location where the file you want to print is stored.
3.
Select the desired file → press [Print].
4.
Press
(Settings/Registration).
5.
Press [Function Settings] → [Store/Access Files] → [Common Settings].
6.
Press [Access Stored Files Settings] → [Change Default Settings].
7.
Press [Initialize].
8.
Press [Yes].
|
NOTE
|
|
Settings stored in favorite settings buttons are not deleted, even if the power is turned Off.
|