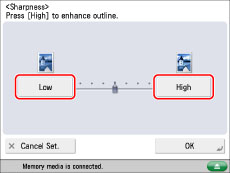
Adjusting the Image Sharpness
You can adjust the sharpness to scan text and lines with a sharper contrast. You can also reduce the sharpness for the half-tone dots of printed photos, etc. to scan with a softer image.
Low
If you scan an original containing halftones, such as a printed image, the moiré effect (a shimmering, wavy pattern) may occur. In this case, you can lessen this moiré effect by using [Low] as the setting.
Low Set
Low Not Set
High
This setting enhances the edges of original images so that faint or fine text is reproduced with a sharper contrast. This setting is particularly suited for scanning blueprints and faint pencil drawn images.
 
 
High Set
High Not Set
As an example, the procedure for selecting memory media as the storage location is explained in this section.
1.
Press [Scan and Store] → [Memory Media].
2.
Select the memory media → select the destination folder → press [Scan].
3.
Press [Options] → [Sharpness].
4.
Press [Low] or [High] to adjust the sharpness.
To scan text or lines clearly, the setting should be towards [High]. To scan originals containing printed photographs or other halftones, the setting should be towards [Low].
5.
Press [OK] → [Close].

IMPORTANT
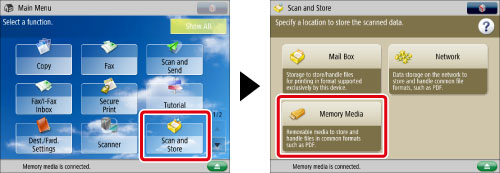
For information on the modes which cannot be set in combination with this mode, see "Unavailable Combination of Functions."
If you are using the Advanced Box of another machine on the network or memory media, the setting for [Sharpness] is invalid when all of the conditions below are met. The setting is reflected in the image displayed for [Display Image], but not for the actual scanned image.
The color mode is Black & White
The original type is set to Text
The resolution is set to 100 x 100 dpi, 150 x 150 dpi, or 200 x 100 dpi.
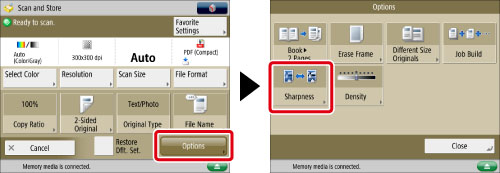
To activate [Sharpness], change the settings.
» Scan and Store » Adjusting the Image Sharpness
0R9W-13R