|
Required Condition
|
|
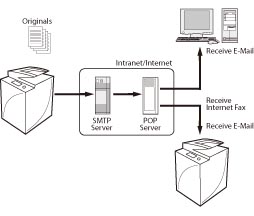
Network settings are set.
The recipient's machine can receive I-fax.
|
 (Settings/Registration) → [Preferences] → [Network] → [TCP/IP Settings] → [DNS Settings] → [DNS Server Address Settings].
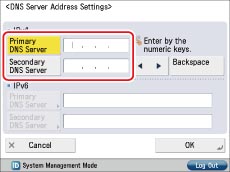
|
NOTE
|
|
The DNS server is a server that converts the domain name, which is the computer name on the internet, into an IP address.
|
|
NOTE
|
|
These settings are not required when using the Intranet Fax function.
|
 (Settings/Registration) → [Function Settings] → [Send] → [E-Mail/I-Fax Settings] → [Communication Settings].
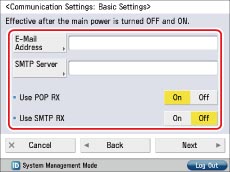
|
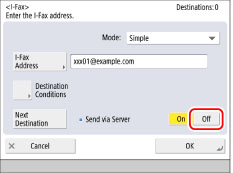
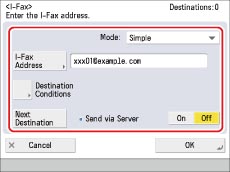
[E-Mail Address]:
|
The e-mail address set on the machine.
|
|
[SMTP Server]:
|
The IP address or host name of the e-mail server used for transmission.
|
|
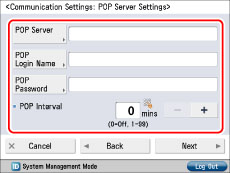
[POP Server]:
|
The IP address and host name of the e-mail server used to send and receive in "POP before SMTP" send authentication format.
|
|
[POP Login Name]:
|
The login name used to access the POP server.
|
|
[POP Password]:
|
The password used to access the POP server.
|
|
[POP Interval]:
|
The time interval at which the machine checks the e-mail on the e-mail server.
|
|
NOTE
|
|
It is recommended that you set [POP Interval] to an interval other than '0'.
|
|
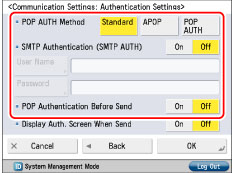
[SMTP Authentication (SMTP AUTH)]:
|
If the environment of the e-mail server requires SMTP authentication, set this setting to 'On' and enter the user name and password.
|
|
[POP Authentication Before Send]:
|
If the provider is in the "POP before SMTP" send authentication system, set this setting to 'On'.
|
(Settings/Registration) → [Function Settings] → [Send] → [E-Mail/I-Fax Settings] → [Maximum Data Size for Sending].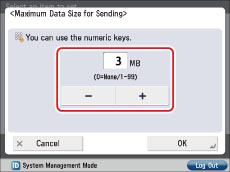 (Settings/Registration) → [Function Settings] → [Send] → [E-Mail/I-Fax Settings] → [Full Mode TX Timeout].
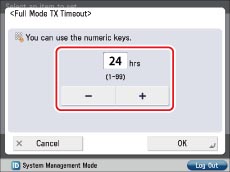 (Settings/Registration) → [Function Settings] → [Send] → [E-Mail/I-Fax Settings] → [Print MDN/DSN upon Receipt].
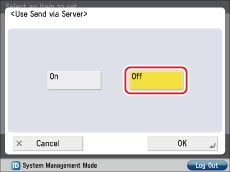
 (Settings/Registration) → [Function Settings] → [Send] → [E-Mail/I-Fax Settings] → [Use Send Via Server].
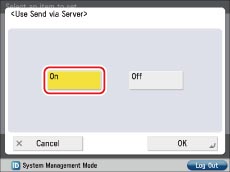
|
NOTE
|
|
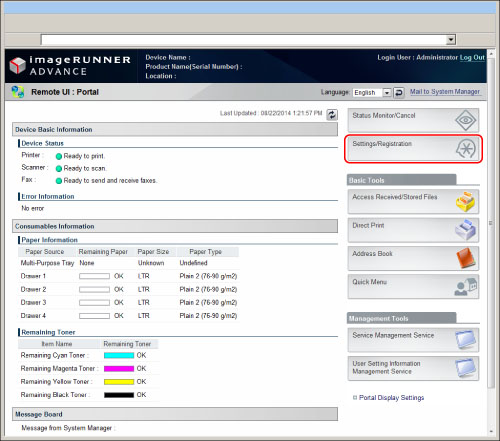
If the following error messages are displayed and you cannot access the Remote UI, follow the procedures below.
Page Not Found:
Select [Tools] from the menu bar → [Internet Options] → display the [General] sheet → delete the temporary internet files. Then, restart the Web browser and access the Remote UI again.
HTTP 404 File Not Found:
Check the IP address. Check the IP address range settings in the Network settings of the machine.
|
|
(1)
|
Click [Preferences] → [Network Settings] → [IPv4 Settings].
|
|
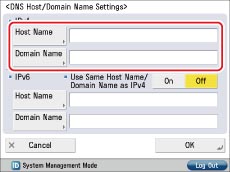
(2)
|
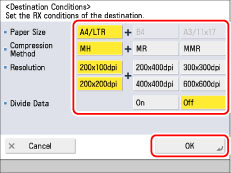
Check [Host Name] and [Domain Name] in <DNS Settings>.
|
|
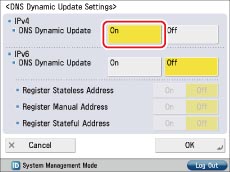
(3)
|
For environments with a dynamic DNS server, select [Perform DNS Dynamic Update].
|
|
(4)
|
Click [OK].
|
|
(1)
|
Click [Function Settings] → [Send] → [Network Settings - E-Mail/I-Fax Settings].
|
|
(2)
|
If the sending server requires authentication, click [Authentication/Encryption Settings] → check the authentication system.
|
|
(3)
|
Click [OK].
|
|
(1)
|
Click [Function Settings] → [Send] → [Communications Settings - E-Mail/I-Fax Settings].
|
|
(2)
|
Click [E-Mail/I-Fax Common Settings] → enter a value for <Maximum Data Size for Sending>.
|
|
(3)
|
Click [OK].
|
|
(1)
|
Click [Function Settings] → [Send] → [Communications Settings - E-Mail/I-Fax Settings].
|
|
(2)
|
Click [I-Fax Settings] → enter a value for <Full Mode TX Timeout>.
|
|
(3)
|
Click [OK].
|
|
(1)
|
Click [Function Settings] → [Send] → [Communications Settings - E-Mail/I-Fax Settings].
|
|
(2)
|
Click [I-Fax Settings] → select <Print MDN/DSN upon Receipt>.
|
|
(3)
|
Click [OK].
|
|
(1)
|
Click [Function Settings] → [Send] → [Communications Settings - E-Mail/I-Fax Settings].
|
|
(2)
|
Click [I-Fax Settings] → select <Send via Server>.
|
|
(3)
|
Click [OK].
|
|
NOTE
|
|
Depending on the provider, port number 25 for send may be closed as a countermeasure for junk mail. For more information, contact your provider.
|
|
NOTE
|
|
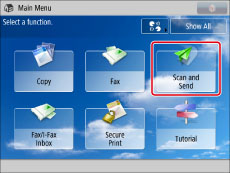
If the Main Menu screen is not displayed, press [Main Menu].
|
 (Start).
|
NOTE
|
|
One of the possible causes for a send failure is that, depending on the provider, port number 25 for sending may be closed to countermeasure junk mail. For information on changing the port of the machine, contact your local authorized Canon dealer.
|
(Settings/Registration) → [Function Settings] → [Send] → [Common Settings] → [TX Report].|
Intranet Fax
|
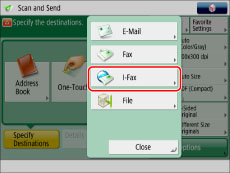
I-Fax
|
|
|
Primary DNS Server
|
Not Required
|
Required
|
|
Secondary DNS Server
|
Not Required
|
Required
|
|
Host Name
|
Not Required
|
Required
|
|
Domain Name
|
Not Required
|
Required
|
|
SMTP Receive
|
On
|
-
|
|
POP
|
-
|
On
|
|
SMTP Server
|
Not Required
|
Required
|
|
E-Mail Address
|
Added as the fax sender. (e.g. mfp01@canon.com)
|
Required
|
|
POP Server
|
-
|
Required
|
|
POP Password
|
-
|
Required
|
|
POP Interval
|
-
|
Required
|