e-ManualTopSite mapHelpGlossary

Category Top

What This Machine Can Do

Overview of This Function

Things You Must Do Before Using This Machine

Flow of Sending Operations

Canceling a Job

Specifying Destinations

Specifying Destinations Using the Address Book (Local)

Specifying Destinations Using the Address Book (Remote)

Specifying Destinations Using the Address Book (LDAP Server)

Specifying Destinations Using the One-Touch Buttons

Specifying a Destination by Entering an E-mail Address

Specifying Destinations by Entering an I-Fax Address

Specifying a Destination by Entering a File Server

Specifying a File Server Using the Keyboard

Specifying a File Server Using the Browse Key (Windows (SMB))

Specifying a File Server Using the Search Host Key (Windows (SMB))

Storing in an Advanced Box

Setting Your Personal Folder as the Destination

Setting Your Own E-Mail Address as the Destination

Setting Cc and Bcc Addresses

Checking/Editing/Deleting the Information for a Destination

Favorite Settings

Recalling Previous Send Jobs

Storing New Addresses

Registering an E-Mail Address

Registering an I-Fax Address

Registering a File Server Address

Registering a Group Address

Registering an Address Obtained via an LDAP Server

Registering an Advanced Box Address

Storing/Editing/Deleting One-Touch Buttons

Checking/Editing/Deleting a Stored Address

Registering/Editing/Deleting Favorite Settings

Registering/Editing Favorite Settings

Checking Favorite Settings

Editing a Name/Comment

Deleting Favorite Settings

Assigning Shortcuts

Switching the Color Mode

Setting the Resolution

Specifying/Registering Scan Sizes

Setting the File Format

Trace and Smooth

Compact PDF or XPS

Searchable PDF/XPS/OOXML

Adding a Digital Signature to a PDF or XPS

Encrypting PDF Files

Applying a Policy

Preview

2-Sided Original

Adjusting Density Manually

Adjusting Background Density

Selecting the Original Type

Adjusting the Image Sharpness

Erase Frame

Delayed Send

Specifying the Orientation of the Original Image

File Name

Subject/Message

Reply-to

Setting E-Mail Priority

Receiving I-Fax Documents

Processing Received Documents

Receiving Documents

Setting the Memory Lock Mode

Forwarding Received Documents

Available Paper Sizes

When Problems Occur

Questions & Answers

Top » Scan and Send » Applying a Policy
Applying a Policy
0C1Y-0W9
You can send a PDF compatible with Rights Management Server. The permission to access the stored PDF can be edited with the Adobe LiveCycle Rights Management ES.
IMPORTANT
You cannot set [Apply Policy] in combination with the following conditions:
When the Encrypt mode is set
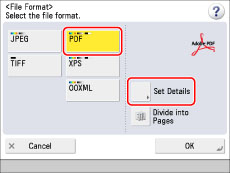
When [Format PDF to PDF/A] is set to 'On' (See "Formatting PDF Files to PDF/A.")
NOTE
Adobe LiveCycle Rights Management ES or Adobe LiveCycle Rights Management ES2 is required to use [Apply Policy]. For more information, contact your local authorized Canon dealer.
The following conditions must be met to use [Apply Policy]:
The Adobe LiveCycle Rights Management server and the machine are connected via the Internet or an intranet.
The URL for the Adobe LiveCycle Rights Management server is set in [Rights Management Server Settings]. (See "Setting a Rights Management Server.")

1.
Press [Scan and Send] → specify the destination → press the file format button.
2.
Select [PDF] → press [Set Details].
3.
Press [Apply Policy] → Enter the user name and password → press [OK].
NOTE
Depending on the authentication method you use, the screen to enter the password may not appear.
For a login user name and password for access to Rights Management Server, contact your system manager.
4.
Select the policy to apply → press [OK].
The policies registered in the Adobe LiveCycle Rights Management server are displayed in the policy list.
NOTE
A maximum of 64 policies can be displayed.
With this machine, only policies encrypted with AES 128-bit or AES 256-bit can be applied.