|
NOTE
|
|
You may have to set up the LDAP servers beforehand, depending on the network environment. (See "LDAP Server Settings.")
|
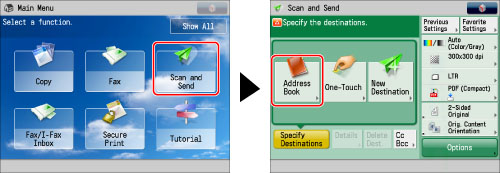
|
NOTE
|
|
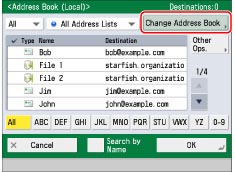
[Change Address Book] appears only if you register both the Remote Address Book and LDAP server. If only the LDAP server is registered on the machine, [To LDAP Server] is displayed.
|
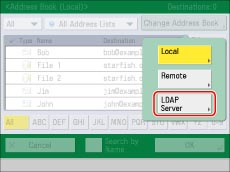
|
IMPORTANT
|
|
You cannot search for a destination via an LDAP server if the time settings of the server and this machine are more than five minutes apart. If you cannot search even when the user name and password are correct, check the time settings for the server and this machine.
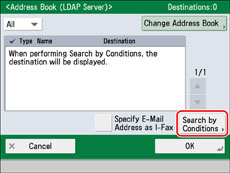
The number of search results displayed will not exceed the maximum limit set in [LDAP Server]. If the desired destination does not appear, either increase the maximum number of addresses to search, or change the search criteria. (See "LDAP Server Settings.")
|
|
NOTE
|
|
If you perform a new destination search when a search result is already displayed on the destination list screen, the displayed search result is cleared.
If you set [Auto Search When Using LDAP Server] to 'Off', nothing appears on the destination list screen until you perform a search.
|
|
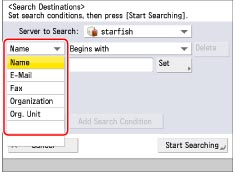
[Name]:
|
Search by name.
|
|
[E-Mail]:
|
Search by e-mail address.
|
|
[Fax]:
|
Search by fax number.
|
|
[Organization]:
|
Search by organization name.
|
|
[Org. Unit]:
|
Search by organizational unit (e.g., departments in an organization).
|
|
NOTE
|
|
You can only use organization/organization unit as search categories if the information has been registered on the LDAP Server.
You may be unable to search using organization/organization unit, depending on the type of server application.
You can also add additional user-defined search attributes. (See "Registering/Editing LDAP Search Attributes.")
If a destination is registered with an e-mail address and a fax number, you can search for the e-mail address by entering the fax number as the search criterion, and vice versa.
|
|
[Contains]:
|
The result must contain the entered text.
|
|
[Does Not Contain]:
|
The result must not contain the entered text.
|
|
[Equals]:
|
The result must equal the entered text.
|
|
[Differs from]:
|
The result must not equal the entered text.
|
|
[Begins with]:
|
The result must begin with the entered text.
|
|
[Ends with]:
|
The result must end with the entered text.
|
|
[or]:
|
The machine searches and returns a result that matches any of the specified search criteria.
|
|
[and]:
|
The machine searches and returns a result that matches all of the specified search criteria.
|
|
NOTE
|
|
You can specify up to four different search criteria at a time.
If you specify three or more search criteria, you cannot use both [or] and [and] together.
|
|
NOTE
|
|
If you press [Start Searching] without specifying any search criteria, all of the addresses stored on the LDAP server appear.
|
|
NOTE
|
|
To cancel a selected destination, select the destination again.
If you specify an e-mail address as an I-fax destination, the only information that you can retrieve from the server is the I-fax address. To specify settings to match the recipient's receiving conditions, press [Details] on the Scan and Send screen.
|
|
NOTE
|
|
The information that can be obtained from the LDAP server consists of only names and e-mail addresses.
You cannot directly specify a destination obtained via a server as a forwarding destination. To specify it as a forwarding destination, you must first store it in the Local Address Book. (See "Registering an Address Obtained via an LDAP Server.")
|