e-ManualTopSite mapHelp

Category Top

Loading Paper

Loading Paper into a Paper Drawer

Adjusting a Paper Drawer to Hold a Different Paper Size

Loading Envelopes

Loading Pre-Punched Paper

Loading Transparencies/Clear Film

Loading Tab Paper

Loading Paper into the POD Deck Lite-B1 (Optional)

Loading Paper into the Multi-drawer Paper Deck-B1 (Optional)

Loading Paper into the Document Insertion Unit-M1 (Optional)

Replacing the Staple Cartridge (For Optional Products)

Replacing the Staple Cartridge in the Stapler Unit (Finisher-AM1/Saddle Finisher-AM2)

Replacing the Staple Cartridge in the Saddle Stitcher Unit (Saddle Finisher-AM2)

Replacing the Staple Cartridge in the Stapler Unit (Staple Finisher-T1/Booklet Finisher-T1)

Replacing the Staple Case in the Saddle Stitcher Unit (Booklet Finisher-T1)

Removing Staple Waste (Finisher-AM1/Saddle Finisher-AM2)

Removing Punch Waste (Puncher Unit-BS1/Puncher Unit-BT1)

Removing Punch Waste (External 2/3 Hole Puncher-C1/External 2/4 Hole Puncher-C1/External 4 Hole Puncher-C1)

Operating the Limited Functions Mode

Replacing the Toner Cartridge

Replacing the Waste Toner Container

Routine Cleaning

Originals Cannot Be Scanned Properly (Cleaning the Platen Glass)

Originals Cannot Be Scanned Properly (Cleaning Method of the Original Scanning Area)

Scanned Originals Become Dirty (Manual Feeder Cleaning)

Scanned Originals Become Dirty (Automatic Feeder Cleaning)

Output Paper Becomes Dirty (Cleaning Inside of the Main Unit)

Output Paper Becomes Dirty (Wire Cleaning)

Output Paper Becomes Dirty (Roller Cleaning)

Output Paper Becomes Dirty (Belt Cleaning)

Streaks and Gloss Unevenness Appear on Output Paper (Refreshing the Fixing Belt)

Streaks and Gloss Unevenness Appear on Output Paper (Adjusting the Fixing Belt Auto Refresh Level)

Cleaning the Touch Panel Display

Consumables

Top » Maintenance » Removing Staple Waste (Finisher-AM1/Saddle Finisher-AM2)
Removing Staple Waste (Finisher-AM1/Saddle Finisher-AM2)
0L3X-0LL
When the staple waste tray of the Finisher-AM1/Saddle Finisher-AM2 becomes full, an animation screen prompting you to remove the staple waste appears on the touch panel display.
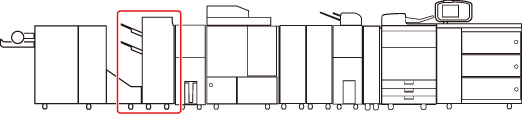
The location of the Finisher-AM1 or Saddle Finisher-AM2 is indicated in the following illustration.
Follow the procedure described below to remove the staple waste.
NOTE
The Finisher-AM1 and Saddle Finisher-AM2 are optional products.
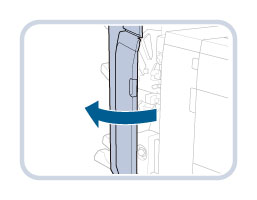
1.
Open the front cover of the finisher.
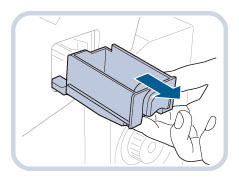
2.
Below the stapler unit is the staple waste tray. Pull out the staple waste tray.
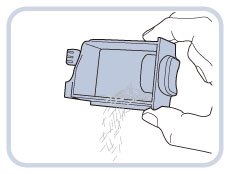
3.
Discard the staple waste.
CAUTION
When discarding the staple waste, be careful not to touch the staple waste, as this may result in personal injury.
4.
Return the staple waste tray to its original position.
Make sure to insert the staple waste tray as far as it can go.
5.
Close the front cover of the finisher.
CAUTION
When closing the front cover of the finisher, be careful not to get your fingers caught, as this may result in personal injury.