| Booklet Mode |
|
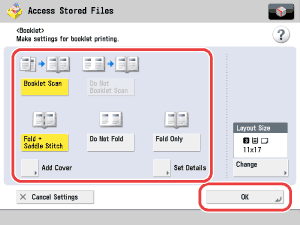
This mode enables you to print one-sided or two-sided files in such a way that the prints are made into a booklet. For the Booklet Scanning mode of the Mail Box function, see [Booklet Scanning] in "Scan and Store."
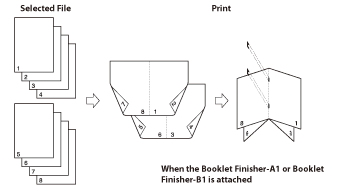
This mode enables you to print documents in such a way that the prints are made into a booklet.
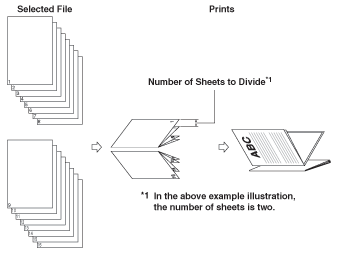
This mode enables you to make a multiple page document with a large number of pages into a divided booklet.
This mode enables you to adjust the position of the images in a booklet by calculating the width of the displacement between the outermost page and center page of the booklet.
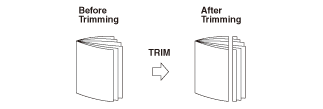
Trims the edges of prints when using the Saddle Stitch.
|

| Remark |
|
|
|||||
|
|
|
Details of each item are shown below.
If [Advanced Box], [Network], or [Memory Media] is selected in step 1, [Booklet Scan] in Booklet mode is set in the Booklet Print settings.
If you selected the paper to use for the main document from [Change MP Tray Paper], select the paper size → press [Next] → select the paper type → press [OK].
If you want to use the Booklet Scan mode, select [Print] or [Do Not Print] for <Front Cover>, <Front Inside Cover>, <Back Inside Cover>, and <Back Cover> → press [OK]. If you do not want to use the Booklet Scan mode, select [Print] or [Do Not Print] → press [OK]. If you are feeding cover paper from the Document Insertion Unit-H1, Document Insertion Unit-J1, or Document Insertion / Folding Unit-G1, select [Leave Blank]. Press [Change] → select the drawer that contains the paper you want to use for the cover → press [OK]. If you selected the paper to use for the cover from [Change MP Tray Paper], select the paper size → press [Next] → select the paper type → press [OK].
|
If you are not specifying other Booklet settings, proceed to step 6. |
Booklet Finisher-A1:
Booklet Finisher-B1:
|
If you select [Manual], press [ |
 ] or [
 ] to adjust the correction width.
|
|
|
|
If you select [Manual], press [ |
|
|