| |
- Drag the mouse in the Preview Area to specify the scanning area.
The specified area is indicated by a broken line.
Once an area is specified, you can change it, as follows:
- You can drag the area to a different position, or drag the frame handles to change the size of the area.
- To cancel the scanning area setting, click outside the area.
- You can also specify the scanning area in the [Cropping Area] dialog box.
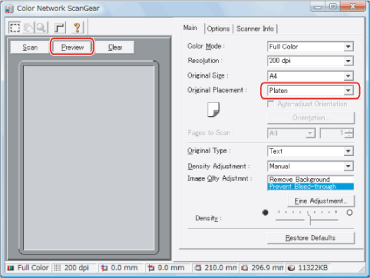
Right-click in the Preview Area, and then select [Cropping Area] to display the [Cropping Area] dialog box. Enter the dimensions of the area to be scanned and click [OK].
- Although it is not possible to display a preview image when scanning using the feeder, you can still specify the scanning area numerically using the [Cropping Area] dialog box, or by dragging the mouse in the empty Preview Area to roughly define the area.
- You cannot specify the scanning area in the following cases:
- When scanning 2-sided originals
- When [Auto-adjust Orientation] is selected
- When [Auto] or [Different Sizes] is selected from [Original Size]
- The window displayed may vary according to the operating system etc.
|
 ] (Crop) on the toolbar.