You can manually select the original type according to the type of image.
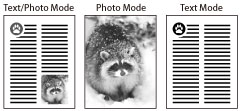
Text/Photo Mode
This mode is best suited for scanning originals containing both text and photos, such as magazines or catalogues.
Photo Mode
This mode is best suited for photos printed on photographic paper.
Text Mode
This mode is best suited for scanning text originals. Blueprints or pencil drawn originals can also be scanned clearly.
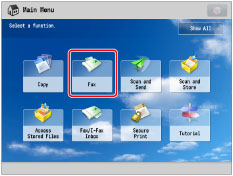
1.
Press [Fax].
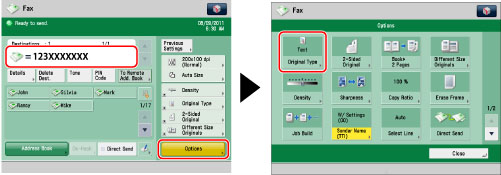
2.
Specify the destination → press [Options] → [Original Type].
3.
Select the original type.
To adjust the text/photo/map processing priority level, press [Text/Photo].
Then press [Adjust Level] → select [Text Priority] or [Photo Priority] → press [OK].
[Text Priority]: Priority is given to the faithful reproduction of text.
[Photo Priority]:Priority is given to the faithful reproduction of photos, with as little moiré effect (a shimmering, wavy pattern) as possible.
You can adjust the text/photo priority level. If you want to reproduce text as faithfully as possible, press [Text Priority], and move the indicator to the left. If you want to reproduce photos as faithfully as possible, press [Photo Priority] and move the indicator to the right.
4.
Press [OK] → [Close].
|
IMPORTANT
|
If you scan an original containing halftones, such as a printed image, using the Photo mode, the moiré effect (a shimmering, wavy pattern) may occur. In this case, you can lessen the effect by using the Sharpness mode. (See "Adjusting the Image Sharpness.") |
|
NOTE
|
|
If the original is a transparency, select the original type, and adjust the exposure to the most appropriate level for the original.
|